Are you ready to create something fun and exciting with your own hands? Imagine building a robot toy that you can control and program yourself.
This Arduino Robot Toy Project is perfect for you if you want to learn, play, and impress your friends with a cool gadget. You’ll discover simple steps, useful tips, and everything you need to bring your robotic toy to life.
Keep reading, and soon you’ll be amazed at what you can build!
Credit: www.amazon.ca
Getting Started With Arduino Robots
Arduino robots are fun projects that teach coding and electronics. They let you build and control your own robot easily.
This guide will help you pick parts, tools, and set up your workspace to start building your Arduino robot.
Choosing The Right Arduino Board
Different Arduino boards suit different robot projects. Choose one that matches your robot’s needs and your skills.
- Arduino Uno: Good for beginners and simple robots.
- Arduino Mega: Has more pins for bigger projects.
- Arduino Nano: Small size, fits compact robots.
- Arduino Leonardo: Can act like a keyboard or mouse.
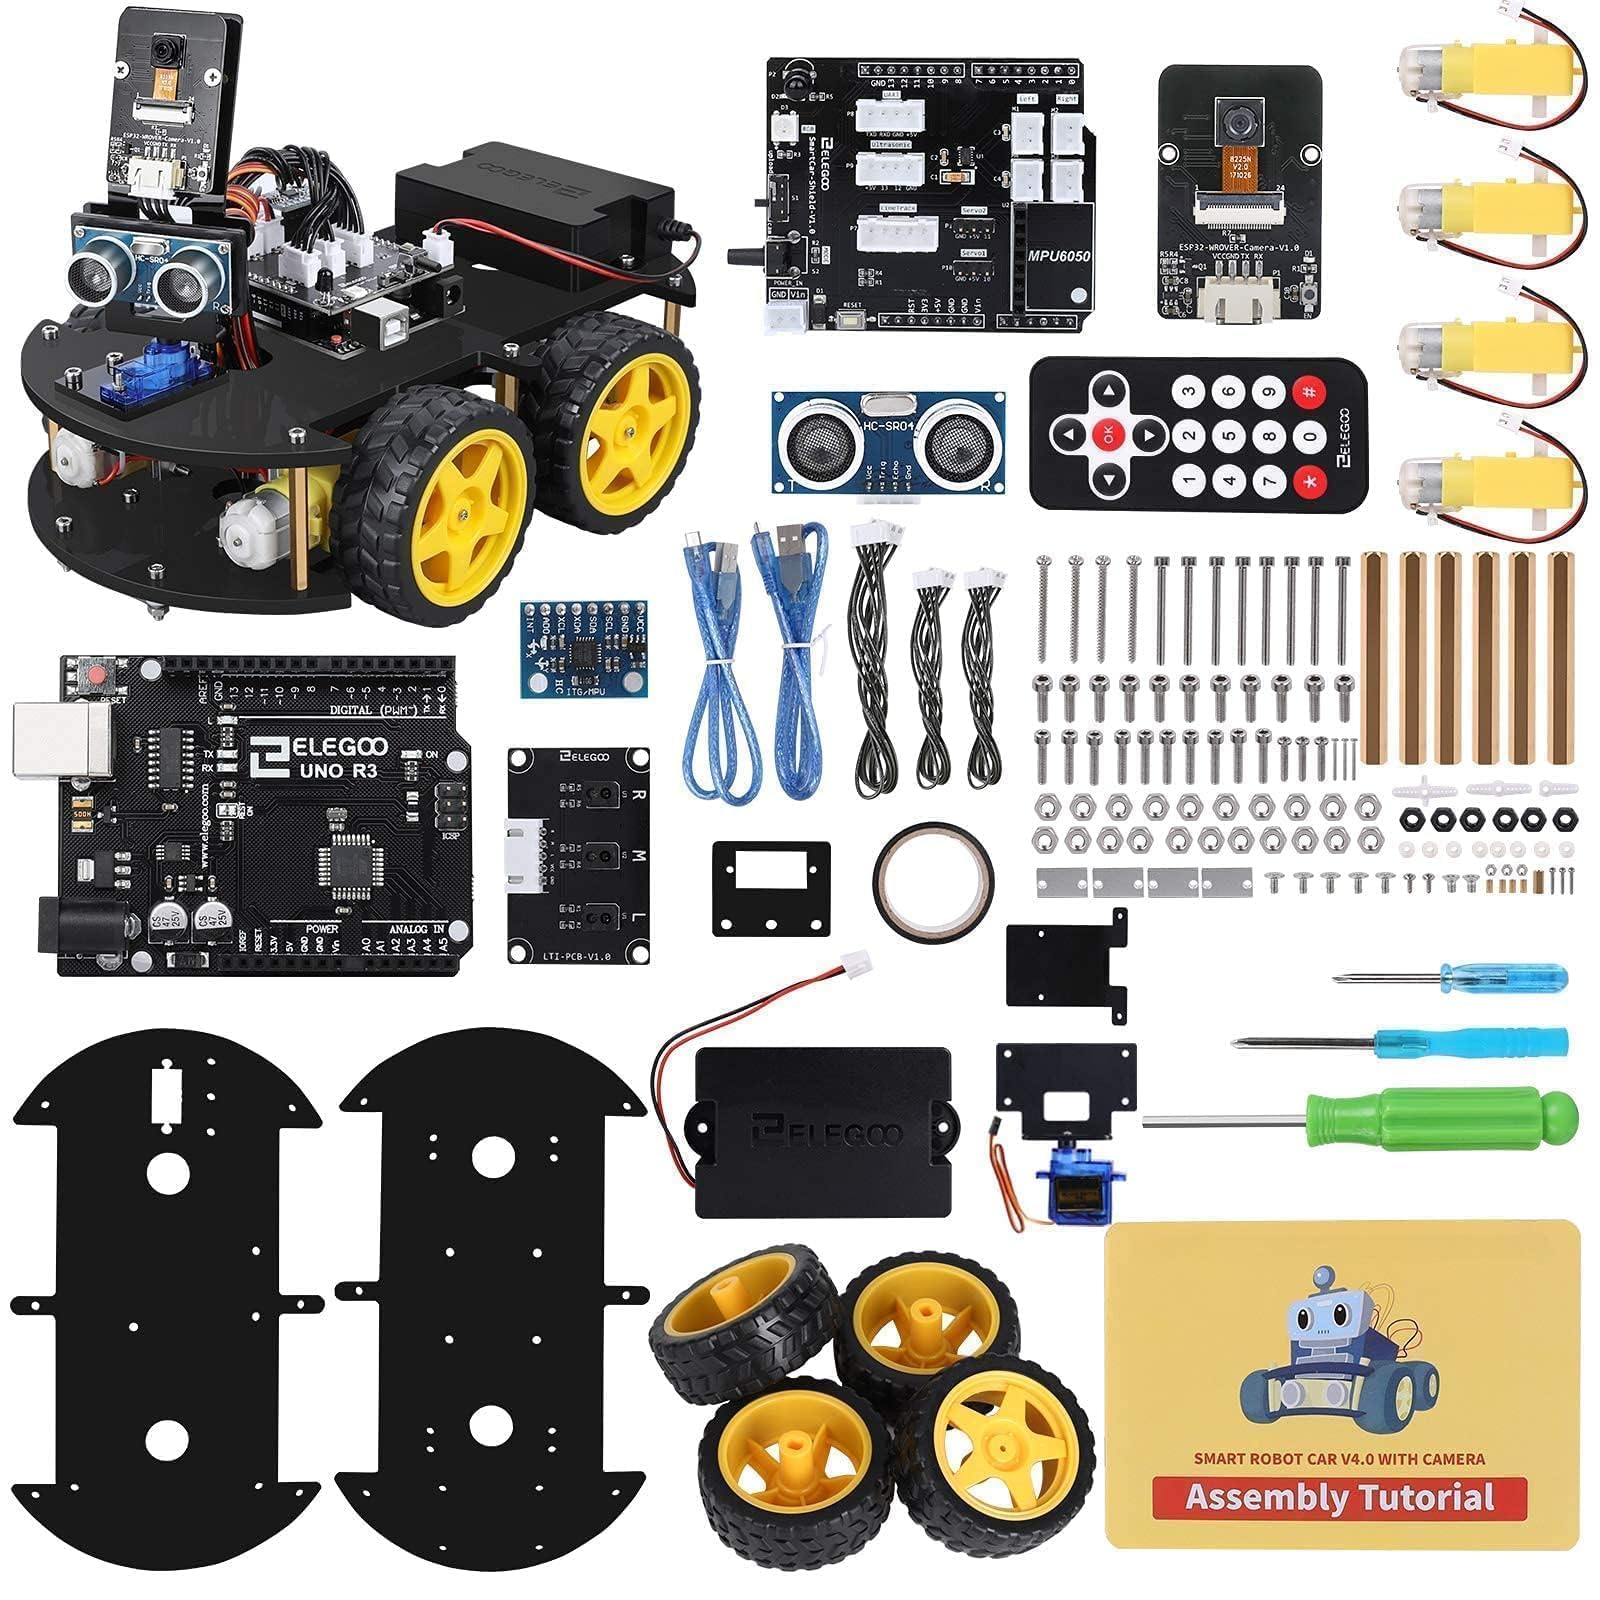
Essential Components And Tools
You need parts and tools to build and test your robot. Prepare these before starting your project.
| Component | Purpose |
| Motors | Make the robot move |
| Wheels | Allow smooth rolling |
| Sensors | Detect obstacles and environment |
| Battery | Power the robot |
| Arduino Board | Control all parts |
| Jumper Wires | Connect components |
| Screwdriver | Assemble parts |
Setting Up The Development Environment
You must install software to write and upload code to your Arduino robot. Follow these steps carefully.
- Download the Arduino IDE from the official website.
- Install the IDE on your computer.
- Connect your Arduino board via USB cable.
- Open the IDE and select your board model under Tools.
- Choose the correct COM port for your board.
- Write your code or use example sketches.
- Click Upload to send code to the robot.

Credit: www.youtube.com
Designing Your Robot Toy
Creating an Arduino robot toy is a fun and educational project. You will learn how to build and control a moving robot. This guide helps you design your robot toy step by step.
Start by choosing the right parts. Then, add sensors and motors to make it interactive. Finally, plan the control system to bring it all together.
Selecting A Robot Chassis
The chassis is the frame that holds all robot parts. Choose one that fits your robot’s size and weight needs. Common types include wheeled, tracked, and legged chassis.
- Wheeled chassis: easy to move on flat surfaces
- Tracked chassis: good for rough terrain
- Legged chassis: mimics animal movement
- Material options: plastic, metal, or wood
- Check for mounting holes and space for electronics
Incorporating Sensors And Actuators
Sensors help your robot detect its environment. Actuators make the robot move or do tasks. Choose parts that fit your robot’s goals and budget.
| Component | Purpose | Example |
| Ultrasonic Sensor | Detect obstacles | HC-SR04 |
| Infrared Sensor | Line following | TCRT5000 |
| Servo Motor | Precise movement | SG90 |
| DC Motor | Drive wheels | Generic 6V motor |
| LEDs | Light signals | Standard 5mm LED |
Planning The Control System
The control system is the brain of your robot. It processes sensor data and controls actuators. Use a microcontroller like Arduino to manage these tasks.
- Choose a suitable microcontroller (e.g., Arduino Uno)
- Design the wiring layout for sensors and motors
- Write the program to read sensors and drive actuators
- Test each part separately before full assembly
- Debug and improve the code for smooth operation
Building The Robot Hardware
Building the robot hardware is the first step in creating your Arduino robot toy. It involves putting together all parts so the robot can move and sense its environment.
This guide covers assembling the frame, wiring sensors and motors, and choosing power supply options for your robot project.
Assembling The Frame
The frame holds all the parts of your robot. Choose a sturdy material like plastic or metal for the base. Attach wheels, motors, and sensor mounts securely.
- Start with the base plate
- Fix the motors to the sides
- Attach the wheels to the motors
- Mount the sensor holders on top
- Ensure all screws are tight
Wiring Sensors And Motors
Connect the sensors and motors to the Arduino board using jumper wires. Make sure to match the sensor pins to the correct Arduino inputs.
| Component | Arduino Pin | Power |
| Ultrasonic Sensor | Digital 7 and 8 | 5V |
| Infrared Sensor | Analog A0 | 5V |
| Left Motor | Digital 3 and 4 | Motor Driver |
| Right Motor | Digital 5 and 6 | Motor Driver |
Power Supply Options
You need a power source to run the Arduino and motors. Choose batteries or a USB power bank depending on your robot size and usage time.
- AA batteries in a holder
- Rechargeable Li-ion battery pack
- 5V USB power bank
Make sure your power supply matches your motor and Arduino voltage needs.
Programming The Robot
Programming an Arduino robot toy lets you control its moves and actions. You write code that tells the robot how to behave.
This guide covers writing basic movement code, adding interactive features, and debugging your program.
Writing Basic Movement Code
Start by writing simple commands to move the robot forward, backward, and turn. Use the Arduino IDE to write and upload the code.
- Define motor pins in the setup function
- Create functions for moving forward and backward
- Add delay to control movement time
- Use loops for repeated actions
Adding Interactive Features
Make the robot respond to sensors or buttons. This lets the robot react to its environment or user input.
| Feature | Description | Code Example |
| Obstacle Avoidance | Stops or turns when near an object | if (distance < 10) { stop(); turnRight(); } |
| Button Control | Starts and stops the robot with a button | if (buttonPressed) { moveForward(); } |
| Light Sensor | Moves toward or away from light | if (lightLevel > threshold) { moveBackward(); } |
Debugging And Testing
Check your code for errors and test the robot’s actions step by step. Fix problems as you find them.
- Upload code and watch the robot’s movement
- Use Serial Monitor to see debug messages
- Test sensors separately to ensure they work
- Adjust timing and motor speeds if needed
- Repeat testing until the robot moves correctly
Enhancing Robot Functionality
Arduino robot toys can do many fun tasks. You can add new features to make them smarter.
Adding voice, sensors, and mobile controls helps robots do more work and play.
Integrating Voice And Sound
Voice and sound make robots easy to control. They can speak or listen to commands.
Use microphones and speakers with Arduino to add voice features. Simple sounds can alert users.
- Connect a microphone to detect sounds
- Use a speaker to play sounds or voice
- Program voice commands for basic tasks
- Add sound effects for fun feedback
Implementing Obstacle Avoidance
Obstacle avoidance helps the robot move safely. It stops or changes direction to avoid hits.
Ultrasonic sensors measure distance to objects. The Arduino uses this data to avoid obstacles.
- Attach ultrasonic sensors on the robot front
- Read distance data with Arduino code
- Stop or turn the robot if something is close
- Test in different places to improve safety
Connecting To Mobile Devices
Mobile connection lets you control the robot from a phone or tablet. This adds flexibility.
Use Bluetooth or Wi-Fi modules to link Arduino with mobile apps. Send commands or get robot status.
- Choose Bluetooth or Wi-Fi module for Arduino
- Pair the robot with your mobile device
- Use a simple app to send commands
- View sensor data on the mobile screen
Creative Project Ideas
Building an Arduino robot toy can be a fun and educational project. You can learn about electronics, programming, and robotics. Here are some creative ideas to get you started.
Line Following Robot Toy
A line following robot can follow a path on the floor. It uses sensors to detect lines and guides itself accordingly. This project is great for beginners.
- Use infrared sensors to detect the line.
- Program the robot to follow the path.
- Test different speeds and turns.
Remote-controlled Robot
A remote-controlled robot can be a fun project. You can control it using a smartphone or a remote. This teaches you about wireless communication.
Try using Bluetooth modules for wireless control.
Experiment with different remote designs.
Gesture-controlled Gadgets
Gesture-controlled gadgets respond to your hand movements. This project can be challenging but very rewarding. It involves using sensors to detect gestures.
| Component | Purpose |
| Accelerometer | Detect hand movements |
| Arduino Board | Process data |
| Servo Motors | Move parts based on gestures |
Troubleshooting Common Issues
Building an Arduino robot toy can be fun and educational. Sometimes, problems happen that slow down your progress. Fixing these common issues will help your robot work better.
This guide covers simple ways to fix wiring problems, handle sensor errors, and improve your code’s performance. Follow these tips to keep your project on track.
Fixing Wiring Problems
Loose or wrong wires often cause the robot to stop working. Check each wire connection carefully. Make sure wires go to the right pins on the Arduino board.
Using a breadboard can help organize wires neatly. Avoid long wire runs that can cause weak signals. Use color-coded wires to track connections easily.
- Double-check connections with the circuit diagram
- Secure wires firmly into breadboard or connectors
- Use shorter wires to reduce interference
- Use multimeter to test continuity
- Replace damaged or broken wires
Handling Sensor Errors
Sensors help the robot detect its environment. Sometimes sensors give wrong readings or no data at all. Clean sensor surfaces to remove dust or dirt that blocks signals.
Check sensor connections and power supply. Test sensors with simple code to see if they respond. Replace faulty sensors if they still do not work.
- Keep sensor lenses clean and dry
- Verify sensor wiring and power
- Test sensors with basic example sketches
- Calibrate sensors if needed
- Swap sensors to check for hardware issues
Improving Code Performance
Slow or buggy code can cause the robot to act oddly. Simplify your code by removing unused parts. Use clear variable names to avoid confusion.
Use delay functions carefully because they can pause the robot’s actions. Instead, use timers or counters to control tasks without stopping the program.
- Keep code simple and organized
- Avoid long delay() calls
- Use functions to repeat code sections
- Test code after small changes
- Use comments to explain your code

Credit: makersmuse.in
Resources And Community Support
Building an Arduino robot toy can be fun and educational. Many resources are available to help you. You can find support from various online communities and local groups.
Explore tutorials, libraries, and workshops to enhance your project. These resources provide valuable insights and assistance.
Online Tutorials And Forums
Online tutorials and forums are great for learning and sharing ideas. They offer step-by-step guides and solutions to common problems.
- Arduino official website tutorials
- Reddit Arduino community
- Stack Exchange for programming help
- YouTube channels with project walkthroughs
Open-source Libraries
Open-source libraries provide pre-written code to simplify your project. They help you add features without starting from scratch.
| Library Name | Functionality |
| Servo | Controls servo motors |
| Wire | I2C communication |
| LiquidCrystal | LCD displays |
Local Maker Groups And Workshops
Local maker groups and workshops provide hands-on experience. They are perfect for learning and networking with other enthusiasts.
Frequently Asked Questions
What Is An Arduino Robot Toy Project?
An Arduino robot toy project involves building a small robot using Arduino microcontroller. It teaches basic robotics and programming. You can control movements, sensors, and actions through code. This project is ideal for beginners and hobbyists interested in electronics and automation.
How Do I Start Building An Arduino Robot Toy?
Begin by gathering essential components like Arduino board, motors, sensors, and chassis. Learn basic Arduino programming and circuit connections. Follow step-by-step tutorials to assemble and code your robot. Testing and debugging are crucial for successful operation.
What Skills Do I Need For This Project?
Basic knowledge of electronics, programming, and robotics helps. Familiarity with Arduino IDE and circuit design is beneficial. Patience and problem-solving skills are important for troubleshooting. This project enhances coding and hardware integration abilities.
Can Arduino Robot Toys Be Customized?
Yes, Arduino robots are highly customizable. You can add sensors, change designs, and modify code. Custom features include obstacle avoidance, line following, and remote control. This flexibility allows creative and educational experimentation.
Conclusion
Building an Arduino robot toy is fun and educational. It helps you learn coding and electronics hands-on. You can customize your robot to do many tasks. This project boosts creativity and problem-solving skills. Start small and add features step by step.
Enjoy the process and celebrate your progress. Keep experimenting and improving your robot toy. This simple project opens doors to more tech ideas. Give it a try and see what you create!