Are you looking for a fun and creative project that you can make with your own hands? A crochet stacking toy DIY is the perfect way to bring joy and color into your home while crafting something unique.
Imagine creating a beautiful, soft toy that not only looks adorable but also helps develop your child’s motor skills. In this guide, you’ll discover simple steps and tips to make your very own crochet stacking toy—no complicated tools or patterns needed.
Ready to turn yarn into a charming, playful masterpiece? Keep reading, and let’s get started!
Materials Needed
Making a crochet stacking toy is a fun and creative project. You will need some basic materials to start. These materials help you create soft and safe toys for children.
Choosing the right materials makes your toy look great and last longer. Below are the main materials you need for this project.
Yarn Selection
Pick yarn that is soft and safe for kids. Cotton yarn is a good choice because it is strong and easy to wash. Acrylic yarn is also popular and comes in many colors.
- Cotton yarn: soft, durable, and washable
- Acrylic yarn: colorful and affordable
- Baby yarn: extra soft for sensitive skin
Hook Size
Select a crochet hook that fits your yarn well. The hook size affects the tightness of your stitches. A tighter stitch helps keep the stuffing inside.
- Use a hook size recommended on your yarn label
- Smaller hooks make tighter stitches
- Larger hooks make looser stitches and bigger holes
Stuffing Options
Stuffing makes your toy soft and squishy. Use safe stuffing materials made for toys. Polyester fiberfill is common and easy to use. You can also use scrap yarn or fabric pieces.
- Polyester fiberfill: light and soft
- Scrap yarn: eco-friendly and cheap
- Fabric scraps: adds weight and texture
Additional Tools
You will need some extra tools to finish your toy. A yarn needle helps sew parts together. Scissors cut yarn cleanly. Stitch markers keep track of your rounds.
- Yarn needle for sewing pieces
- Scissors for cutting yarn
- Stitch markers to mark rounds
- Measuring tape to check size

Basic Crochet Stitches
Learning basic crochet stitches helps you create many fun projects. These stitches build the foundation for your crochet skills.
This guide covers chain stitch, single crochet, and how to increase and decrease stitches. Each section explains the steps clearly.
Chain Stitch
The chain stitch forms the base of most crochet projects. It creates a row of loops to work into.
- Make a slip knot on your hook.
- Wrap yarn over the hook from back to front.
- Pull the yarn through the loop on the hook.
- Repeat until you have the desired chain length.
Single Crochet
Single crochet is a tight, dense stitch. It is easy to learn and widely used in many projects.
| Step | Action |
| 1 | Insert hook into the second chain from the hook. |
| 2 | Yarn over and pull through the chain (two loops on hook). |
| 3 | Yarn over again and pull through both loops. |
| 4 | Repeat across the row for more single crochet stitches. |
Increasing And Decreasing
Increasing and decreasing change the shape of your crochet work. You add or remove stitches to make curves or edges.
Increase:Work two stitches in one stitch to add stitches.
Decrease:Crochet two stitches together to remove stitches.
Creating The Rings
Crochet stacking toys are fun and safe for kids. The rings are the main parts to crochet.
This guide explains how to make each ring step by step. You will learn how to start, build layers, and shape them.
Starting The Base Ring
Begin by making a magic ring or chain four and join. This forms the center of your ring.
Work single crochet stitches into the ring evenly. This creates a tight and sturdy base.
- Make a magic ring or chain 4 and join to form a circle
- Crochet 6 single crochets into the ring
- Pull the ring tight to close the center hole
Building Up The Layers
Add rounds by increasing stitches evenly. This helps the ring grow in size.
Use single crochet stitches for a firm texture. Count stitches to keep the shape round.
- In each round, increase stitches evenly around
- Use stitch markers to track the start of rounds
- Keep the stitch tension consistent
Shaping And Sizing
Adjust the number of rounds to make each ring bigger or smaller. Check the ring's diameter often.
Shape the ring by keeping stitches tight. Avoid loose stitches that can change the ring’s form.
- Measure the ring diameter after each round
- Stop adding rounds once the ring reaches the desired size
- Keep stitches tight and even for a smooth shape
Making The Stack Base
Creating a sturdy base is key to a safe and fun crochet stacking toy. This base holds the rings and keeps the toy balanced. Use yarn that is soft but firm enough to keep shape.
Start with a simple circle and build up layers. This will give you a strong stand that supports the whole toy.
Crocheting The Stand
Begin by crocheting a flat circle for the bottom. Use single crochet stitches to make it dense. Increase the number of stitches evenly to keep the circle flat.
- Start with a magic ring or chain 4 and join to form a circle.
- Work 6 single crochets into the ring.
- Increase by 6 stitches evenly in each round.
- Continue until the circle reaches desired diameter.
- Stop increasing and crochet even rounds for height.
Adding Stability
To keep the stand steady, add a firm base inside. You can insert a small piece of cardboard or plastic before closing the circle. This stops the base from bending.
| Material | Purpose |
|---|---|
| Cardboard circle | Provides flat, firm base |
| Plastic disc | Water-resistant and sturdy |
| Extra yarn layer | Increases thickness and strength |
Assembling The Toy
Creating a crochet stacking toy is fun and rewarding. You need to assemble the toy carefully for it to be safe and functional.
Follow the steps to make sure each piece is securely attached and easy for little hands to stack.
Stacking The Rings
Stacking the rings correctly is crucial. Begin with the largest ring at the bottom.
- Place the largest ring first to ensure stability.
- Add medium-sized rings one by one.
- Finish with the smallest ring on top.
Securing Pieces Together
Securing the pieces ensures that the toy stays intact during play.
| Piece | Method of Securing |
| Base | Stitch tightly to the bottom ring |
| Rings | Use a strong yarn to attach each |
| Top | Knot securely to prevent slipping |

Customizing Your Toy
Creating a crochet stacking toy is fun. You can make it unique by customizing it. This makes the toy special for the child who will play with it.
Customizing your toy allows you to choose colors, add embellishments, and personalize it. This guide will help you explore these options.
Color Patterns
Choosing the right colors makes your toy appealing. You can pick bright colors to make it cheerful or soft tones for a calming effect.
Think about the child's favorite colors. Mix and match different shades for a playful look.
- Rainbow colors for a vibrant toy
- Pastel shades for a gentle touch
- Bold colors for a striking design
Adding Embellishments
Embellishments add charm to your crochet toy. You can sew on small buttons or crochet tiny flowers.
Use safe materials to ensure the toy is safe for children. Embellishments make the toy more interesting and fun to play with.
- Buttons for eyes or nose
- Small crochet shapes like stars or hearts
- Ribbons or yarn for extra texture
Personalizing With Names
Adding a name makes the toy special. You can crochet the letters or stitch them onto the toy.
Personalized toys are treasured keepsakes. They make perfect gifts for birthdays or special occasions.
- Use contrasting colors for the name
- Choose a font style that is easy to read
- Securely stitch the name to prevent unraveling
Safety Tips For Kids
Making a crochet stacking toy for kids is fun and creative. Safety is very important to keep children safe while playing.
Use safe materials and check the toy well. This helps avoid accidents and ensures the toy lasts long.
Choosing Child-safe Materials
Pick yarn and stuffing that do not cause allergies or harm. Use natural fibers like cotton or bamboo yarn.
Avoid toxic dyes or chemicals. Choose hypoallergenic and non-toxic stuffing for softness and safety.
- Use 100% cotton or bamboo yarn
- Select stuffing labeled non-toxic and hypoallergenic
- Use child-safe fabric dyes only
- Avoid materials with sharp or rough textures
Avoiding Small Parts
Small parts can be a choking hazard for young children. Avoid buttons, beads, or tiny decorations on the toy.
Instead, crochet all parts as one piece or sew securely to prevent pieces from coming loose.
- Do not use small buttons or beads
- Sew all parts firmly and double stitch
- Make stacking rings big enough to avoid swallowing
- Check toy parts for loose threads or pieces
Durability Checks
Test the toy’s strength before giving it to kids. Pull and tug on rings and connections to ensure they hold well.
Regularly inspect the toy for wear and tear. Replace or repair any weak spots immediately.
- Check all seams for tight stitching
- Ensure stacking rings keep their shape
- Remove the toy if yarn starts to fray
- Fix loose parts before use
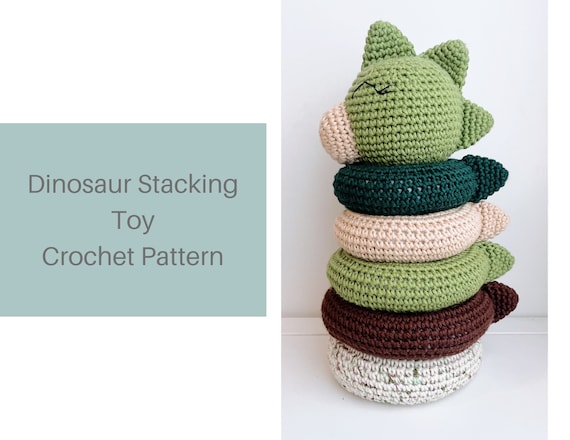
Care And Maintenance
Crochet stacking toys are soft and fun, but they need care. Keeping them clean and in good shape helps them last longer.
Follow simple steps to wash and fix your crochet stacking toy. This way, it stays safe for children to play with.
Washing Instructions
Wash your crochet stacking toy gently to keep its shape. Use mild soap and cold water for cleaning.
Avoid using a washing machine or hot water. Hand wash is best to stop colors from fading and yarn from stretching.
- Fill a basin with cold water and mild soap
- Soak the toy for 5-10 minutes
- Gently squeeze the toy, do not wring
- Rinse well with cold water
- Press out extra water with a towel
- Air dry flat on a clean surface
Repairing Wear And Tear
Check your crochet stacking toy often for loose yarn or holes. Fix small problems quickly to prevent bigger damage.
Use a crochet hook or needle to pull loose yarn back in place. Tie knots carefully to keep repairs neat and safe.
- Trim any frayed yarn ends
- Use matching yarn for repairs
- Stitch holes closed with tight, small stitches
- Reinforce areas that wear out fast, like edges
- Check seams and joints regularly
Creative Variations
Making a crochet stacking toy is fun and lets you try new ideas. You can change shapes, sizes, and colors. These changes make each toy special and exciting.
Using different materials and styles also adds variety. This helps you create toys that fit any child’s taste and skill level.
Different Shapes And Sizes
Crochet stacking toys don’t have to be just rings. You can make blocks, animals, or stars. Different shapes make the toy more fun and educational.
Changing the size of each piece helps children learn about order and balance. Small pieces are good for fine motor skills. Big pieces are easier for little hands.
- Circles, squares, and triangles
- Animal shapes like owls or bears
- Stars, hearts, and flowers
- Varying sizes for stacking challenge
Theme Ideas
You can give your crochet stacking toy a theme. Themes make the toy more interesting and help children learn about different topics.
Some themes use colors, shapes, or characters. They also make great gifts for special occasions or holidays.
- Rainbow colors for learning colors
- Animal themes with matching sounds
- Nature themes like trees and flowers
- Holiday themes like Christmas or Easter
Combining With Other Crafts
Mixing crochet with other crafts adds texture and fun. You can use wood, fabric, or beads to decorate the toy. This makes each piece unique and creative.
Combining crafts also teaches children about different materials. It can make the stacking toy last longer and look more beautiful.
- Add wooden rings inside crochet covers
- Sew fabric patches on crochet pieces
- Use beads or buttons for decoration
- Paint wooden parts with safe colors
Frequently Asked Questions
What Materials Are Needed For A Crochet Stacking Toy Diy?
You need yarn, crochet hooks, stuffing, stitch markers, and a yarn needle. Choose soft, non-toxic yarn for baby safety. Different colors add visual interest. Basic crochet skills like single crochet and increasing stitches are essential.
How Long Does It Take To Make A Crochet Stacking Toy?
Making a crochet stacking toy usually takes 4 to 6 hours. Time varies based on skill level and toy complexity. Beginners might take longer, while experienced crocheters finish faster. Breaking the project into smaller sessions helps manage time well.
Is A Crochet Stacking Toy Safe For Babies?
Yes, a crochet stacking toy is safe if made with baby-friendly yarn. Avoid small parts like buttons that can be choking hazards. Use tightly stitched yarn to prevent stuffing from escaping. Always supervise babies during playtime for added safety.
Can Beginners Make A Crochet Stacking Toy Easily?
Yes, beginners can make a crochet stacking toy with basic stitches. Following a clear pattern simplifies the process. Starting with simple shapes like rings or cones builds confidence. Practice consistency in tension for even shapes.
Conclusion
Creating a crochet stacking toy is fun and rewarding. It brings joy to both makers and children. You can choose colors and shapes freely. The process helps improve your crochet skills little by little. Such toys are safe and soft for kids to play.
They also make thoughtful handmade gifts. Give yourself time and enjoy each step. Soon, you will have a charming toy to cherish. Try this project and see how satisfying it feels. Crafting something useful with your own hands is special.