Imagine turning simple cardboard into a fun, hands-on toy computer keyboard that sparks creativity and learning. You don’t need fancy tools or expensive materials—just a bit of imagination and some everyday items.
Whether you want to keep your kids entertained, teach them about technology, or simply enjoy a crafty project yourself, this DIY cardboard toy keyboard is perfect for you. Keep reading to discover easy steps that will bring your very own keyboard to life, right at home!
Materials Needed
Creating a DIY cardboard toy computer keyboard is fun and easy. You need some basic materials to get started.
Gather the right supplies before you begin your project for the best results.
Cardboard Selection
Choose sturdy cardboard to make your toy keyboard strong. Thin cardboard may bend or tear easily.
Look for smooth surfaces to help with drawing and decorating the keys clearly.
- Corrugated cardboard (like from shipping boxes)
- Poster board or thick craft cardboard
- Flat sheets without dents or wrinkles
Tools And Supplies
You will need simple tools to cut and assemble the cardboard pieces. These tools help you create clean shapes.
Use safe and easy-to-handle supplies for a smooth building experience.
- Scissors or craft knife
- Ruler and pencil for measuring
- Glue stick or white craft glue
- Cutting mat or a safe surface
- Double-sided tape (optional)
Decorative Items
Decorate your cardboard keyboard to make it look real and fun. Use simple items for decoration.
These items add color and detail to your toy computer keyboard.
- Colored markers or pens
- Stickers or printed keyboard letters
- Paints or crayons
- Clear tape to protect decorations
Designing The Keyboard
Designing a cardboard toy computer keyboard can be fun and creative. It lets you build a simple toy that looks like a real keyboard.
You start by planning the shape and layout of the keys. This helps make the toy easy to use and nice to look at.
Choosing The Layout
Pick a keyboard layout that fits your cardboard size. Most toy keyboards use a simple QWERTY layout.
Decide how many rows and columns of keys you want. Keep space between keys for easy cutting and pasting.
- Standard QWERTY layout is familiar to most people
- Use fewer keys for a smaller, easier design
- Leave room for special buttons like space and enter
Drawing The Keys
Draw each key carefully on the cardboard using a pencil. Make sure the keys are the same size and shape.
Label each key with the correct letter, number, or symbol. Use clear, simple letters for easy reading.
- Use a ruler to keep keys straight and even
- Draw rectangles or squares for each key
- Write letters in the center of each key
Adding Special Buttons
Add special keys like space bar, enter, shift, and backspace. These keys are bigger or differently shaped.
Make these buttons stand out by drawing larger shapes or using different colors. This helps kids recognize them easily.
- Space bar is usually the longest key at the bottom
- Shift and enter keys are wider than letter keys
- Backspace key often has an arrow symbol
Cutting And Assembly
Building a cardboard toy computer keyboard is a fun project. It requires careful cutting and assembly. This guide explains how to cut the pieces and put them together.
Use simple tools like scissors and glue. Take your time to make sure each part fits well. Let's start with cutting the cardboard pieces.
Cutting The Cardboard Pieces
Cut the cardboard into shapes for the base and keys. Measure twice to avoid mistakes. Use a ruler and pencil for straight lines.
- Cut a large rectangle for the keyboard base.
- Cut small rectangles for each key.
- Make sure all keys are the same size.
- Cut thin strips to separate rows of keys.
Assembling The Base
Glue the large base piece on a flat surface. Add cardboard strips to create rows. This helps keep keys organized and stable.
| Material | Purpose |
| Large cardboard rectangle | Main base |
| Thin cardboard strips | Rows divider |
| Glue | Fix pieces together |
Attaching The Keys
Place each key on the base inside the rows. Use a small amount of glue to fix them. Press keys gently until the glue sets.
- Arrange keys in the correct order.
- Apply glue to the bottom of each key.
- Press keys on the base firmly.
- Let the glue dry completely before use.

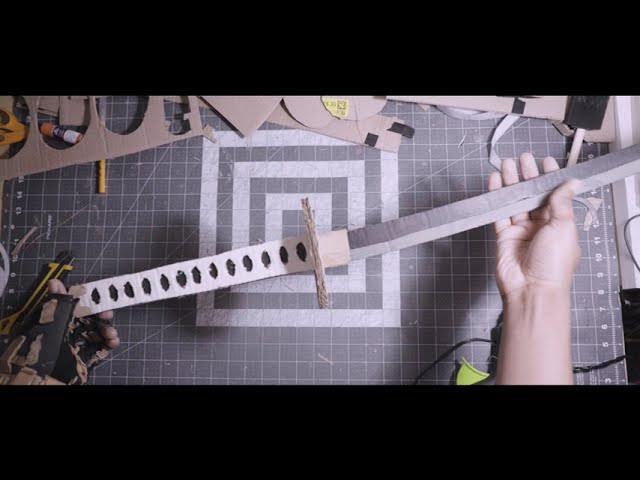
Credit: www.reddit.com
Decorating The Keyboard
Decorating your DIY cardboard toy computer keyboard makes it fun and unique. You can use many easy methods to add color and style.
Try painting, stickers, or personal touches to make your keyboard stand out. Each way lets you show your creativity.
Painting Techniques
Painting is a simple way to add bright colors to your cardboard keyboard. Use acrylic paints for best results.
- Start with a white base coat to make colors pop.
- Use small brushes for details like keys and buttons.
- Let each layer dry before adding another.
- Add patterns like stripes or dots for extra fun.
- Seal the paint with a clear coat to protect it.
Using Stickers And Labels
Stickers and labels give your keyboard a quick style boost. They come in many shapes and colors to fit your theme.
| Sticker Type | Best Use |
|---|---|
| Alphabet stickers | Labeling keys clearly |
| Decorative stickers | Adding fun designs |
| Glow-in-the-dark | Making your keyboard shine at night |
| Patterned labels | Creating uniform style |
Personalizing The Design
Make your keyboard truly yours by adding personal touches. Use your favorite colors and symbols.
- Write your name or initials on the keyboard frame.
- Draw small pictures or icons on some keys.
- Add glitter or textured tape for extra flair.
- Use different colors for important keys.
- Attach small charms or ribbons to the side.
Interactive Play Ideas
Creating a DIY cardboard toy computer keyboard is a fun project. It opens up various interactive play ideas for children. They can use it to explore different imaginative scenarios.
This simple creation can spark creativity and learning. Kids can pretend to type, play games, and learn new things.
Pretend Computer Games
Kids love playing pretend computer games with their cardboard keyboard. They can imagine they are playing their favorite video games.
They can even mimic typing commands for games. This activity enhances their creativity and role-playing skills.
- Create a game story
- Type imaginary codes
- Role-play as a game character
Learning Letters And Numbers
The toy keyboard is perfect for learning letters and numbers. Kids can practice identifying them on the keys.
Parents can guide children to press keys while saying the letter or number aloud. This helps in early literacy and numeracy.
- Press each letter and say its name
- Count from 1 to 10 using the keyboard
- Spell simple words
Group Play Activities
The cardboard keyboard can be used in group play. Kids can take turns pretending to be on a computer.
They can also play typing games together. This encourages teamwork and communication among children.
- Take turns typing messages
- Guess the typed word
- Create a group story
Credit: medium.com
Safety Tips
Building a cardboard toy computer keyboard is fun and creative. Safety is important to keep playtime safe and worry-free.
Follow these safety tips to protect yourself and children during the project and play.
Handling Tools Carefully
Use scissors, cutters, and glue carefully to avoid injuries. Keep sharp tools out of children’s reach.
- Cut cardboard slowly and steadily
- Use child-safe scissors if possible
- Keep glue and tape away from eyes
- Store tools in a safe place after use
- Wear protective gloves if needed
Non-toxic Materials
Choose materials that are safe and free from harmful chemicals. This keeps children safe if they touch or taste parts of the toy.
| Material | Safety Feature |
| Cardboard | Natural and recyclable |
| Non-toxic glue | Safe if touched or inhaled |
| Water-based paint | Low odor and safe for kids |
| Child-safe scissors | Blunt edges reduce cuts |
Supervision Recommendations
Adults should watch children while they build or play with the cardboard keyboard. Supervision prevents accidents and helps with tricky steps.
Follow these supervision tips:
- Stay close during cutting and gluing
- Help children with sharp or small parts
- Explain safety rules before starting
- Check the toy regularly for damage
Benefits For Kids
Creating a DIY cardboard toy computer keyboard is a fun activity for kids. It brings many benefits that help in their development.
This project combines creativity with learning. Let's explore how it aids in various aspects of a child's growth.
Enhancing Creativity
Building a cardboard keyboard allows kids to express their creativity. They use colors, shapes, and ideas to make it unique.
- Choosing colors and designs
- Customizing keys and layout
- Adding personal touches like stickers
Developing Fine Motor Skills
Creating and assembling the keyboard improves fine motor skills. Kids cut, glue, and arrange pieces, which helps hand-eye coordination.
| Activity | Skill Developed |
| Cutting cardboard | Precision and control |
| Gluing pieces | Hand-eye coordination |
| Decorating | Finger dexterity |
Encouraging Imaginative Play
The cardboard keyboard can be a tool for imaginative play. Kids can pretend to type, send emails, or write stories, enhancing their creativity.

Credit: www.youtube.com
Frequently Asked Questions
What Materials Are Needed For A Diy Cardboard Keyboard?
You will need sturdy cardboard, scissors, markers, glue, ruler, and a printed keyboard template. These materials are affordable and easy to find, making this project accessible for all ages.
How Do You Assemble A Cardboard Toy Computer Keyboard?
Cut out the keyboard base and keys from cardboard. Use glue to attach keys in the correct layout. Decorate with markers for a realistic look.
Is The Diy Cardboard Keyboard Functional?
The cardboard keyboard is a toy and not electronically functional. It is designed for creative play and learning about keyboard layouts.
Can Children Safely Make This Cardboard Keyboard?
Yes, children can safely make this project with adult supervision. It involves simple cutting and gluing, promoting creativity and fine motor skills.
Conclusion
Building a cardboard toy computer keyboard is fun and simple. It helps kids learn about computers and creativity. Using everyday materials makes the project easy and affordable. This craft encourages hands-on learning and imagination. Try adding colors or stickers to personalize it.
Creating this toy can bring family and friends together. Enjoy the process and share your work with others. Keep experimenting with new designs for more fun. This project sparks curiosity in a playful way. Give it a try and see what you create!