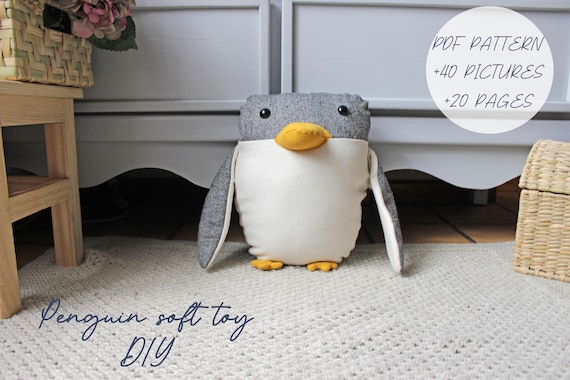
Are you looking for a fun and creative project that brings joy and charm to your home? Imagine making your very own adorable toy penguin, stitched by your own hands.
With this DIY Toy Penguin Sewing Pattern, you can turn simple fabric into a cute companion that’s perfect for gifts, decor, or even a new hobby. Whether you’re a beginner or have some sewing experience, this guide will walk you through every step, making it easy and enjoyable.
Ready to create something special? Let’s dive in and bring your penguin to life!
Materials Needed
Making a DIY toy penguin needs some basic materials. These will help you create a soft and cute toy.
Gathering the right supplies makes sewing easier and the final toy nicer to hold.
Fabric Choices
Choosing the right fabric is key to making a soft and durable penguin. Pick fabrics that feel gentle to touch.
- Fleece – soft and warm, easy to sew
- Felt – holds shape well and comes in many colors
- Cotton – breathable but less stretchy
- Minky fabric – very soft, great for plush toys
Sewing Tools
Having the right tools helps you sew accurately and safely. Keep your tools clean and sharp.
- Sewing needles – choose size based on fabric thickness
- Thread – strong polyester thread works best
- Scissors – sharp fabric scissors for clean cuts
- Pins or clips – hold pieces together while sewing
- Measuring tape or ruler – check fabric sizes
- Marking pen – to trace patterns on fabric
- Sewing machine (optional) – speeds up the process
Stuffing Options
Stuffing fills your penguin and gives it shape. Choose stuffing that is safe and soft.
- Polyester fiberfill – common, soft, and washable
- Cotton batting – natural and firm
- Fabric scraps – eco-friendly but less fluffy
- Plastic pellets – add weight and stability
Additional Supplies
Extra supplies help add details and finish your penguin neatly. They make your toy look more complete.
- Buttons or safety eyes – for the penguin’s eyes
- Embroidery thread – to add beak and feet details
- Fabric glue – to secure small parts if needed
- Seam ripper – fix mistakes easily
- Stuffing tool or chopstick – push stuffing into small areas
Preparing The Pattern
Before sewing your toy penguin, you need to prepare the sewing pattern. This step helps ensure your final toy looks just right.
Preparing the pattern carefully saves time and fabric. It also makes sewing easier and more fun.
Printing And Cutting
Print the sewing pattern on regular paper. Use the correct size setting to keep the pattern accurate.
After printing, cut out each pattern piece carefully along the solid lines. Avoid cutting inside or outside the lines.
- Use sharp scissors for clean edges
- Cut slowly to follow the lines exactly
- Keep pieces organized by labeling them
Transferring Pattern To Fabric
Place the paper pattern pieces on your chosen fabric. Make sure the fabric is flat and smooth before tracing.
Trace around the edges of the paper pattern with a fabric marker or tailor's chalk. Mark any special points like notches or darts.
- Pin the pattern pieces to the fabric to stop slipping
- Double-check the fabric grain direction before tracing
- Leave extra space for seam allowances if not included
Cutting Fabric Pieces
Cutting fabric pieces is an important step in making your DIY toy penguin. Cutting carefully helps the pieces fit together well.
Use sharp scissors and a clean surface to get neat cuts. This makes sewing easier and your penguin look better.
Marking Fabric
Mark your fabric before cutting to follow the pattern shapes exactly. Use a pencil or fabric chalk that can erase easily.
Place the pattern pieces on the fabric and trace around them. Mark any notches or sewing lines clearly.
- Use light marks to avoid visible lines on the finished toy
- Mark both sides if the fabric is thick or double-layered
- Double-check your markings before cutting
Cutting Tips
Cut fabric pieces slowly to keep the edges smooth. Avoid lifting the fabric too much while cutting.
Cut all pattern pieces in the right order. Keep pieces organized to avoid confusion when sewing.
- Use sharp fabric scissors for clean cuts
- Cut on a flat surface to prevent uneven edges
- Cut slightly outside the marked lines for seam allowance if needed
- Keep fabric flat and avoid stretching during cutting
Sewing The Penguin Body
Sewing the body of your toy penguin is a fun and simple process. It involves joining fabric pieces to form the shape of the penguin.
Take your time to sew carefully so the body looks neat and strong. This guide will help you sew the main parts and leave space for stuffing.
Stitching The Main Pieces
Start by placing the front and back fabric pieces with the right sides together. Pin them so they stay aligned as you sew.
Sew around the edges using a straight stitch. Keep the seam allowance consistent for a smooth finish. Be careful around the curves to keep the shape.
- Use a 1/4 inch seam allowance
- Sew slowly around curves
- Remove pins as you sew
- Backstitch at the start and end
Leaving An Opening For Stuffing
Do not sew the entire edge closed. Leave a small opening to add stuffing later. This hole should be about two to three inches wide.
Place the opening on the back or bottom where it will be less visible. After stuffing, you will sew this opening closed by hand.
- Leave a 2-3 inch gap
- Choose a hidden spot for the opening
- Check edges are securely sewn around the opening
Adding Details
Adding details to your DIY toy penguin makes it look more real and cute. Small parts like wings, beak, and eyes bring your project to life.
Take your time to sew and attach these pieces carefully. This will give your penguin a polished and finished look.
Attaching Wings And Beak
Start by sewing the wings on each side of the penguin’s body. Use small stitches so the wings stay secure and look neat.
Next, attach the beak in the center of the face. Make sure it is centered and points slightly outward for a natural look.
- Pin wings before sewing to keep them in place
- Use thread color that matches the fabric
- Sew the beak with tight stitches for durability
- Check symmetry to keep the penguin balanced
Sewing Eyes And Facial Features
Sew the eyes carefully on the face area. You can use buttons, beads, or embroidered stitches for the eyes.
Add small stitches for eyebrows or cheeks to give your penguin expression. Keep the features simple and soft.
- Place eyes evenly apart and at the right height
- Use strong thread to avoid loose eyes
- Add small stitches for extra facial details
- Test different materials for eyes before sewing

Credit: craftbits.com
Stuffing And Closing
Sewing a toy penguin can be fun and rewarding. Stuffing and closing are key steps in the process.
Choosing the right stuffing and properly closing the opening affects how your penguin looks and feels.
Choosing The Right Stuffing
The stuffing you choose will determine the penguin's softness and shape. Consider these options when selecting stuffing for your DIY toy penguin.
- Polyester Fiberfill:Soft and lightweight, easy to work with.
- Cotton Batting:Natural and dense, adds weight to your penguin.
- Recycled Materials:Eco-friendly, can be used for a firm feel.
Hand Sewing The Opening
After stuffing your penguin, the next step is closing the opening. A neat finish enhances the toy's appearance.
Tools Needed:
| Needle | Sewing Thread |
| Scissors | Pins |
Begin by threading the needle and knotting the end. Use a ladder stitch to sew the opening closed.
Take small, even stitches to ensure the seam is secure and invisible. This technique gives a professional look to your toy penguin.
Finishing Touches
After stitching your toy penguin, it's time to focus on the finishing touches. These details make your creation look polished and complete.
Follow these steps to ensure your toy penguin is the best it can be. Pay attention to every little detail for a professional finish.
Trimming Threads
Trimming threads is essential for a neat appearance. Loose threads can make your toy look messy and unfinished.
- Use small, sharp scissors for precision.
- Check all seams for loose threads.
- Trim threads as close to the fabric as possible.
- Ensure no thread tails are visible on the surface.
Optional Embellishments
Adding embellishments can give your toy penguin a unique personality. Choose elements that match your style and theme.
Consider these options for embellishments:
- Buttons for eyes or decorative features
- Felt shapes to add texture
- Embroidery for extra detailing
- Ribbons and bows for a playful touch
Credit: www.etsy.com
Care And Maintenance
Keeping your DIY toy penguin clean and well-maintained helps it last longer. Regular care protects the fabric and stitching.
Follow simple steps to clean and store your penguin safely. This keeps it looking new and keeps it safe from damage.
Cleaning Tips
Clean your toy penguin carefully to avoid ruining its shape or colors. Use gentle methods and mild products.
- Spot clean with a damp cloth and mild soap for small stains.
- Hand wash with cold water and gentle detergent if needed.
- Do not use bleach or harsh chemicals on the fabric.
- Air dry the penguin flat on a towel to keep its form.
- Avoid using a dryer or direct sunlight for drying.
Storage Suggestions
Store your penguin in a dry, cool place to protect it from dust and moisture. Proper storage helps prevent mold and fading.
| Storage Condition | Reason |
| Cool temperature | Prevents fabric weakening and color fading |
| Dry environment | Avoids mold and mildew growth |
| Away from direct sunlight | Protects colors from fading |
| Use a breathable cloth bag | Allows air circulation and keeps dust away |
Credit: craftresource.fandom.com
Frequently Asked Questions
What Materials Are Needed For The Diy Toy Penguin Sewing Pattern?
You will need fabric, thread, scissors, sewing needles, stuffing, and the printable pattern. Optional items include buttons and fabric markers for decoration.
How Difficult Is The Diy Toy Penguin Sewing Pattern To Make?
This pattern is beginner-friendly, perfect for those new to sewing. It includes clear instructions and simple shapes for easy assembly.
Can I Customize The Toy Penguin Design?
Yes, you can choose different fabrics, colors, and add accessories. Customizing makes each penguin unique and personal.
How Long Does It Take To Sew The Toy Penguin?
The project typically takes 1 to 2 hours, depending on your sewing speed and skill level.
Conclusion
Creating your own toy penguin brings joy and pride. Each stitch adds character and charm to your craft. This sewing pattern is simple and fun to follow. It helps you make a soft, cute penguin easily. Enjoy the process and share your handmade toy with loved ones.
Sewing can be relaxing and a great way to spend time. Try this pattern and see your penguin come to life. Keep practicing, and your skills will improve fast. Happy sewing!