Have you ever wanted to create your very own toy car? Imagine holding a cool, custom-made car that you built with your own hands.
It’s easier than you think, and you don’t need fancy tools or materials. In this guide, you’ll discover simple steps to make a toy car that’s fun and unique. Whether it’s for a gift, a school project, or just for fun, you’ll love how rewarding it feels to bring your toy car to life.
Ready to get started? Let’s dive in!

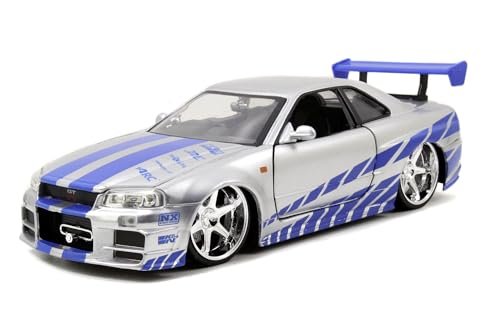
Credit: www.havi.co
Materials Needed
Making a toy car is a fun and creative project. Before starting, gather all the materials you need. Having the right tools and parts helps you build the car smoothly. Safety gear keeps you protected during the process.
Basic Tools
Basic tools make the building process easier. You will need a small screwdriver to fasten screws. A pair of pliers helps to bend wires or hold small parts. Scissors or a craft knife are useful for cutting materials. A ruler or measuring tape ensures parts fit well.
Parts And Components
The parts form the structure of your toy car. Wheels are essential for movement. Axles connect the wheels to the body. The body can be made from wood, plastic, or cardboard. Small screws or glue hold parts together. Optional parts include paint and stickers for decoration.
Safety Gear
Safety gear protects you while building. Wear safety glasses to shield your eyes. Use gloves to avoid cuts or splinters. Work in a well-lit area to see clearly. Keep your workspace clean to prevent accidents.
Design Your Toy Car
Designing your toy car is an exciting step. It lets you bring your ideas to life. A clear design plan saves time and materials. It helps you create a fun, unique toy car. Start with simple steps. Think about style, shape, and size. These choices shape your car’s look and feel.
Choosing A Style
Pick a style that fits your taste. Classic cars have smooth, round shapes. Sports cars look fast with sharp edges. Trucks are big and strong. Think about colors and details. Simple styles work best for beginners. Choose one that feels fun to you.
Sketching Your Plan
Draw your idea on paper. Use simple lines and shapes. Don’t worry about mistakes. Sketching helps you see your car’s form. You can change parts before building. Label parts like wheels, windows, and doors. Keep your sketch clear and easy to follow.
Selecting Dimensions
Decide the size of your toy car. Small cars fit in your hand. Bigger cars are easier to build. Measure length, width, and height. Keep proportions balanced. Wheels should match the car size. Write down all measurements for reference.
Cutting And Shaping Parts
Cutting and shaping parts is an important step in making a toy car. This process gives the car its form and ensures each piece fits well. Careful cutting and shaping create a smooth, attractive toy. It also makes the car safe for children to play with.
Working With Wood Or Plastic
Choose wood or plastic as your base material. Use a small saw or a craft knife to cut the parts. Cut slowly to avoid mistakes. Follow the design carefully for accurate shapes. Wood is easy to carve but needs smooth edges. Plastic can be cut with scissors or a blade but requires steady hands.
Sanding And Smoothing
Sand each part after cutting to remove rough edges. Use fine-grit sandpaper for a smooth finish. Sand gently in one direction. This step prevents splinters and sharp spots. Smooth parts also help the paint stick better. Take your time to make every piece soft to touch.
Preparing Wheels And Axles
Cut wheels from wood or plastic circles. Make sure all wheels are the same size. Drill holes in the center for the axles. Use small wooden sticks or metal rods as axles. Test the wheels to see if they spin freely. Adjust the holes or axles to avoid friction. Well-prepared wheels make the toy car roll smoothly.
Assembling The Car
Assembling the toy car is the step where your creation starts to take shape. This process needs patience and care. Each part must fit well to make the car strong and fun to play with. Follow the steps closely to build a toy car that works smoothly and looks great.
Attaching The Body
Begin by placing the car body on a flat surface. Align the holes on the body with the base. Press gently but firmly to fit the parts together. Check that the body sits evenly and does not wobble. This step gives the car its shape and style.
Fixing The Wheels
Pick the wheels and prepare them for attachment. Slide each wheel onto its axle carefully. Make sure the wheels spin freely without falling off. Properly fixed wheels help the car roll smoothly on any surface.
Securing The Axles
Insert the axles through the slots under the car body. Push them until they lock in place. Use small clips or glue if needed to hold the axles firmly. Strong axles keep the wheels steady and support the car’s movement.
Painting And Decorating
Painting and decorating your toy car is the fun part. This step brings your creation to life. Colors and details make the car special and unique. A good paint job also protects the toy from wear and tear.
Choosing Paint Types
Use paint made for wood or plastic. Acrylic paints dry fast and stick well. Avoid oil-based paints; they take longer to dry. Spray paints give a smooth finish but use them outside. Test paint on a small area first. This prevents unwanted surprises later.
Adding Details
Details add personality to your toy car. Use fine brushes for small lines and shapes. Paint windows, headlights, and racing stripes. Stickers or decals can also work well. Be creative but keep it simple for a clean look.
Applying Finishing Touches
Seal the paint with a clear coat. This keeps the colors bright and stops chipping. Let the car dry completely before handling. Add small accessories like wheels or decals last. These finishing touches complete your toy car’s look.
Testing And Adjusting
Testing and adjusting your toy car is a key step in building it. This process helps you find and fix problems. It also makes sure the car runs smoothly. A well-tested car moves better and lasts longer.
Checking Wheel Movement
Start by spinning each wheel. They should turn freely without sticking. If a wheel is hard to move, check the axle. Make sure it is straight and not too tight. Clean any dirt or glue that blocks the wheels. Smooth wheels help the car go faster.
Balancing The Car
Place the car on a flat surface. It should sit evenly without tipping. If one side is heavier, add weight to the lighter side. Use small pieces of tape or clay. A balanced car drives straight and stable. This improves speed and control.
Troubleshooting Common Issues
If the car wobbles or stops, look for loose parts. Tighten screws and glue joints again. Check if the wheels touch the body or ground wrongly. Fix any parts that rub against each other. Test the car after each fix. Repeat until it runs well.
Creative Variations
Making a toy car can be a fun project. You can try many creative ideas. These ideas make your toy car special and exciting. Here are some creative ways to change your toy car.
Adding Motorized Features
Give your toy car a motor to make it move on its own. Small electric motors work well. Attach the motor to the wheels with a simple gear. Use batteries to power the motor. This makes the car run without pushing. It adds fun and learning about machines.
Using Recycled Materials
Use old items to build your toy car. Bottle caps can be wheels. Cardboard boxes make the car body. Old plastic containers add shapes and colors. This saves money and helps the environment. It also makes your car unique and creative.
Customizing With Stickers And Accessories
Decorate your toy car with stickers for style. Add small accessories like flags, lights, or tiny figures. Paint the car with bright colors. Use markers to draw designs. These simple touches make your car look great and personal.

Credit: www.youtube.com

Credit: www.wikihow.com
Frequently Asked Questions
What Materials Do I Need To Make A Toy Car?
To make a toy car, gather wood or plastic, small wheels, glue, paint, and basic tools like a saw or screwdriver. Choose lightweight materials for easy handling and safe play.
How Long Does It Take To Build A Toy Car?
Building a toy car typically takes 1 to 3 hours depending on complexity. Simple models are faster, while detailed designs require more time and patience.
Can Kids Safely Make Toy Cars At Home?
Yes, kids can safely make toy cars with adult supervision. Use child-friendly materials and tools to ensure safety during crafting activities.
What Are Simple Designs For A Beginner’s Toy Car?
Simple toy car designs include block shapes with four wheels attached. These basic models help beginners learn cutting, assembling, and painting techniques easily. As children gain confidence in their skills, they can explore more complex designs, incorporating features like a streamlined body or additional accessories. Additionally, learning how to draw a toy car can further enhance their creativity, allowing them to visualize their ideas before bringing them to life. This combination of drawing and crafting fosters both artistic expression and practical skills.
Conclusion
Making a toy car can be fun and easy. You just need some simple materials and steps. This project helps you learn and create something with your own hands. It is a great way to spend time alone or with friends.
Keep practicing, and you will get better each time. Enjoy the process and be proud of your toy car! Keep making and exploring new ideas.