Imagine creating a toy soldier fort that feels so real, you’ll want to jump right in and command your troops. You might think building one is hard, but it’s easier than you expect—and a lot more fun.
In this guide, you’ll discover simple steps and clever tips to make a strong, cool fort that your toy soldiers will love. Ready to bring your imagination to life and impress everyone with your creation? Keep reading, and let’s get started!

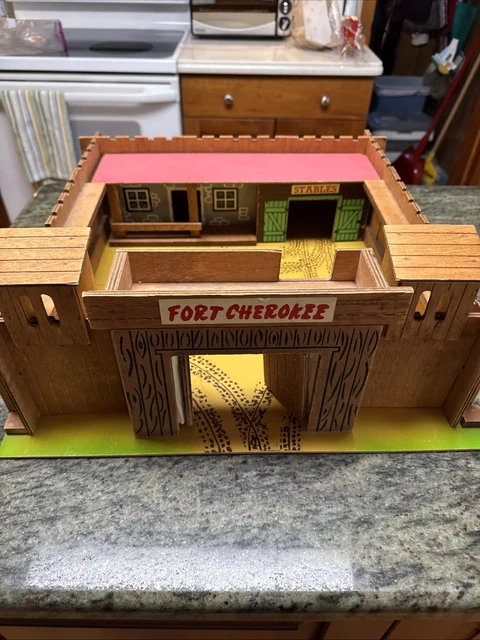
Credit: www.amazon.co.uk
Choosing Materials
Building a toy soldier fort can be fun and creative. Choosing the right materials is very important.
The materials you pick affect how strong and safe the fort will be. Let’s look at some choices.
Types Of Materials
You can use many materials for your toy soldier fort. Wood, cardboard, and plastic are popular choices.
- Wood:Strong and lasts a long time. Easy to paint and decorate.
- Cardboard:Light and cheap. Easy to cut but not very strong.
- Plastic:Durable and water-resistant. Can be heavy and hard to cut.
- Foam:Soft and safe. Good for kids but not very sturdy.
Tools Needed
You need some tools to build your fort. The tools depend on the materials you choose.
- Scissors or a craft knife for cutting cardboard and foam
- A hammer and nails for wood pieces
- Glue or tape to hold parts together
- A ruler to measure pieces accurately
- Paintbrushes if you want to paint the fort
Safety Tips
Safety is very important when building your fort. Always be careful with sharp tools and small parts.
- Use scissors or knives with adult help
- Wear gloves to protect your hands from splinters or cuts
- Keep your work area clean and tidy
- Do not use broken or cracked materials
- Store tools safely when not in use
Planning Your Fort
Building a toy soldier fort is a fun project. Planning helps make it strong and fun to play with.
Good planning saves time and makes sure the fort fits your space and needs.
Design Ideas
Think about how you want your fort to look. Choose a style that fits your toy soldiers.
You can make a castle, a military base, or a simple wall fort. Add towers or gates for detail.
- Castle style with tall walls and towers
- Military base with bunkers and lookout points
- Simple wall fort with gates and barriers
- Include small rooms or hiding spots
Measuring And Marking
Measure the area where you want to build the fort. Check the space for size and shape.
Mark the measurements on paper or the building surface. Use a ruler or tape measure.
- Measure length and width of the space
- Mark corners and wall positions
- Note door and window spots if needed
- Double-check measurements before building
Setting A Budget
Decide how much money you want to spend on the fort. Plan your budget before buying materials.
Include costs for wood, paint, glue, and decorations. Keep some money for tools or extra parts.
- List all needed materials and their prices
- Set a total spending limit
- Save money by using recycled materials
- Keep a small fund for unexpected costs
Constructing The Base
Building a strong base is the first step to make your toy soldier fort sturdy. The base supports the whole structure and keeps it stable.
Use simple materials and tools to create a flat, solid foundation for your fort. This guide will help you get started.
Cutting Materials
Start by measuring the size of the base you want for your fort. Mark the materials clearly before cutting to avoid mistakes.
Use a saw or scissors depending on the material. Make straight cuts to make assembly easier.
- Measure twice before cutting
- Use wood, cardboard, or foam board
- Cut pieces to the same size for balance
Assembling The Foundation
Lay out the cut pieces on a flat surface. Arrange them to form the shape of your fort’s base.
Join the pieces by lining up edges carefully. This helps the base hold its shape well.
- Place pieces side by side or in a frame shape
- Align edges and corners tightly
- Check that the base is flat and even
Securing The Base
Use glue, tape, or small nails to hold the base pieces together. This will stop them from moving or falling apart.
Press the pieces firmly and let the glue dry if you use it. Add extra support at corners for better strength.
- Apply glue evenly on joining edges
- Use clamps or weights to hold parts while drying
- Reinforce corners with tape or small nails
Building Walls And Towers
Building a toy soldier fort starts with strong walls and tall towers. These parts help protect your fort and give it a classic look.
Use simple materials like blocks, cardboard, or wood pieces. Focus on making each part stable and easy to build.
Wall Construction Techniques
Choose the right shape and size for your walls. Rectangular walls are easy to build. Use stacking or interlocking pieces for strength.
- Start with a solid base for the walls.
- Use pieces that fit tightly together.
- Build walls at least two pieces high for better defense.
- Leave gaps for doors or windows.
- Keep walls straight and even on all sides.
Adding Towers And Lookouts
Towers give your fort a lookout point. They help you see far and add height to your structure.
| Tower Type | Materials | Height |
| Square Tower | Wood blocks | 4 pieces tall |
| Round Tower | Cardboard tubes | 5 pieces tall |
| Lookout Post | Plastic cups | 3 pieces tall |
Place towers at the corners or at the middle of walls. Add small openings for soldiers to look through.
Reinforcement Tips
Reinforce your fort to keep it strong and stable. Use extra supports and secure weak points.
- Glue loose pieces together to prevent falling.
- Add support beams inside walls for extra strength.
- Use tape or string to hold parts tight.
- Check and fix any wobbly spots often.
- Build a wide base to stop tipping.
Creating Entry Points
Entry points give your toy soldier fort access and style. They let soldiers come in and out.
Designing good doors and gates makes the fort look real and fun to play with.
Designing Doors And Gates
Choose the size of doors to fit your toy soldiers. Big doors allow easy movement.
Gates can be simple or have bars like a castle gate. Use cardboard or wood for strength.
- Make doors tall enough for toy soldiers to pass
- Use sturdy materials like craft sticks or thick cardboard
- Add a latch or handle for realism
- Consider double doors for wider entry
Hinges And Fastening
Hinges let doors open and close smoothly. Simple hinges work well for a toy fort.
Use small pieces of tape, paper fasteners, or tiny metal hinges to attach doors.
- Paper fasteners allow easy door movement
- Strong tape can hold doors in place temporarily
- Small metal hinges add durability
- Test hinges before final fixing
Decorative Elements
Decorate doors and gates to make the fort look interesting. Paint or draw patterns.
Add small details like knobs, bolts, or flags to create a realistic look.
- Use paint or markers for door colors
- Glue small beads or buttons as knobs
- Draw wood grain or metal plates
- Add paper flags on top of gates

Credit: www.classic-pirates.com
Detailing And Decoration
Adding details and decorations makes your toy soldier fort look real and fun. Small touches improve the fort’s style and feel.
Use paint, accessories, and weatherproofing to finish your fort. Each step adds to the fort’s charm and durability.
Painting And Finishing
Choose colors that match your toy soldiers or the fort’s theme. Use acrylic paint for easy application and quick drying.
- Paint the walls in army green, brown, or gray.
- Use fine brushes for details like windows and doors.
- Apply two coats for a smooth finish.
- Add camouflage patterns for a realistic look.
- Seal paint with a clear matte spray for protection.
Adding Accessories
Accessories bring your fort to life. Add small items that soldiers might use or see in a real fort.
| Accessory | Description |
| Mini flags | Place on towers or walls for identity. |
| Barrels and crates | Use for storage and decoration. |
| Small ladders | Attach for access to walls or towers. |
| Sandbags | Arrange around the fort for defense look. |
| Toy weapons | Place near soldiers or storage areas. |
Weatherproofing
Protect your fort from weather damage using simple methods. This keeps the fort strong for outdoor play.
Use waterproof sprays or varnish to coat the fort’s exterior. Cover all painted and wooden parts evenly.
Keep the fort in a shaded area to avoid sun fading. Place a plastic sheet on the base to stop water damage.
Setting Up The Fort
Building a toy soldier fort is a fun and creative project. It requires careful planning and imagination.
Follow these simple steps to set up an impressive fort for your toy soldiers.
Placing Toy Soldiers
Arrange your toy soldiers strategically to guard the fort. Decide which soldiers will stand on the walls and which will patrol the area.
Make sure the soldiers are spaced evenly to cover all angles. This will make your fort look ready for action.
- Place soldiers on lookout towers for better visibility
- Position soldiers at entry points for defense
- Use different soldier types for varied roles
Arranging Accessories
Accessories add realism to your toy soldier fort. Use items like sandbags, flags, and tents to enhance the scene.
Organize these accessories to create a believable military environment. This makes the fort look more detailed and interesting.
- Place sandbags around the fort for protection
- Add flags to show your fort's allegiance
- Set up tents for soldier camps
Display Ideas
Once your fort is set up, think about how to display it. Use a shelf or table to keep everything visible and organized.
Consider adding a backdrop to enhance the display. This can be a painted scene or a printed image.
- Use a spotlight to highlight the fort
- Display on a raised platform for better viewing
- Rotate soldiers occasionally for variety
Credit: picclick.ca
Maintenance And Upgrades
Building a toy soldier fort is fun, but keeping it in top shape needs effort. Regular maintenance and smart upgrades help your fort last longer.
Here we cover essential repair tips, ways to expand, and ideas for seasonal decorations.
Repair Tips
Even the best forts need repairs. Fixing small issues quickly can prevent bigger problems later.
- Check for loose parts and tighten them.
- Replace broken pieces with new ones.
- Use non-toxic glue for minor fixes.
Expanding The Fort
Want more room for your toy soldiers? Expanding your fort is easy with simple tools and materials.
- Add extra walls for more space.
- Incorporate towers to enhance lookout points.
- Install gates for controlled entry.
Seasonal Decorations
Decorating your fort for different seasons adds excitement. Simple changes can make your fort festive and fun.
Consider these seasonal themes:
- Winter:Add snowflakes and icicles.
- Spring:Use flowers and green leaves.
- Fall:Decorate with pumpkins and autumn leaves.
Frequently Asked Questions
What Materials Are Needed To Build A Toy Soldier Fort?
You need cardboard, glue, paint, scissors, and toy soldiers. These materials are affordable and easy to find. Cardboard provides a sturdy base. Paint adds color and detail. Glue and scissors help assemble parts securely.
How Do I Design A Safe Toy Soldier Fort?
Design the fort with smooth edges and stable walls. Avoid sharp objects to prevent injuries. Use lightweight materials for easy handling. Ensure the fort is big enough for toy soldiers to move inside. Safety keeps playtime fun and worry-free.
Can Kids Build A Toy Soldier Fort Themselves?
Yes, kids can build a toy soldier fort with supervision. Simple steps like cutting and painting are kid-friendly. Adults should assist with sharp tools and gluing. This activity encourages creativity and fine motor skills development.
How Long Does It Take To Build A Toy Soldier Fort?
Building a toy soldier fort usually takes 1 to 3 hours. Time varies based on design complexity and drying times for glue or paint. Planning and preparation can speed up the process. Patience ensures a sturdy and attractive fort.
Conclusion
Building a toy soldier fort can be fun and creative. You can use simple materials like blocks or cardboard. It takes some patience and careful planning. Small steps lead to a strong and cool fort. Playing with your fort makes the effort worth it.
Keep trying new ideas to make it better. Enjoy the process and share it with friends. Your toy soldier fort can become a favorite playtime spot. Have fun building and imagining new adventures!