Are you ready to impress your classmates and teachers with a cool school project? Making a toy car might sound tricky, but with the right steps, you can build one easily and have fun doing it.
Imagine showing off a car you made yourself, rolling smoothly across the table. In this guide, you’ll discover simple materials and clear instructions to create a toy car that works great. Keep reading, and by the end, you’ll have a project that stands out and makes you proud!
Credit: www.youtube.com
Materials Needed
Gathering the right materials is the first step to making a toy car for a school project. Having the correct supplies helps the process go smoothly. It also ensures the toy car works well and looks good. Below is a list of the materials needed to create a simple, fun toy car.
Basic Supplies
- Cardboard or a small wooden block for the car body
- Four plastic bottle caps or small wheels
- Wooden skewers or straight sticks for axles
- Glue or strong tape to hold parts together
- Scissors for cutting cardboard or tape
- Markers or paint for decorating the car
Optional Tools
- Ruler to measure parts accurately
- Craft knife for detailed cutting (adult supervision needed)
- Sandpaper to smooth rough edges
- Hot glue gun for stronger adhesion
- Small drill or punch to make holes for axles

Credit: www.wikihow.com
Designing The Toy Car
Designing the toy car is an important step in your school project. It sets the foundation for how your car will look and work. A good design helps you build the car with ease and makes it fun to use. Focus on simple shapes and clear plans to avoid confusion.
Think about what kind of toy car you want to create. Will it be fast, small, or strong? Your answers will guide your design choices. This part lets you be creative and practical at the same time.
Choosing The Car Shape
Start by picking a shape for your toy car. Common shapes include rectangle, oval, or square. Choose a shape that is easy to cut and assemble. Rounded shapes often look better and can help the car move smoothly. Avoid complicated shapes that need many parts. Simple shapes save time and materials.
Planning Dimensions
Decide the size of your toy car. Think about how long, wide, and tall it should be. Keep the car small enough to fit on your desk. Use a ruler or measuring tape to draw a clear plan. Precise dimensions help when you cut parts and build the car. Write down all measurements before you start cutting.
Cutting And Shaping Parts
Cutting and shaping parts is a key step in making a toy car for your school project. This step helps turn simple materials into the main pieces of the car. Taking care during this process ensures the toy car looks neat and works well. You will focus on two main parts: the body and the wheels.
Preparing The Body
Start with a sturdy piece of wood or cardboard for the car body. Use a pencil to draw the car shape on it. Keep the shape simple, like a rectangle or oval. Use scissors or a small saw to cut along the lines carefully. Smooth the edges with sandpaper to avoid rough spots. This makes the car safe to hold and easy to paint later.
Creating Wheels
Wheels can be made from bottle caps, wooden discs, or cardboard circles. Trace a circle shape on your material using a coin or lid. Cut out four wheels with scissors or a craft knife. Make sure all wheels are the same size for balance. Smooth the edges with sandpaper for better rolling. Punch a small hole in the center of each wheel for the axle.
Assembling The Car
Assembling the toy car is a fun and important step. This is where your project starts to take shape. You will join all parts carefully to build a strong, working car. Follow these simple steps to put your car together easily.
Attaching Wheels
Start by fixing the wheels to the car base. Use small axles or sticks to hold the wheels in place. Make sure the wheels spin freely but do not fall off. Test each wheel by rolling the car on a flat surface. Adjust the tightness if wheels are too loose or tight. Properly attached wheels help the car move smoothly.
Securing The Body
Next, attach the car body to the base. Use glue or tape to hold it firmly. Press the body down and wait a few minutes for glue to dry. Check that the body does not wobble or come loose. A strong attachment keeps your car steady during the project.
Adding Finishing Touches
Adding finishing touches to your toy car makes it look special and complete. This step brings your project to life. It also shows your creativity and effort. Simple details can change the whole look of your car. Let’s explore how to paint, decorate, and add small details that stand out.
Painting And Decorating
Choose bright colors for your toy car. Use water-based paint for easy application and quick drying. Paint the body evenly to avoid drips. Let each coat dry before applying the next. Use tape to create stripes or patterns. Stickers can add fun designs and logos. Paint the wheels a different color for contrast. Keep your brush strokes smooth and steady. A small brush helps with tiny areas. Let the paint dry fully before touching the car.
Adding Details
Small details make your toy car unique. Glue tiny parts like headlights, mirrors, or spoilers. Use buttons or beads for lights. Cut paper or foam for windows and doors. Draw lines for doors and handles with a marker. Add a number or name on the car for a personal touch. Secure all parts firmly so they do not fall off. Check for loose pieces before finishing. These details make your car look real and exciting.
Testing And Troubleshooting
Testing and troubleshooting are important steps in making a toy car for a school project. These steps help find problems early and make sure the car works well. Checking the moving parts and fixing issues helps the car run smoothly. This section explains how to test and fix common problems.
Checking Wheel Movement
Start by spinning each wheel by hand. The wheels should turn freely without stopping. If a wheel does not move well, it may be stuck or too tight. Check if the wheel is hitting the car body or axle. Make sure the wheels are on the right side and properly attached. The wheels need to spin easily for the car to move fast.
Fixing Common Issues
If the car does not roll straight, check the alignment of the wheels. Wheels that point inward or outward can make the car turn or stop. Tighten loose parts but do not make them too tight. Loose wheels wobble and tight wheels stop moving. Use small tools to adjust axles or remove any dirt blocking movement. Test the car after each fix to see if it improves.

Credit: www.havi.co
Frequently Asked Questions
What Materials Are Needed To Make A Toy Car?
You need cardboard, straws, bottle caps, glue, and scissors. These materials are affordable and easy to find. They help build a lightweight, durable toy car for your school project. Optional items include paint and markers for decoration.
How Do You Assemble The Wheels On A Toy Car?
Attach bottle caps as wheels by inserting straws as axles. Secure the straws to the car body with glue. Ensure wheels spin freely for smooth movement. Proper wheel attachment is key for a functional toy car.
What Is The Best Way To Decorate A Homemade Toy Car?
Use paint, markers, or stickers to decorate your toy car. Choose bright colors to make it visually appealing. Decoration adds a creative touch and enhances your project’s presentation.
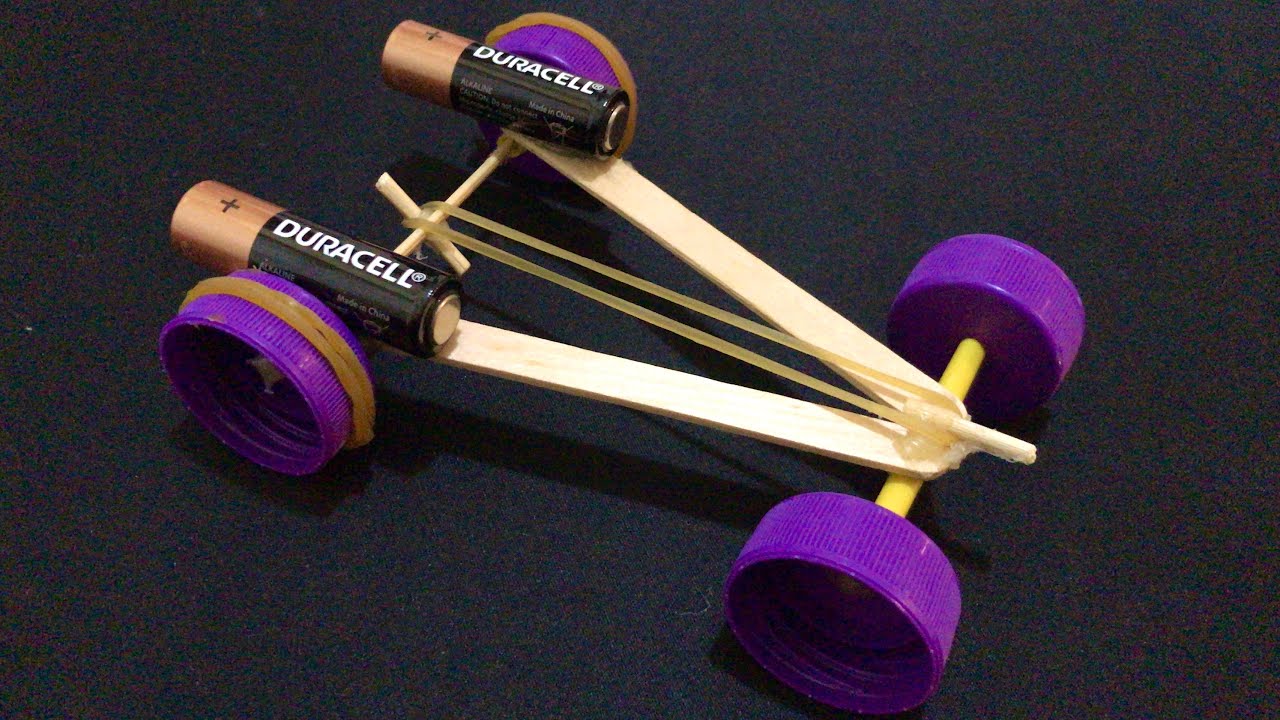
How Can I Make The Toy Car Move Faster?
Reduce friction by ensuring wheels spin freely and are properly aligned. Use lightweight materials to minimize weight. Adding a rubber band motor can also increase speed effectively.
Conclusion
Making a toy car for a school project can be fun and simple. You only need a few materials and some patience. Follow the steps carefully to build your car. This project helps you learn about science and creativity. You will feel proud when your car moves on its own.
Try different designs to see what works best. Keep practicing, and you will get better every time. Enjoy the process and share your work with friends and family.