Have you ever wanted to create a magical toy princess crown that feels just right for your little one? Making your own crown is easier than you think, and it adds a special touch that store-bought crowns can’t match.
Imagine the joy on your child’s face when they wear a crown you made with care. In this guide, you’ll discover simple steps and helpful tips to craft a beautiful, fun toy princess crown. Keep reading, and you’ll be surprised how quickly you can bring a bit of royal sparkle to playtime!
Materials Needed
Making a toy princess crown is a fun and simple craft project. You only need a few materials to create a lovely crown for playtime.
Below are the basic supplies you will need and some optional decorative items to add sparkle and charm.
Basic Supplies
Gather these essential items to start making your toy princess crown. These materials are easy to find and safe for children.
- Cardstock or thick paper
- Scissors
- Glue stick or liquid glue
- Ruler
- Pencil
- Elastic band or ribbon
Optional Decorative Items
You can use decorations to make the crown more colorful and special. Choose any of these to add your own style.
| Decoration | Purpose |
| Glitter | Add shine and sparkle |
| Colored markers | Draw patterns or shapes |
| Stickers | Easy, fun designs |
| Gemstones or beads | Create a royal look |
| Feathers | Add texture and flair |
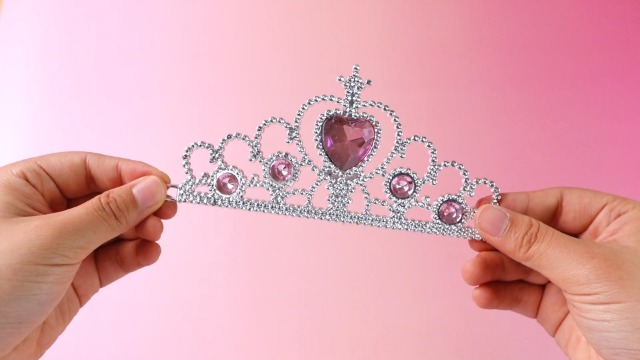
Credit: www.amazon.com
Choosing The Right Base
Picking a good base is important for a toy princess crown. It gives the crown shape and holds decorations well.
Many materials work well. We will look at cardboard and soft options like foam and felt.
Cardboard Options
Cardboard is strong and easy to shape. It holds its form and works well with glue and paint.
- Use thin cardboard for light crowns.
- Thicker cardboard gives a sturdy base but can be less flexible.
- Recycle old boxes for an eco-friendly option.
- Cover cardboard with paper or fabric to hide rough edges.
Foam And Felt Alternatives
Foam and felt are soft materials that feel nice to wear. They are easy to cut and shape with scissors.
| Material | Pros | Cons |
| Foam | Lightweight, flexible, easy to decorate | Less sturdy than cardboard |
| Felt | Soft, comfortable, comes in many colors | Can bend easily, may need extra support |
Measuring And Cutting
Making a toy princess crown starts with measuring and cutting. These steps help the crown fit well and look pretty.
Using the right size and shape makes the crown comfortable and fun to wear.
Sizing For Comfort
Measure the child's head with a soft tape measure. Wrap it around the forehead, just above the ears.
Add one inch to the measurement for a comfortable fit. This extra space prevents the crown from feeling tight.
- Use a flexible tape for accurate measuring
- Write down the measurement before cutting
- Remember to add extra space for comfort
Creating Crown Shapes
Draw the crown shape on sturdy paper or craft foam. Use the measured length to draw a band that fits the head.
Choose classic points or rounded shapes. Cut carefully along the lines for a neat finish.
- Start with a straight band matching the head size
- Add triangles or curves on top for the crown’s peaks
- Use scissors to cut slowly and precisely
- Check the shape by holding it against the head
Assembling The Crown
After cutting out all the pieces for your toy princess crown, it's time to put them together. This step makes the crown strong and ready to wear.
Use simple tools and materials to join the parts. Taking care during assembly helps the crown last longer.
Gluing Techniques
Use glue to stick the decorative parts on the crown base. Apply the glue evenly for a smooth finish.
Wait a few minutes after applying glue before pressing parts together. This helps the glue hold better.
- Use craft glue or hot glue for strong bonds
- Apply glue in small amounts to avoid mess
- Press pieces firmly but gently together
- Allow glue to dry fully before moving on
Securing The Ends
To make the crown fit, connect the ends securely. This keeps the crown in a round shape.
Use tape, glue, or small staples to join the ends. Check that the connection is tight but not sharp.
- Overlap the ends slightly for a better fit
- Use strong tape or glue to hold ends firmly
- Cover staples with tape to avoid scratches
- Try the crown on to check size before final sealing
Decorating Ideas
Making a toy princess crown is fun and creative. Decorating it makes the crown special and unique.
Use simple materials like paint, gems, ribbons, and stickers. These add color and shine to the crown.
Painting And Coloring
Choose bright colors to paint the crown. Use acrylic or poster paint for best results. Let the paint dry before adding other decorations.
- Pick your favorite colors.
- Paint the whole crown or make patterns.
- Wait for the paint to dry completely.
- Add a second coat if needed for bold color.
Adding Gems And Stickers
Gems and stickers add sparkle and fun shapes to the crown. You can use glue or double-sided tape to stick them.
| Type | How to Use |
| Plastic Gems | Glue them on points or edges |
| Foil Stickers | Place on flat painted areas |
| Gem Stickers | Stick on without glue |
| Glitter Stickers | Add shine and texture |
Using Ribbons And Lace
Ribbons and lace make the crown look fancy and soft. Tie ribbons around the base or glue lace on the edges.
Ribbon and Lace Tips:
- Choose colors that match the paint.
- Use thin ribbons for delicate looks.
- Glue lace carefully for neat edges.
- Make small bows with ribbons to add charm.
Tips For Durability
Creating a toy princess crown that lasts can be simple. Use sturdy materials and smart techniques.
Ensuring durability means your child can enjoy their crown for longer. Let's explore how to strengthen it.
Reinforcing Weak Spots
Weak spots can cause a crown to break easily. Reinforce these areas for better longevity.
- Use extra glue on joints
- Attach support strips under large decorations
- Choose sturdy materials like cardstock
Safe Materials For Kids
Choosing safe materials is vital for a child's toy. Ensure all materials are non-toxic and kid-friendly.
| Material | Safety Feature |
| Cardstock | Non-toxic and sturdy |
| Water-based glue | No harmful chemicals |
| Fabric | Soft edges for comfort |
Alternative Crown Styles
Creating a toy princess crown can be fun and easy. There are many styles to choose from, each offering a unique charm. Let's explore some exciting alternatives you can try.
From classic royal designs to magical fairy themes, these styles can bring joy to any child's playtime. Read on to discover different ways to craft your perfect crown.
Classic Royal Look
The classic royal style is timeless and elegant. It often features gems, gold colors, and intricate designs. This crown can make any child feel like a true princess.
- Use gold or silver paper for a regal base.
- Decorate with colorful faux gemstones.
- Cut the paper into peaks to mimic a real crown.
Fantasy And Fairy Themes
Fantasy and fairy crowns are whimsical and magical. These styles often use flowers, glitter, and pastel colors. They are perfect for a fairy-tale themed playtime.
To create a fairy crown, consider using:
- Fresh or artificial flowers
- Ribbons in soft pastel colors
- Glitter for extra sparkle
| Material | Use |
| Flowers | Decoration |
| Ribbons | Tying and embellishment |
| Glitter | Adding sparkle |

Credit: www.bakerross.co.uk

Credit: mommyofaprincess.com
Frequently Asked Questions
What Materials Are Needed To Make A Toy Princess Crown?
You need craft foam, glue, scissors, glitter, and decorative gems. These materials are safe and easy to handle for kids. Using these items makes the crown lightweight and comfortable for play.
How Long Does It Take To Make A Toy Princess Crown?
Making a toy princess crown usually takes about 30 to 45 minutes. This includes cutting, gluing, and decorating. The time may vary depending on your design complexity and crafting skills.
Can Children Safely Make A Toy Princess Crown?
Yes, children can safely make a toy princess crown with adult supervision. Use kid-friendly materials like foam and non-toxic glue. Always supervise scissors and small decorations to ensure safety.
How Can I Personalize The Toy Princess Crown?
You can personalize the crown by adding different colors, shapes, and gems. Use glitter, stickers, or paint to match your child's favorite themes. Personal touches make the crown unique and special.
Conclusion
Making a toy princess crown is fun and simple. You only need a few materials to start. Kids love wearing crowns they create themselves. It sparks creativity and brings joy. Try different colors and shapes to make it unique. Crafting together also builds happy memories.
Keep practicing to improve your skills. Enjoy the process, not just the result. This project is perfect for any playtime. Give it a try and see the smiles!