Have you ever wanted to create something fun and exciting for your child? Making a toy robot is a perfect way to spark creativity and bring joy to your kid’s playtime.
Imagine the smile on their face when they see a robot you built with your own hands! In this guide, you’ll find simple steps to build a toy robot that’s safe, easy, and full of fun. Ready to surprise your child with a unique toy?
Let’s get started!

Credit: www.youtube.com
Materials Needed
Making a toy robot for kids is fun and educational. You need the right materials to build a safe and working robot.
Gathering good materials helps the project go smoothly. It also keeps the toy sturdy and safe for children.
Basic Tools And Supplies
Start with simple tools that are easy to use. These help you cut, join, and shape the robot parts quickly.
- Scissors or small craft knife for cutting
- Glue stick or strong craft glue
- Screwdriver for small screws
- Wire cutters for electrical parts
- Small pliers for bending wires
- Measuring tape or ruler
- Batteries for powering the robot
You will also need supplies like cardboard, plastic parts, or lightweight wood. These form the body of the robot.
Choosing Safe Components
Pick parts that are safe for children to handle. Avoid sharp edges and toxic materials to prevent accidents.
Check that batteries and small pieces are secured well. This stops choking hazards and electric risks.
- Use non-toxic glue and paint
- Choose smooth plastic or wood parts
- Cover wires with tape or sleeves
- Use low-voltage batteries only
- Make sure screws are tight and hidden
- Avoid small parts for kids under 3 years

Credit: www.youtube.com
Designing Your Robot
Designing a toy robot is a fun and creative process. It helps kids learn shapes and sizes while using their imagination.
In this section, we focus on simple shapes and adding fun features to make the robot exciting and easy to build.
Simple Shapes And Sizes
Start by choosing basic shapes for your robot’s body. Use rectangles, squares, circles, and triangles. These shapes are easy to cut and assemble.
| Part | Shape | Size Suggestion |
|---|---|---|
| Head | Square | 3x3 inches |
| Body | Rectangle | 4x6 inches |
| Arms | Rectangles | 1x3 inches |
| Legs | Rectangles | 1x4 inches |
| Eyes | Circles | 0.5 inch diameter |
Keep sizes proportional to make the robot balanced. Use cardboard or foam sheets to cut out the shapes.
Adding Fun Features
Adding features makes the robot more interesting and playful. You can include moving parts, lights, or decorations.
- Attach small wheels for movement
- Use pipe cleaners for antennas
- Add stickers or colored paper for details
- Include buttons or bottle caps as eyes
- Use a small LED light for glowing effects
Building The Robot Body
Building the robot body is the first step in making a toy robot. This part holds all the pieces together. It gives the robot its shape and strength.
You will learn how to make a strong frame and how to attach the robot parts securely. These steps help the robot stand and move safely.
Constructing The Frame
The frame is the robot’s skeleton. Use lightweight materials like cardboard or plastic. Cut out shapes for the head, body, arms, and legs.
- Start by cutting two large rectangles for the front and back of the body.
- Cut four strips to connect the front and back pieces.
- Make sure all pieces fit well before gluing or taping.
- Use a ruler to measure and keep shapes even.
- Check that the frame is strong and can stand on its own.
Attaching The Parts
Once the frame is ready, attach the robot’s parts. Use glue or tape to fix parts in place. Make sure each part fits well and moves if needed.
| Part | Material | How to Attach |
| Head | Small box or ball | Glue on top of the frame |
| Arms | Straws or sticks | Tape or glue on sides |
| Legs | Cardboard strips | Glue at bottom corners |
| Eyes | Buttons or paper circles | Glue on head |
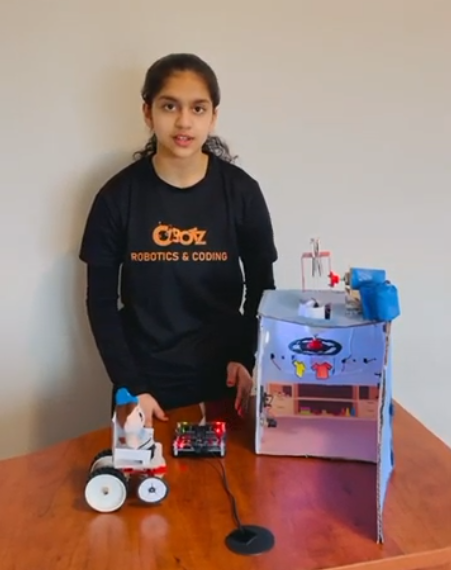
Credit: obotz.ca
Wiring And Electronics
Building a toy robot needs careful wiring and electronic setup. This helps the robot move and work properly.
We will look at setting up the circuit and choosing the right power source. These are key parts of the robot’s electronics.
Setting Up The Circuit
Start by connecting the wires to the robot’s main parts. Use a breadboard to hold the parts together. This makes changes easy.
- Connect the motor wires to the motor driver pins.
- Attach sensors like infrared or touch sensors to input pins.
- Use jumper wires to link the battery to the circuit board.
- Check each connection with a multimeter to avoid shorts.
- Keep wires neat to prevent confusion and damage.
Power Source Options
The toy robot needs power to run its parts. Choose a power source that fits your robot’s size and use.
| Power Source | Description | Voltage | Pros | Cons |
| AA Batteries | Standard alkaline batteries | 1.5V each | Easy to find, replaceable | Shorter life |
| Rechargeable Li-ion | Rechargeable battery pack | 3.7V typical | Longer life, rechargeable | Needs charger |
| USB Power Bank | Portable USB battery pack | 5V output | High capacity, rechargeable | Bigger size |
Programming Basics
Making a toy robot is fun and educational. Kids learn simple programming to control the robot's actions.
Understanding basic commands helps kids make their robots move. Let's explore how to program these toy robots.
Simple Commands For Movement
Robots move using simple commands like "forward" or "turn". These commands make programming easy for kids.
Kids can learn to sequence commands to create movement patterns. This helps them understand basic programming logic.
- "Forward" moves the robot straight
- "Turn left" changes direction to the left
- "Turn right" changes direction to the right
- "Stop" halts the robot
Using Easy Coding Tools
There are tools that make coding for kids simple. These tools use visual blocks instead of text.
Kids can drag and drop blocks to create programs. This helps them focus on logic without worrying about syntax errors.
- Scratch uses colorful blocks for coding
- Blockly helps kids see how code works
- Tynker offers fun tutorials for young programmers
Testing And Troubleshooting
After building the toy robot, testing is important. It helps find problems early.
Troubleshooting means fixing issues to make the robot work well.
Checking Connections
Check all wires and parts to make sure they are connected tightly. Loose wires can stop the robot.
Look for any broken or bent wires that could cause trouble.
- Make sure battery wires are secure
- Check motor wires for good contact
- Verify switch connections are firm
- Confirm sensors are connected properly
Fixing Common Issues
If the robot does not move, check the battery first. Replace it if it is dead.
For motors that do not run, clean the contacts and try again.
- Replace weak or dead batteries
- Reattach loose wires
- Clean dirty contacts with a cloth
- Test switches to make sure they work
- Look for damaged parts and replace them
Customizing Your Robot
Building a toy robot is just the beginning. You can make it unique with colors and accessories. This guide will help you customize your robot.
Let's explore how you can paint, decorate, and add fun accessories to your robot. This will make it truly one of a kind.
Painting And Decorating
Painting is a fun way to give your robot a unique look. Choose colors that you love. Use safe, non-toxic paints suitable for kids.
- Pick a color scheme that matches your style.
- Use brushes for detailed designs.
- Let the paint dry completely before adding more layers.
Adding Accessories
Accessories add character to your robot. You can use everyday items to create amazing looks.
Here are some creative accessory ideas:
- Use buttons for eyes.
- Attach small gears as ears.
- Glue on ribbons or fabric for a cape.
- Use stickers for extra flair.
| Accessory | Material |
| Eyes | Buttons |
| Ears | Gears |
| Cape | Fabric |
| Decoration | Stickers |
Safety Tips For Kids
Making a toy robot can be fun and educational for kids. Safety is very important to keep children safe during the activity.
Parents and teachers should teach kids how to use tools and materials safely. This helps avoid accidents and injuries.
Handling Tools Properly
Children must learn to hold and use tools correctly. Using tools the wrong way can cause cuts or other injuries.
Always use child-friendly tools made for small hands. Teach kids to keep fingers away from sharp edges.
- Use safety scissors instead of sharp ones
- Hold glue sticks and tape carefully
- Keep screwdrivers and small tools out of reach when not in use
- Use protective gloves if needed
Supervision Recommendations
Adults should watch children closely while making the toy robot. Supervision helps prevent accidents before they happen.
Explain each step clearly and answer any questions. Stay nearby to help if kids struggle with any part of the project.
- Stay within arm’s reach when using tools
- Check the workspace for hazards before starting
- Encourage kids to ask for help anytime
- Keep small parts away from very young children
Frequently Asked Questions
What Materials Are Needed To Make A Toy Robot For Kids?
You need basic materials like cardboard, glue, scissors, batteries, and small motors. These are safe and easy for kids to handle. Additional items include wires, LED lights, and markers for decoration. Using recyclable materials is eco-friendly and cost-effective.
How Can Kids Safely Build A Toy Robot At Home?
Supervise kids when using scissors and batteries. Use non-toxic glue and lightweight materials. Teach children basic electrical safety with simple circuits. Always ensure a clean workspace and encourage wearing safety goggles. Safety first ensures a fun, injury-free experience.
What Simple Robot Functions Can Kids Create Easily?
Kids can make robots that move, light up, or make sounds. Basic motorized wheels or blinking LEDs are great starter projects. These functions teach kids about circuits and robotics fundamentals. Start with simple tasks and gradually increase complexity as skills improve.
How Long Does It Take To Build A Toy Robot?
Building a simple toy robot usually takes 1-3 hours. More complex robots may take longer depending on design and skill level. Allow extra time for decoration and testing. Patience is key to a successful and enjoyable building experience.
Conclusion
Making a toy robot for kids can be fun and simple. Use easy materials and follow the steps carefully. Kids enjoy building and playing with their own creations. It helps them learn and be creative at the same time. This project brings joy and learning together.
Try making a robot today and watch kids smile with pride. A little effort can create big happiness. Give it a go and enjoy the process!