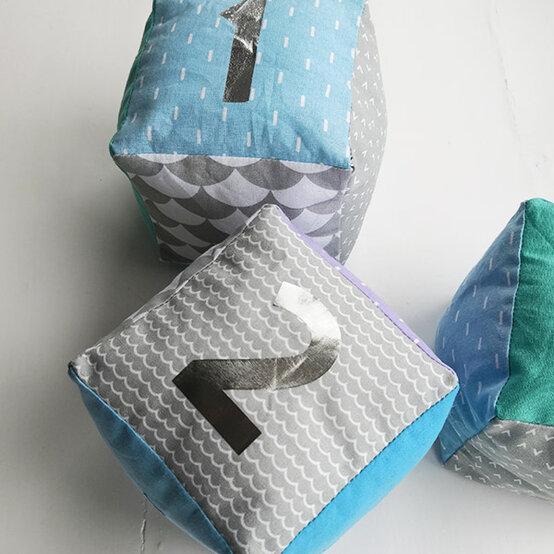
Are you looking for a fun and creative project that you can make at home? Imagine holding a soft, colorful cube toy that you made yourself.
It’s not only satisfying but also perfect for relaxing or gifting. In this guide, you’ll discover simple steps to create your own soft cube toy with easy-to-find materials. Whether you want a new decoration, a cozy stress reliever, or a unique handmade gift, this tutorial will help you bring your idea to life.
Keep reading, and you’ll be surprised at how simple and enjoyable making your soft cube toy can be!
Materials Needed
Making a soft cube toy requires the right materials. Choosing good supplies helps you get a cozy and safe toy.
This guide covers fabrics, stuffing, and sewing tools you need to create your cube toy.
Fabric Choices
Pick soft and durable fabrics for your cube toy. Cotton and fleece are popular because they feel nice and wash well.
- Cotton – soft and easy to sew
- Fleece – warm and plush
- Minky fabric – very soft, perfect for babies
- Flannel – gentle and light
Stuffing Options
Stuffing gives the cube its shape and softness. Use materials that are safe and easy to clean.
| Stuffing Type | Benefits |
| Polyester fiberfill | Lightweight and washable |
| Cotton batting | Natural and soft |
| Foam pieces | Firm and holds shape well |
| Wool | Warm and natural but may be itchy |
Sewing Supplies
Gather these sewing tools to build your soft cube toy easily and neatly.
- Sewing machine or needle for hand sewing
- Thread matching the fabric color
- Scissors for cutting fabric
- Pins to hold pieces together
- Measuring tape or ruler
- Fabric marker or chalk
Preparing The Fabric
Preparing the fabric is an important step to make a soft cube toy. It helps ensure your toy looks neat and lasts long. Taking time here saves effort later.
In this section, we will focus on measuring and cutting the fabric, and marking the seam lines. These tasks set the base for sewing your cube correctly.
Measuring And Cutting
Start by measuring the fabric carefully. Use a ruler or measuring tape to get the right size for each side of the cube. Accuracy is key for all six square pieces.
- Measure each side with a ruler, usually 4 inches for a small cube.
- Mark the squares lightly with a pencil or fabric chalk.
- Use sharp fabric scissors for clean cuts.
- Cut slowly along the marked lines to avoid mistakes.
- Cut six equal squares for the cube sides.
Marking Seam Lines
Mark seam lines on each fabric square. These lines guide your sewing and help keep the edges even. Usually, seam lines are 1/4 inch from the fabric edges.
| Tool | Purpose |
| Fabric chalk | Draw seam lines without damaging fabric |
| Ruler | Measure even seam allowances |
| Marking pen (washable) | Optional, for clearer seam lines |
Sewing The Cube
Sewing the soft cube toy is an important step. It holds the pieces together and shapes the cube.
Follow simple sewing tips to make your cube neat and strong. This guide helps you stitch the sides and leave an opening for stuffing.
Stitching The Sides
Start by aligning two fabric squares with the right sides facing each other. Use pins to hold them in place. Sew along the edge with a straight stitch, leaving a small seam allowance.
- Use matching thread color for a clean look.
- Keep stitches even and close together.
- Backstitch at the start and end to secure seams.
- Press seams open with an iron for neatness.
Leaving An Opening
Do not sew all sides completely closed. Leave a small opening to turn the cube right side out and add stuffing.
| Side | Action |
|---|---|
| First five sides | Sew fully closed |
| Last side | Leave 2 to 3 inch opening |
| After stuffing | Sew opening closed by hand |
Stuffing The Toy
Stuffing the soft cube toy is a key step. It gives the toy its shape and softness.
Proper stuffing makes the toy comfortable and easy to hold.
Choosing The Right Stuffing
Pick stuffing that is soft and safe for children. Polyester fiberfill is a popular choice.
Natural options like cotton or wool can also work well. Avoid stuffing that can cause allergies.
- Polyester fiberfill: soft, lightweight, washable
- Cotton: natural, breathable, hypoallergenic
- Wool: warm, natural, but may cause allergies
- Foam pieces: firm, but less soft
Filling Evenly
Fill the cube toy evenly to keep its shape. Add stuffing little by little.
Push the stuffing into all corners. Make sure each side feels firm but soft.
- Start with small amounts of stuffing
- Use a tool or pencil to reach corners
- Check the toy’s shape often
- Add more stuffing if any area feels flat
Closing The Cube
After filling your soft cube toy, you need to close the opening carefully. Closing the cube keeps the stuffing inside and gives it a neat look.
Take your time while closing to make sure the seams are strong and the cube looks smooth. This part is important for a nice finish.
Hand Sewing The Opening
Use a needle and thread that matches the fabric color. Start sewing from one end of the opening to the other.
Use small, tight stitches to hold the fabric edges together. This keeps the stuffing from coming out and makes the cube strong.
- Thread the needle and tie a knot at the end
- Insert the needle inside the fabric edge to hide the knot
- Make small stitches along the opening edges
- Pull the thread tight but not too tight to avoid puckering
- Finish by tying a secure knot and hiding the thread inside
Finishing Touches
After sewing, check all sides of the cube for loose threads or gaps. Trim any excess thread carefully.
You can gently shape the cube with your hands to make the corners sharp and the sides smooth. This helps the cube look neat and soft.
Customization Ideas
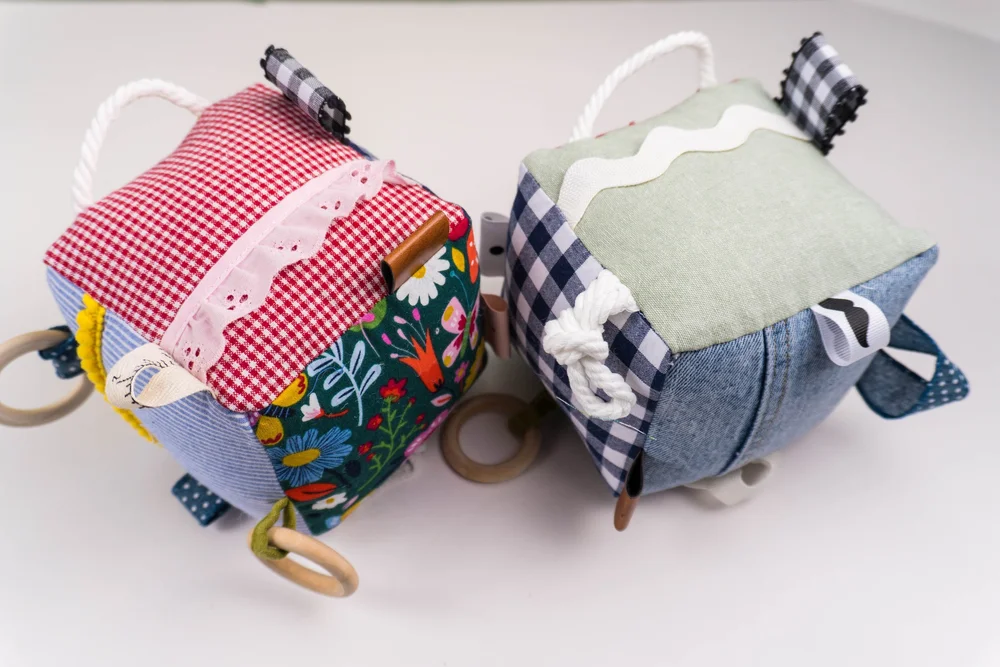
Creating a soft cube toy is a fun and creative activity. You can make each toy unique with simple customization ideas.
Personalizing your soft cube toy can make it more special. Here are some easy ways to customize your toy.
Adding Embellishments
Embellishments can make your soft cube toy stand out. They add texture and interest.
Consider using buttons, ribbons, or patches. Each embellishment gives a unique touch to the toy.
- Buttons for eyes or patterns
- Ribbons for colorful edges
- Patches for fun designs
Using Different Fabrics
Different fabrics can change the feel of the toy. Choose fabrics that are soft and safe for children.
Mixing fabrics can add variety to your toy. Try using cotton, fleece, or even denim.
- Cotton for a soft touch
- Fleece for warmth
- Denim for durability
Care And Maintenance
Soft cube toys are wonderful companions for children. Keeping them clean and well-maintained ensures safety and longevity.
Proper care includes regular cleaning and smart storage solutions. Follow these tips to keep your toy in great shape.
Cleaning Tips
Cleaning your soft cube toy is essential to remove dirt and germs. Regular cleaning prevents buildup and keeps it fresh.
- Check the label for washing instructions.
- Use mild detergent in cold water.
- Hand wash to maintain shape and color.
- Rinse thoroughly to remove soap residue.
- Air dry completely before use.
Storage Advice
Proper storage helps maintain the toy's shape and cleanliness. Store in a way that prevents damage and dust accumulation.
Here are some storage tips:
- Keep in a breathable bag to avoid moisture.
- Avoid direct sunlight to prevent fading.
- Store away from sharp objects.
- Use a dedicated shelf or bin for toy storage.
Frequently Asked Questions
What Materials Are Needed To Make A Soft Cube Toy?
To make a soft cube toy, you need fabric, stuffing, scissors, thread, and a needle or sewing machine. Choose soft, durable fabric like cotton or fleece. Use polyester fiberfill for stuffing. These materials ensure a safe, cuddly, and easy-to-make toy.
How Do I Sew A Soft Cube Toy Step-by-step?
Cut six square fabric pieces, sew edges together leaving a gap. Turn inside out, stuff with fiberfill, then sew the gap closed. Follow precise stitching for durability. This method creates a neat, soft cube toy suitable for children.
Can I Customize The Soft Cube Toy Design?
Yes, customize by using different fabric colors, patterns, or adding embroidery. You can also sew on buttons or appliques for decoration. Customization makes the toy unique and personal, enhancing its appeal and creativity.
How Long Does It Take To Make A Soft Cube Toy?
It usually takes about 1 to 2 hours depending on your sewing skills. Beginners may take longer, while experienced sewers finish faster. Planning and preparation can reduce time, making the process enjoyable and efficient.
Conclusion
Making a soft cube toy is fun and simple. You only need a few materials and some patience. Take your time to sew carefully and stuff it well. This project helps you create a cozy, handmade toy anyone can enjoy.
Try different colors and fabrics to make it unique. Crafting toys like this can bring joy to both kids and adults. Keep practicing, and your skills will improve quickly. Give it a try and enjoy your soft cube toy every day.