Have you ever wanted to create your own toy figurines that truly reflect your style and imagination? Making toy figurines is not only fun but also a rewarding way to bring your ideas to life.
Imagine holding a unique character crafted by your own hands, something no one else has. In this guide, you’ll discover simple steps and tips that make the process easy and enjoyable, even if you’ve never tried it before. Ready to unlock your creativity and start making your own mini masterpieces?
Let’s dive in!
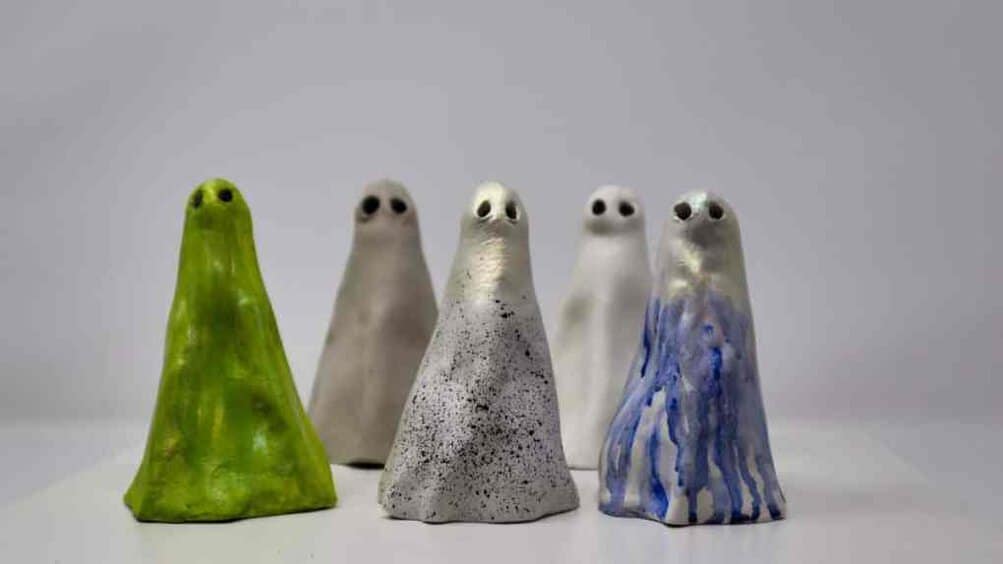
Credit: cabinceramics.co.uk
Materials Needed
Making toy figurines requires a few basic materials. These supplies help you shape, paint, and finish your creations.
Choosing the right materials makes the process easier and more fun. Below are the key items you will need.
Choosing Clay And Tools
Select clay that is easy to mold and holds its shape well. Polymer clay is popular for toy figurines. You will also need some basic tools to shape the clay.
- Polymer clay in various colors
- Clay sculpting tools (knives, shaping sticks)
- Rolling pin or smooth bottle for flattening
- Clay cutter or blade
- Work surface like a cutting mat
Selecting Paints And Brushes
Paints add color and details to your figurines. Choose paints that stick well to clay and dry quickly. Brushes help you apply the paint smoothly.
| Type of Paint | Best Use | Drying Time |
| Acrylic | Bright colors, easy to use | Fast (15-30 minutes) |
| Watercolor | Light colors, less vibrant | Medium (30-60 minutes) |
| Oil Paint | Rich colors, slow drying | Slow (several hours) |
Brushes come in many sizes. Use small brushes for details and larger ones for base coats.
- Fine detail brushes (size 0-2)
- Medium flat brushes (size 4-6)
- Palette for mixing paints
- Water cup for cleaning brushes
Additional Supplies
Extra items help with finishing and protecting your figurines. These make your work last longer.
- Glossy or matte varnish to seal paint
- Sandpaper for smoothing surfaces
- Oven for baking polymer clay
- Toothpicks or fine needles for tiny details

Credit: www.reddit.com
Preparing Your Workspace
Making toy figurines needs a clean and organized workspace. This helps you work faster and avoid mistakes.
Before you start, arrange your area so everything is easy to reach. This saves time and keeps you focused.
Setting Up A Clean Area
Choose a flat surface with good lighting for your workspace. Clean the area to remove dust and dirt.
Clear away any items you do not need. A tidy space helps you find tools quickly and keeps your figurines safe.
- Use a table or desk with enough room for your materials
- Wipe the surface with a damp cloth before starting
- Keep a trash bin nearby for scraps and waste
- Make sure the area is well-lit to see small details
Organizing Tools For Efficiency
Group your tools by type and purpose. This makes it easier to grab what you need fast.
Use containers, trays, or shelves to keep tools in place. Labeling helps if you have many items.
- Keep sculpting tools like knives and needles together
- Store paints and brushes in one section
- Arrange glue and adhesives near your main working space
- Use small boxes for tiny parts and accessories
Basic Sculpting Techniques
Sculpting toy figurines is a fun and creative activity. It allows you to bring your ideas to life in a small, detailed form.
Understanding basic sculpting techniques helps you create better shapes and textures. These skills make your figurines look more realistic.
Shaping The Base Form
Start by making a simple shape that matches your toy's main body. This base form acts as the foundation for your figurine.
Use soft clay or modeling material for easy shaping. Keep the shape smooth and even before adding details.
- Roll clay into balls or cylinders
- Pinch or flatten to get rough shapes
- Use tools to smooth out rough areas
- Check proportions before moving on
Adding Details And Textures
Add small features like eyes, noses, or clothing folds after the base form is ready. Details make your figurine unique.
Use sculpting tools or toothpicks to create textures. Textures give your toy a realistic look and feel.
- Carve lines for wrinkles or fabric
- Press shapes to form eyes and mouth
- Use stamps or textured tools for patterns
- Smooth edges around details for clean finish
Assembling Figurine Parts
Putting together toy figurines is a fun and careful process. You combine different parts to create one complete figure.
Each part must fit well and stay in place. This helps the figurine look good and last longer.
Attaching Limbs And Accessories
Attach limbs like arms and legs by matching their joints with the body. Use gentle pressure to snap parts together.
Accessories such as hats or weapons should fit securely. Check if each accessory has a special slot or clip.
- Align limb joints carefully before pressing
- Use glue only if parts do not snap well
- Fit accessories into their correct positions
- Handle small parts with care to avoid damage
Ensuring Stability And Balance
Check the figurine's balance by placing it on a flat surface. The figure should stand without support.
If the figure tips over, adjust the limbs or base for better support. Sometimes adding weight inside helps balance.
- Test stability on a flat table or shelf
- Adjust limb positions for even weight distribution
- Add small weights if the figure falls easily
- Use a stand if needed for extra support
Baking And Hardening
Baking and hardening are key steps in making toy figurines. These steps help the figurines keep their shape and last longer. You must follow safety rules and choose the right methods.
Different materials need different ways to harden. Below are safe oven tips and other ways to harden your figurines.
Using An Oven Safely
Use the oven carefully to bake your toy figurines without damage or injury. Always check the temperature and time before baking.
- Preheat the oven to the recommended temperature for your clay.
- Place figurines on a baking tray lined with parchment paper.
- Keep the oven door closed while baking to keep heat steady.
- Use an oven thermometer to check the temperature.
- Do not leave the oven unattended during baking.
- Let figurines cool completely before handling.
Alternative Hardening Methods
Some clays and materials harden without an oven. These methods work well for small or delicate figurines.
| Method | Description | Best For |
| Air Drying | Leave the figurine in open air for 24–72 hours. | Light clay, simple shapes |
| Sun Drying | Place figurines in direct sunlight to speed drying. | Small, heat-resistant materials |
| Boiling Water | Dip figurines briefly in boiling water to harden. | Some plastic clays |
| UV Light | Use UV lamps to cure special UV-sensitive clays. | UV clay, detailed designs |

Credit: www.youtube.com
Painting Your Figurine
Painting your toy figurine brings it to life with color and detail. It lets you add personality and style.
Good painting takes planning and care. Choose colors and use the right techniques for the best look.
Choosing Color Schemes
Pick colors that match your figurine’s theme. Think about the mood and story you want to tell.
- Use 2 to 3 main colors for balance
- Include a light and a dark shade for contrast
- Consider natural colors for realism
- Try bold colors for fantasy or cartoon styles
Applying Base Coats And Highlights
Start with a smooth base coat to cover the figurine evenly. This helps other colors stick better.
| Painting Stage | Description | Tips |
| Base Coat | Apply one or two even layers of main color | Use thin paint layers to avoid details loss |
| Shading | Add darker tones to creases and corners | Use a fine brush for small areas |
| Highlighting | Brush lighter colors on raised parts | Dry brush technique works well |
| Detailing | Paint eyes, buttons, or small features carefully | Use a steady hand and small brush |
Sealing And Finishing Touches
After shaping and painting your toy figurines, sealing them is important. It helps protect your work and makes it last longer.
Finishing touches add detail and make your figurines look more complete and polished.
Protective Coatings
Protective coatings keep your figurines safe from scratches and fading. Use a clear sealant that suits the paint type.
There are different finishes like matte, satin, or glossy. Choose one based on the look you want for your toy.
- Spray sealants dry evenly and fast
- Brush-on sealants give more control
- Test the sealant on a small area first
- Apply thin layers to avoid drips
- Let each coat dry before applying the next
Adding Final Details
Adding small details makes your figurines unique and interesting. Use fine brushes or tools for precision.
Details like eyes, clothing patterns, and textures bring your toy to life. Take your time and work carefully.
- Use a toothpick for tiny dots and lines
- Apply highlights to raise areas for depth
- Add shadows to create contrast
- Use a magnifier for very small parts
- Seal the details again after finishing
Troubleshooting Common Issues
Making toy figurines can be fun but some problems may occur. Fixing these issues helps improve the final product.
This guide covers how to fix cracks and breaks and how to improve paint durability on your figurines.
Fixing Cracks And Breaks
Cracks and breaks can happen during or after making your figurines. Quick repair keeps them looking good and strong.
- Use a strong glue made for plastics or resin.
- Apply glue carefully to avoid extra mess.
- Hold the pieces together until the glue dries fully.
- Fill small cracks with modeling putty or filler.
- Sand the repaired area gently to smooth it out.
- Paint over the fixed spot to match the rest of the figurine.
Improving Paint Durability
Paint can chip or fade if not applied or sealed properly. Use these tips to make your paint last longer.
| Tip | Description |
| Clean Surface | Remove dust and grease before painting. |
| Use Primer | Apply a primer layer to help paint stick well. |
| Thin Layers | Paint in thin coats to avoid cracking. |
| Seal the Paint | Use a clear sealant after painting to protect the surface. |
| Handle with Care | Avoid rough use to keep paint intact. |
Creative Ideas For Custom Designs
Making toy figurines lets you bring your ideas to life. You can create unique designs with simple tools and materials.
Try new ways to decorate your figurines and make them truly yours. Use your creativity to add special touches.
Incorporating Mixed Media
Mixed media means using different materials on one figurine. This adds texture and color in fresh ways.
- Use fabric to add clothing or accessories.
- Attach small metal pieces for armor or tools.
- Paint with acrylics for bright, lasting color.
- Glue on beads or buttons for eyes and details.
- Mix clay with wood or plastic parts for shapes.
Personalizing Figurines
Personalizing makes your figurines special and one of a kind. Add details that show your style or story.
| Method | Description |
| Custom Paint | Use unique colors or patterns to decorate. |
| Engraving | Carve names or symbols into the figurine. |
| Adding Accessories | Create hats, glasses, or weapons for your figure. |
| Using Stickers | Apply small decals for quick details. |
| Mixing Styles | Combine cartoon and realistic features. |
Frequently Asked Questions
What Materials Are Best For Making Toy Figurines?
Clay, polymer clay, resin, and plastic are popular materials. Choose based on durability, detail, and ease of use. Polymer clay is beginner-friendly, while resin offers fine details and strength.
How Do I Paint Toy Figurines Effectively?
Use acrylic paints for vibrant, quick-drying results. Apply thin layers and allow drying between coats. Seal with a clear varnish to protect the paint and add shine.
What Tools Do I Need For Sculpting Figurines?
Basic tools include sculpting knives, shaping tools, and fine brushes. For polymer clay, use a craft knife and needle tools. A smooth workspace and good lighting help precision.
How Can I Create Detailed Features On Figurines?
Work slowly and use fine tools for intricate details. Add texture with small tools or toothpicks. Baking polymer clay after shaping helps harden details permanently.
Conclusion
Making toy figurines can be fun and rewarding. Start with simple shapes and materials. Take your time to add details carefully. Practice helps you improve your skills fast. Enjoy the process and be creative. Share your toys with friends or family.
Keep trying new ideas and designs. Making figurines can bring joy and pride. Keep crafting, and you will get better.