Have you ever wanted to create something special with your own hands? Making a wooden toy astronaut is a fun and rewarding project you can enjoy right at home.
Imagine holding a little astronaut you crafted yourself—something unique, full of character, and ready to inspire your imagination or delight a child. In this guide, you’ll discover simple steps and tips to turn plain wood into a charming space explorer.
Ready to bring your creativity to life? Let’s get started!

Credit: www.amazon.co.uk
Materials Needed
Making a wooden toy astronaut needs the right materials. These materials help you build a safe and fun toy.
Below are the main types of wood, tools, and extra supplies you need to complete the project.
Wood Types
Choose wood that is easy to shape and safe for children. Soft woods are good for beginners.
- Pine: Soft and easy to carve
- Basswood: Smooth texture, perfect for detailed work
- Poplar: Lightweight and affordable
- Birch: Strong and smooth finish
Tools Required
You need some basic tools to cut, shape, and smooth the wood pieces for your astronaut toy.
| Tool | Purpose |
| Hand saw | Cut wood into parts |
| Sandpaper | Smooth rough edges |
| Carving knife | Shape small details |
| Clamps | Hold wood steady while working |
| Drill | Make holes for joints |
Additional Supplies
These extra supplies help put your wooden astronaut together and add finishing touches.
- Wood glue to join parts
- Non-toxic paint for color
- Clear wood finish to protect
- Small brushes for painting details
- Safety gloves for protection
Designing The Toy
Designing a wooden toy astronaut starts with a clear plan. Good design helps make the toy safe and fun to play with.
Focus on simple shapes and parts. This will make cutting and assembling easier.
Choosing A Shape
Pick a shape that looks like an astronaut but is easy to carve. Use basic shapes like circles and rectangles.
Keep the shape simple to avoid small parts that can break or be unsafe.
- Use a round head and a rectangular body
- Add simple arms and legs with straight lines
- Include a helmet shape for the astronaut’s head
Drawing The Template
Draw your astronaut on paper first. This is your template for cutting the wood.
Use clear lines and mark where parts join. This helps with assembly later.
- Sketch the front and side views
- Mark where arms and legs will attach
- Note any details like buttons or helmet lines
Sizing The Parts
Decide the size for each part. Make sure parts fit well together and are safe for kids.
Keep small parts big enough to avoid choking hazards. Use easy-to-handle sizes.
- Head: about 2 inches wide
- Body: about 4 inches tall
- Arms and legs: about 3 inches long
Cutting The Wood
Cutting the wood is the first big step to make your wooden toy astronaut. It shapes the parts you will put together. Careful cutting helps the toy look nice and fit well.
Using the right tools and methods keeps you safe and makes the work easier. Take your time and follow safety tips while cutting.
Marking The Wood
Mark the wood clearly before cutting. Use a pencil and a ruler to draw the shapes you need. Clear marks help you cut the right size and shape.
Double-check your measurements. Marking well reduces mistakes and wasted wood.
- Use a sharp pencil for clear lines
- Draw straight lines with a ruler or square
- Label parts if needed to avoid confusion
- Check measurements twice before marking
Safe Cutting Techniques
Always keep safety first when cutting wood. Use tools that fit your skill level. Wear safety goggles and gloves to protect yourself.
Cut slowly and follow your marks. Keep your fingers away from the blade. Use clamps to hold the wood steady while cutting.
- Wear safety goggles and gloves
- Use a sharp saw or cutting tool
- Hold the wood firmly with clamps
- Cut slowly along your marks
- Keep hands clear of the blade
Sanding The Edges
After cutting, sand the edges to make them smooth. Sanding removes rough spots and splinters. It helps your toy feel safe to touch.
Use fine-grit sandpaper. Sand in one direction for a clean finish. Check all edges and corners carefully.
- Choose fine-grit sandpaper (120-220 grit)
- Sand edges gently in one direction
- Remove all splinters and rough patches
- Wipe dust away before assembling
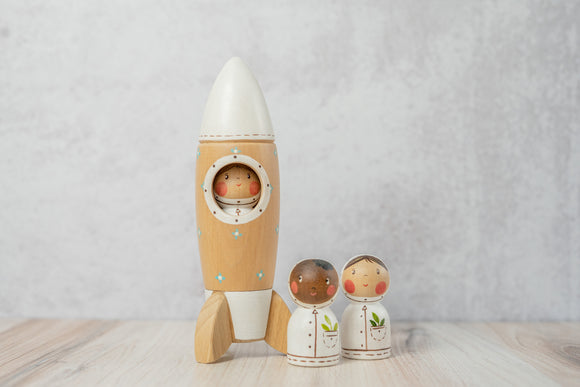
Credit: poppybabyco.com
Assembling The Pieces
Putting together your wooden toy astronaut needs care and patience. Assembling the parts correctly helps the toy last long.
This guide covers how to glue, fasten, and make the toy stable. Follow these tips for a solid build.
Gluing Components
Use wood glue to join flat surfaces. Apply a thin, even layer on both pieces. Press them together and hold for a few minutes.
- Choose glue made for wood
- Clean surfaces before gluing
- Clamp or hold pieces firmly
- Let glue dry fully, usually 24 hours
Using Fasteners
Fasteners like small nails or screws add strength. They work well on thicker parts or where glue is not enough.
| Fastener Type | Best Use | Tip |
| Small Nails | Thin wooden pieces | Use a hammer gently |
| Wood Screws | Thicker parts | Pre-drill holes to avoid cracks |
| Brads | Decorative parts | Use with glue for extra hold |
Ensuring Stability
Check the toy for any loose parts. Make sure all joints fit tightly. Add extra glue or fasteners if needed.
Tips for stability:
- Test the toy’s balance on a flat surface
- Smooth rough edges to avoid breaks
- Use wood filler to fix gaps
- Let everything dry before play
Painting And Finishing
Painting and finishing make your wooden toy astronaut look great. They also protect the wood from damage.
Use safe materials since this toy is for children. Take your time to get smooth, even coats.
Selecting Paints
Choose non-toxic, water-based paints. These paints are safe for kids and easy to clean up.
Acrylic paints work well on wood. They dry fast and give bright colors that last.
- Look for labels that say "child-safe" or "non-toxic"
- Pick water-based acrylic paints for good coverage
- Avoid oil-based paints that smell strong and take longer to dry
Applying Primer And Paint
Start by sanding the toy smooth to help paint stick better. Remove dust with a dry cloth.
Apply a thin coat of primer to seal the wood. Let it dry completely before painting.
- Use a small brush for details and a bigger one for large areas
- Paint thin layers to avoid drips and uneven spots
- Wait for each layer to dry before adding the next
Sealing The Toy
Seal the painted toy to protect the colors and wood. Use a clear, non-toxic finish.
Apply a thin coat of sealant with a clean brush. Let it dry fully before use.
- Choose water-based polyurethane or acrylic sealers
- Apply two or three thin coats for best protection
- Allow each coat to dry completely to avoid stickiness

Credit: judge.me
Adding Details
Creating a wooden toy astronaut is fun and creative. Adding details makes it unique and special.
Let us explore how to add decorative features, personalize your toy, and ensure safety.
Decorative Features
Decorative features bring the toy to life. Paint is a simple way to add color and charm.
- Use non-toxic paint for safety.
- Choose bright colors for visibility.
- Add small stickers for a playful touch.
Personalizing The Toy
Personalizing your toy makes it special to the child. You can add a name or initials.
Safety Checks
Ensuring safety is important. Check for sharp edges and loose parts.
| Check | Action |
| Sharp edges | Sand them smooth |
| Loose parts | Tighten securely |
| Paint safety | Use non-toxic options |
Tips For Beginners
Creating a wooden toy astronaut can be a fun project. It's perfect for beginners learning woodworking skills.
Start by gathering all materials and tools needed. This ensures you have a smooth crafting process.
Avoiding Common Mistakes
Beginners often rush through the project. Take your time to avoid errors.
Measure twice before cutting the wood. This prevents waste and ensures parts fit together.
- Use a pencil to mark measurements
- Double-check your plans
- Keep your workspace tidy
Time-saving Tricks
Prepare all pieces before you start assembling. This saves time in the long run.
Use pre-cut wood blocks if available. It reduces the time spent on cutting and shaping.
- Label each piece clearly
- Organize tools in advance
- Set up a dedicated workspace
Maintaining Tools
Keep your tools in good condition. This makes your work easier and safer.
Sharpen blades regularly. Clean tools after each use to prevent rust and damage.
- Store tools in a dry place
- Oil moving parts to prevent wear
- Replace worn-out tools promptly
Frequently Asked Questions
What Materials Are Needed To Make A Wooden Toy Astronaut?
You need wood pieces, sandpaper, non-toxic paint, glue, and small brushes. Safety gear like gloves is recommended. These materials ensure a durable, safe, and attractive wooden toy astronaut.
How Long Does It Take To Craft A Wooden Toy Astronaut?
Crafting a wooden toy astronaut usually takes 2 to 4 hours. Time depends on skill level and design complexity. Allow extra time for painting and drying.
Can Beginners Make A Wooden Toy Astronaut Easily?
Yes, beginners can make it with simple tools and clear instructions. Start with basic shapes and gradually add details. Practice improves skills and results.
What Safety Tips Should Be Followed While Making Wooden Toys?
Always wear safety goggles and gloves. Use non-toxic paint and glue. Work in a well-ventilated area and handle tools carefully to avoid injuries.
Conclusion
Making a wooden toy astronaut is a fun and creative project. It helps improve your skills and brings joy to children. You only need simple tools and materials to start. Take your time and enjoy each step carefully. Soon, you will have a unique toy to cherish or gift.
This craft also teaches patience and attention to detail. Try making different designs to explore your creativity. Building wooden toys can become a relaxing hobby. Keep practicing, and you will get better every time.