Have you ever wanted to create something special with your own hands? Making a wooden toy figurine is a fun and rewarding way to do just that.
Imagine holding a unique toy you crafted yourself, one that can bring joy to your kids or become a charming decoration. In this guide, you’ll discover simple steps to turn a block of wood into a beautiful figurine, even if you’ve never carved before.
Ready to unlock your creativity and make a lasting keepsake? Let’s get started!
Choosing The Right Wood
Making a wooden toy figurine starts with picking the right wood. The wood affects how the toy looks and lasts.
Choosing safe and good quality wood is key for a fun and lasting toy.
Types Of Wood For Toys
Some woods are better for toys because they are strong and smooth. Soft woods can dent or break fast.
- Maple – hard and smooth, good for detailed carving
- Birch – light color and fine grain, easy to paint
- Beech – tough and safe, common for kids’ toys
- Cherry – smooth texture, darkens nicely with age
- Pine – soft and easy to shape, but dents easily
Wood Safety Considerations
Wood for toys must be safe. Avoid woods with toxins or sharp splinters. Sand the wood well to prevent scratches.
| Safety Factor | Details |
| Toxicity | Use non-toxic wood and finishes |
| Splinters | Sand all surfaces smooth |
| Durability | Choose wood that won’t break easily |
| Moisture | Dry wood avoids warping and mold |
Sourcing Quality Materials
Get your wood from trusted sources. Check for clear grain and no cracks. Fresh wood is better than old or damaged wood.
- Buy from local lumber yards or specialty wood stores
- Look for wood labeled safe for children’s toys
- Ask if the wood is untreated or chemical-free
- Choose wood with even color and no knots
- Check moisture content to avoid warping
Essential Tools And Supplies
Making a wooden toy figurine requires specific tools and supplies. These help shape, smooth, and decorate the wood.
Choosing the right materials makes the process easier and the final product better. Below are the key tools and supplies needed.
Basic Carving Tools
Carving tools help you shape the wooden figurine. You need sharp and safe tools for detailed work.
Start with simple tools that are easy to handle. These will help you cut and carve the wood smoothly.
- Carving knives for shaping and detail
- Gouges and chisels for scooping and cutting
- Mallet to gently tap chisels
- Wood rasps for rough shaping
- Bench clamp or vise to hold wood steady
Sanding And Finishing Supplies
Sanding smooths the wood surface after carving. It removes rough spots and prepares wood for painting.
Finishing supplies protect the wood and give it a nice look. Choose products safe for toys.
- Different grit sandpapers (coarse to fine)
- Sanding block or sponge for even sanding
- Wood sealer or clear varnish for protection
- Soft cloth for applying finishes
- Optional wood conditioner for better finish
Painting And Decorating Materials
Painting adds color and character to your wooden figurine. Use safe paints made for wood toys.
Decorating materials give your toy a unique look. Use brushes and tools to create details.
- Non-toxic acrylic paints in various colors
- Fine and medium paintbrushes for details
- Painter’s palette or mixing tray
- Sealant to protect painted surface
- Optional markers or decals for extra designs
Designing Your Figurine
Designing a wooden toy figurine starts with a clear plan. Good design helps you make a fun and safe toy.
Focus on simple shapes, the right size, and a theme you like. These basics make carving easier and more enjoyable.
Sketching Simple Shapes
Begin your design by drawing simple shapes. Circles, squares, and triangles form the base of your figurine.
- Use light pencil strokes for easy changes
- Combine shapes to create the body and limbs
- Keep shapes large and clear at first
- Add details after the basic shapes look right
Planning Dimensions And Details
Decide on your figurine’s size and the small features it will have. This step helps you avoid mistakes later.
| Part | Suggested Size (inches) | Notes |
| Height | 4 to 6 | Fits small hands well |
| Width | 2 to 3 | Stable and easy to hold |
| Detail Size | 0.2 to 0.5 | Safe for carving tools |
Selecting A Theme Or Character
Pick a theme or character that inspires you. This makes your figurine unique and fun to create.
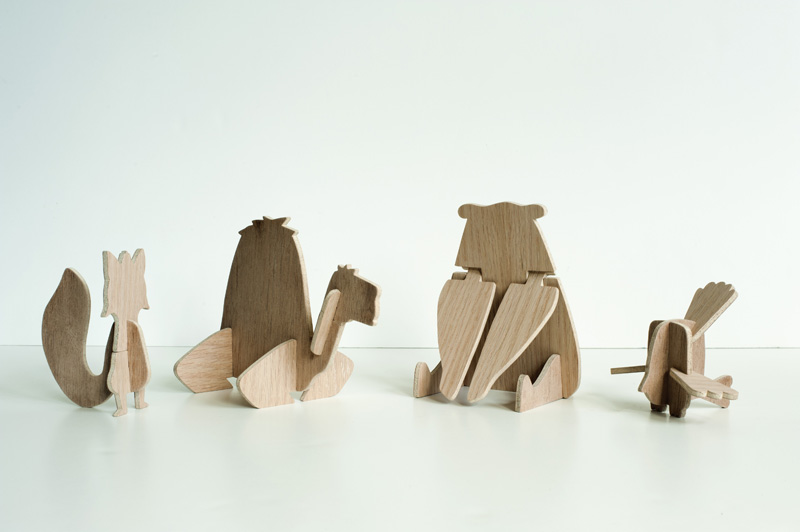
- Animals like bears, birds, or dogs
- Fantasy characters such as elves or dragons
- Simple human shapes like children or workers
- Objects like cars or boats
Cutting And Shaping The Wood
Making a wooden toy figurine starts with cutting and shaping the wood. This process forms the basic shape of the figure.
Using the right tools and techniques keeps the work safe and precise. Careful shaping brings the toy to life.
Safe Cutting Techniques
Always wear safety goggles to protect your eyes from wood chips. Use gloves to avoid cuts.
Cut wood on a stable surface. Secure the wood with clamps before cutting. This stops slipping and accidents.
- Use sharp saw blades for smooth cuts
- Cut slowly and steadily
- Keep fingers clear of the blade
- Work in a well-lit area
Carving Basic Forms
Start carving by removing large wood pieces to shape the figure. Use a carving knife or gouge tool.
Work with the wood grain to avoid splinters. Carve gently and check the shape often.
- Mark the shape on wood with pencil
- Remove wood outside the lines first
- Use even strokes for smooth cuts
- Take breaks to rest your hands
Refining The Shape
After rough carving, smooth the shape with sandpaper. Start with coarse grit and move to fine grit.
Check edges and curves for sharp spots. Sand carefully to create a soft, even finish.
- Sand with the grain to avoid scratches
- Use small files for tight areas
- Clean dust with a brush or cloth
- Inspect shape under good light
Sanding And Smoothing
Sanding is an important step in making a wooden toy figurine. It removes rough spots and shapes the wood.
Smoothing the surface prepares the figurine for painting or finishing. It makes the wood safe to touch.
Choosing The Right Grit
Sandpaper comes in different grits. Coarse grits remove wood fast. Fine grits smooth the surface.
Start with a low grit to shape the wood. Then use higher grits to finish smooth.
- 60-80 grit for rough shaping
- 120-150 grit for smoothing
- 220 grit or higher for fine finishing
Sanding Techniques For Smooth Surfaces
Sand with the grain to avoid scratches. Move the sandpaper in long, even strokes.
Use light pressure to prevent gouges. Check your work often to see the smoothness.
- Wrap sandpaper around a block for flat areas
- Use folded sandpaper for curves
- Clean dust between sanding steps
Preparing For Finishing
After sanding, clean the figurine with a soft cloth. Remove all dust before finishing.
Check the surface by touch. It should feel smooth and even without rough spots.
- Use a tack cloth to pick up fine dust
- Inspect under good light for scratches
- Sand lightly again if needed before paint or varnish
Painting And Decorating
Making wooden toy figurines is a fun and creative activity. Painting and decorating bring them to life.
Choose the right materials and techniques for a safe and vibrant finish.
Selecting Non-toxic Paints
Non-toxic paints are safe for children and the environment. They are available in many colors.
- Look for water-based paints
- Avoid paints with harmful chemicals
- Check labels for safety certifications
Adding Details And Patterns
Details and patterns make your figurine unique. Use simple tools for intricate designs.
Sealing And Protecting The Surface
Seal your work to protect it from wear and tear. This ensures the colors remain bright and vivid.
| Type of Sealant | Benefits |
| Water-based | Easy to clean |
| Oil-based | Durable finish |
| Natural wax | Eco-friendly option |
Finishing Touches
Completing your wooden toy figurine is an exciting moment. The final steps add charm and functionality.
These finishing touches ensure your creation is both fun and safe for play.
Attaching Accessories
Accessories bring life and personality to your figurine. They can be hats, scarves, or small tools.
- Use non-toxic glue for attachment
- Ensure accessories are securely fastened
- Choose colors that complement the figurine
Adding Moving Parts
Moving parts make the toy interactive. They add a dynamic element to playtime.
Consider using dowels or small hinges for joints. Ensure they move smoothly without friction.
Final Inspection And Safety Checks
Safety is crucial for any toy. Inspect each part carefully.
| Check Area | Action |
| Sharp Edges | Sand down until smooth |
| Loose Parts | Tighten or reattach securely |
| Paint | Ensure it is child-safe and dry |

Care And Maintenance Tips
Wooden toy figurines bring joy and last long with proper care. Regular maintenance keeps them safe and beautiful.
Learn easy ways to clean, repair, and store your wooden toys. These tips help preserve their quality for years.
Cleaning Wooden Toys
Clean wooden toys gently to avoid damage. Use a soft cloth and mild soap with water. Avoid soaking the wood.
- Wipe toys with a damp cloth and mild soap.
- Dry immediately with a clean towel.
- Do not use harsh chemicals or soak in water.
- For tough stains, gently sand the surface with fine sandpaper.
- Apply natural oil to keep the wood moisturized.
Repairing Minor Damages
Small cracks and chips can be fixed easily at home. Use wood glue and sanding for smooth finishes.
| Damage Type | Repair Method |
| Small cracks | Fill with wood glue, clamp until dry |
| Chipped edges | Sand smooth and apply matching paint |
| Loose parts | Re-glue and press firmly |
Storing For Longevity
Proper storage protects wooden toys from damage and wear. Keep them dry and away from direct sunlight.
- Store toys in a cool, dry place.
- Avoid plastic bags that trap moisture.
- Use breathable fabric bags or wooden boxes.
- Keep toys away from heat sources.
- Check toys regularly for signs of damage.
Frequently Asked Questions
What Materials Are Needed To Make Wooden Toy Figurines?
You need wood blocks, carving tools, sandpaper, wood glue, and non-toxic paint. Quality wood like basswood is ideal for easy carving and durability.
How Do You Carve Details On Wooden Toy Figurines?
Use fine carving knives and gouges for details. Work slowly and carefully, following your design. Sand edges smooth after carving to avoid splinters.
What Type Of Wood Is Best For Toy Figurines?
Basswood and pine are popular choices. They are soft, easy to carve, and safe for children. Avoid hardwoods that are difficult to shape.
How Can I Safely Finish Wooden Toy Figurines?
Use non-toxic, child-safe paints and sealants. Avoid harsh chemicals. Apply thin coats and let dry completely to ensure safety and durability.
Conclusion
Making wooden toy figurines is fun and rewarding. You can create unique toys with simple tools and wood. Each step teaches patience and creativity. Start small, practice often, and enjoy the process. Wooden toys last long and bring joy to many.
Try different shapes and designs to improve skills. Handmade toys have a special charm children love. Keep your workspace safe and clean always. With time, you will make beautiful wooden figurines. Give it a try and enjoy crafting!