Do you want to create a charming wooden walking duck toy that moves just like the real thing? Imagine the joy of making something with your own hands—a toy that can waddle and walk, bringing smiles to kids and adults alike.
In this guide, you’ll discover simple steps to craft your very own wooden duck, even if you’ve never worked with wood before. Ready to turn basic materials into a delightful, moving toy? Let’s dive in and make your creative project come to life!
Materials Needed
Making a wooden walking duck toy is a fun project. You need the right materials to build it well.
This guide lists the main materials you will need to create your wooden duck toy.
Types Of Wood
Choosing the right wood is important for your toy’s look and strength. Softwoods are easier to carve. Hardwoods last longer and look nicer.
- Pine: Soft and easy to shape
- Maple: Hard and smooth finish
- Birch: Strong and light color
- Poplar: Good for painting and carving
- Ash: Durable and flexible
Tools Required
You will need simple hand tools to shape and assemble the duck toy. Safety is important when using tools.
- Hand saw or coping saw for cutting wood
- Sandpaper or sanding block for smoothing edges
- Wood carving knife for detailed shaping
- Drill for making holes
- Clamps to hold pieces while gluing
- Hammer and small nails or wood glue
Additional Supplies
Some extra supplies help finish your wooden toy. These make your toy safe and attractive.
- Non-toxic wood paint or stain for color
- Clear wood finish or sealant to protect wood
- Small wheels or dowels for the walking mechanism
- String or elastic band for pulling the toy
- Wood filler to fix any cracks or holes
Preparing The Wood
Preparing the wood is an important step to make a wooden walking duck toy. It helps the pieces fit well and look nice. Good preparation also makes the toy safe to use.
Start by choosing smooth and strong wood. Then, follow the right steps to get the wood ready for cutting and shaping.
Measuring And Marking
Measure the wood pieces carefully before cutting. Use a ruler or tape measure for exact sizes. Mark the lines clearly with a pencil.
Double-check all measurements. Mark the parts for the duck’s body, legs, and wheels. Clear marks help you cut the pieces accurately.
- Use a straight edge to draw lines
- Mark all sides of the wood
- Label each piece for easy identification
Cutting The Pieces
Cut the wood along the marked lines with a saw. Use a fine-toothed saw for smooth edges. Take your time to avoid mistakes.
Cut all parts needed for the duck toy. Keep the pieces organized after cutting. Smooth rough edges with sandpaper for safety.
- Cut the body, legs, neck, and wheels separately
- Wear safety glasses during cutting
- Sand edges to remove splinters
Shaping The Duck
Shaping the wooden duck toy is a careful process. It involves carving, forming, and sanding. Each step helps create a smooth and attractive toy.
Focus on the details to bring the duck to life. Use proper tools and take your time with each part.
Carving The Body
Start by carving the main body from a solid wood block. Use a carving knife or gouge for rough shaping. Remove large chips first, then work on smaller details.
- Draw the duck’s body outline on the wood.
- Cut away excess wood around the outline.
- Shape the sides and bottom smoothly.
- Check symmetry from all angles.
- Refine curves to match a duck’s shape.
Forming The Head And Beak
Carve the head separately or from the same block, depending on your design. Shape the beak carefully to make it distinct but smooth.
| Part | Tool | Tip |
|---|---|---|
| Head | Carving knife | Work slowly to keep round shape |
| Beak | Small chisel | Make shallow cuts for fine details |
Sanding For Smoothness
After carving, sand the entire duck to remove rough spots. Use fine-grit sandpaper for a soft finish. Sand lightly around edges and details.
- Start with medium grit (120-150) sandpaper.
- Switch to fine grit (220-320) for smooth surface.
- Sand in the direction of the wood grain.
- Use a sanding sponge for curves.
- Wipe off dust before painting or finishing.
Assembling The Toy
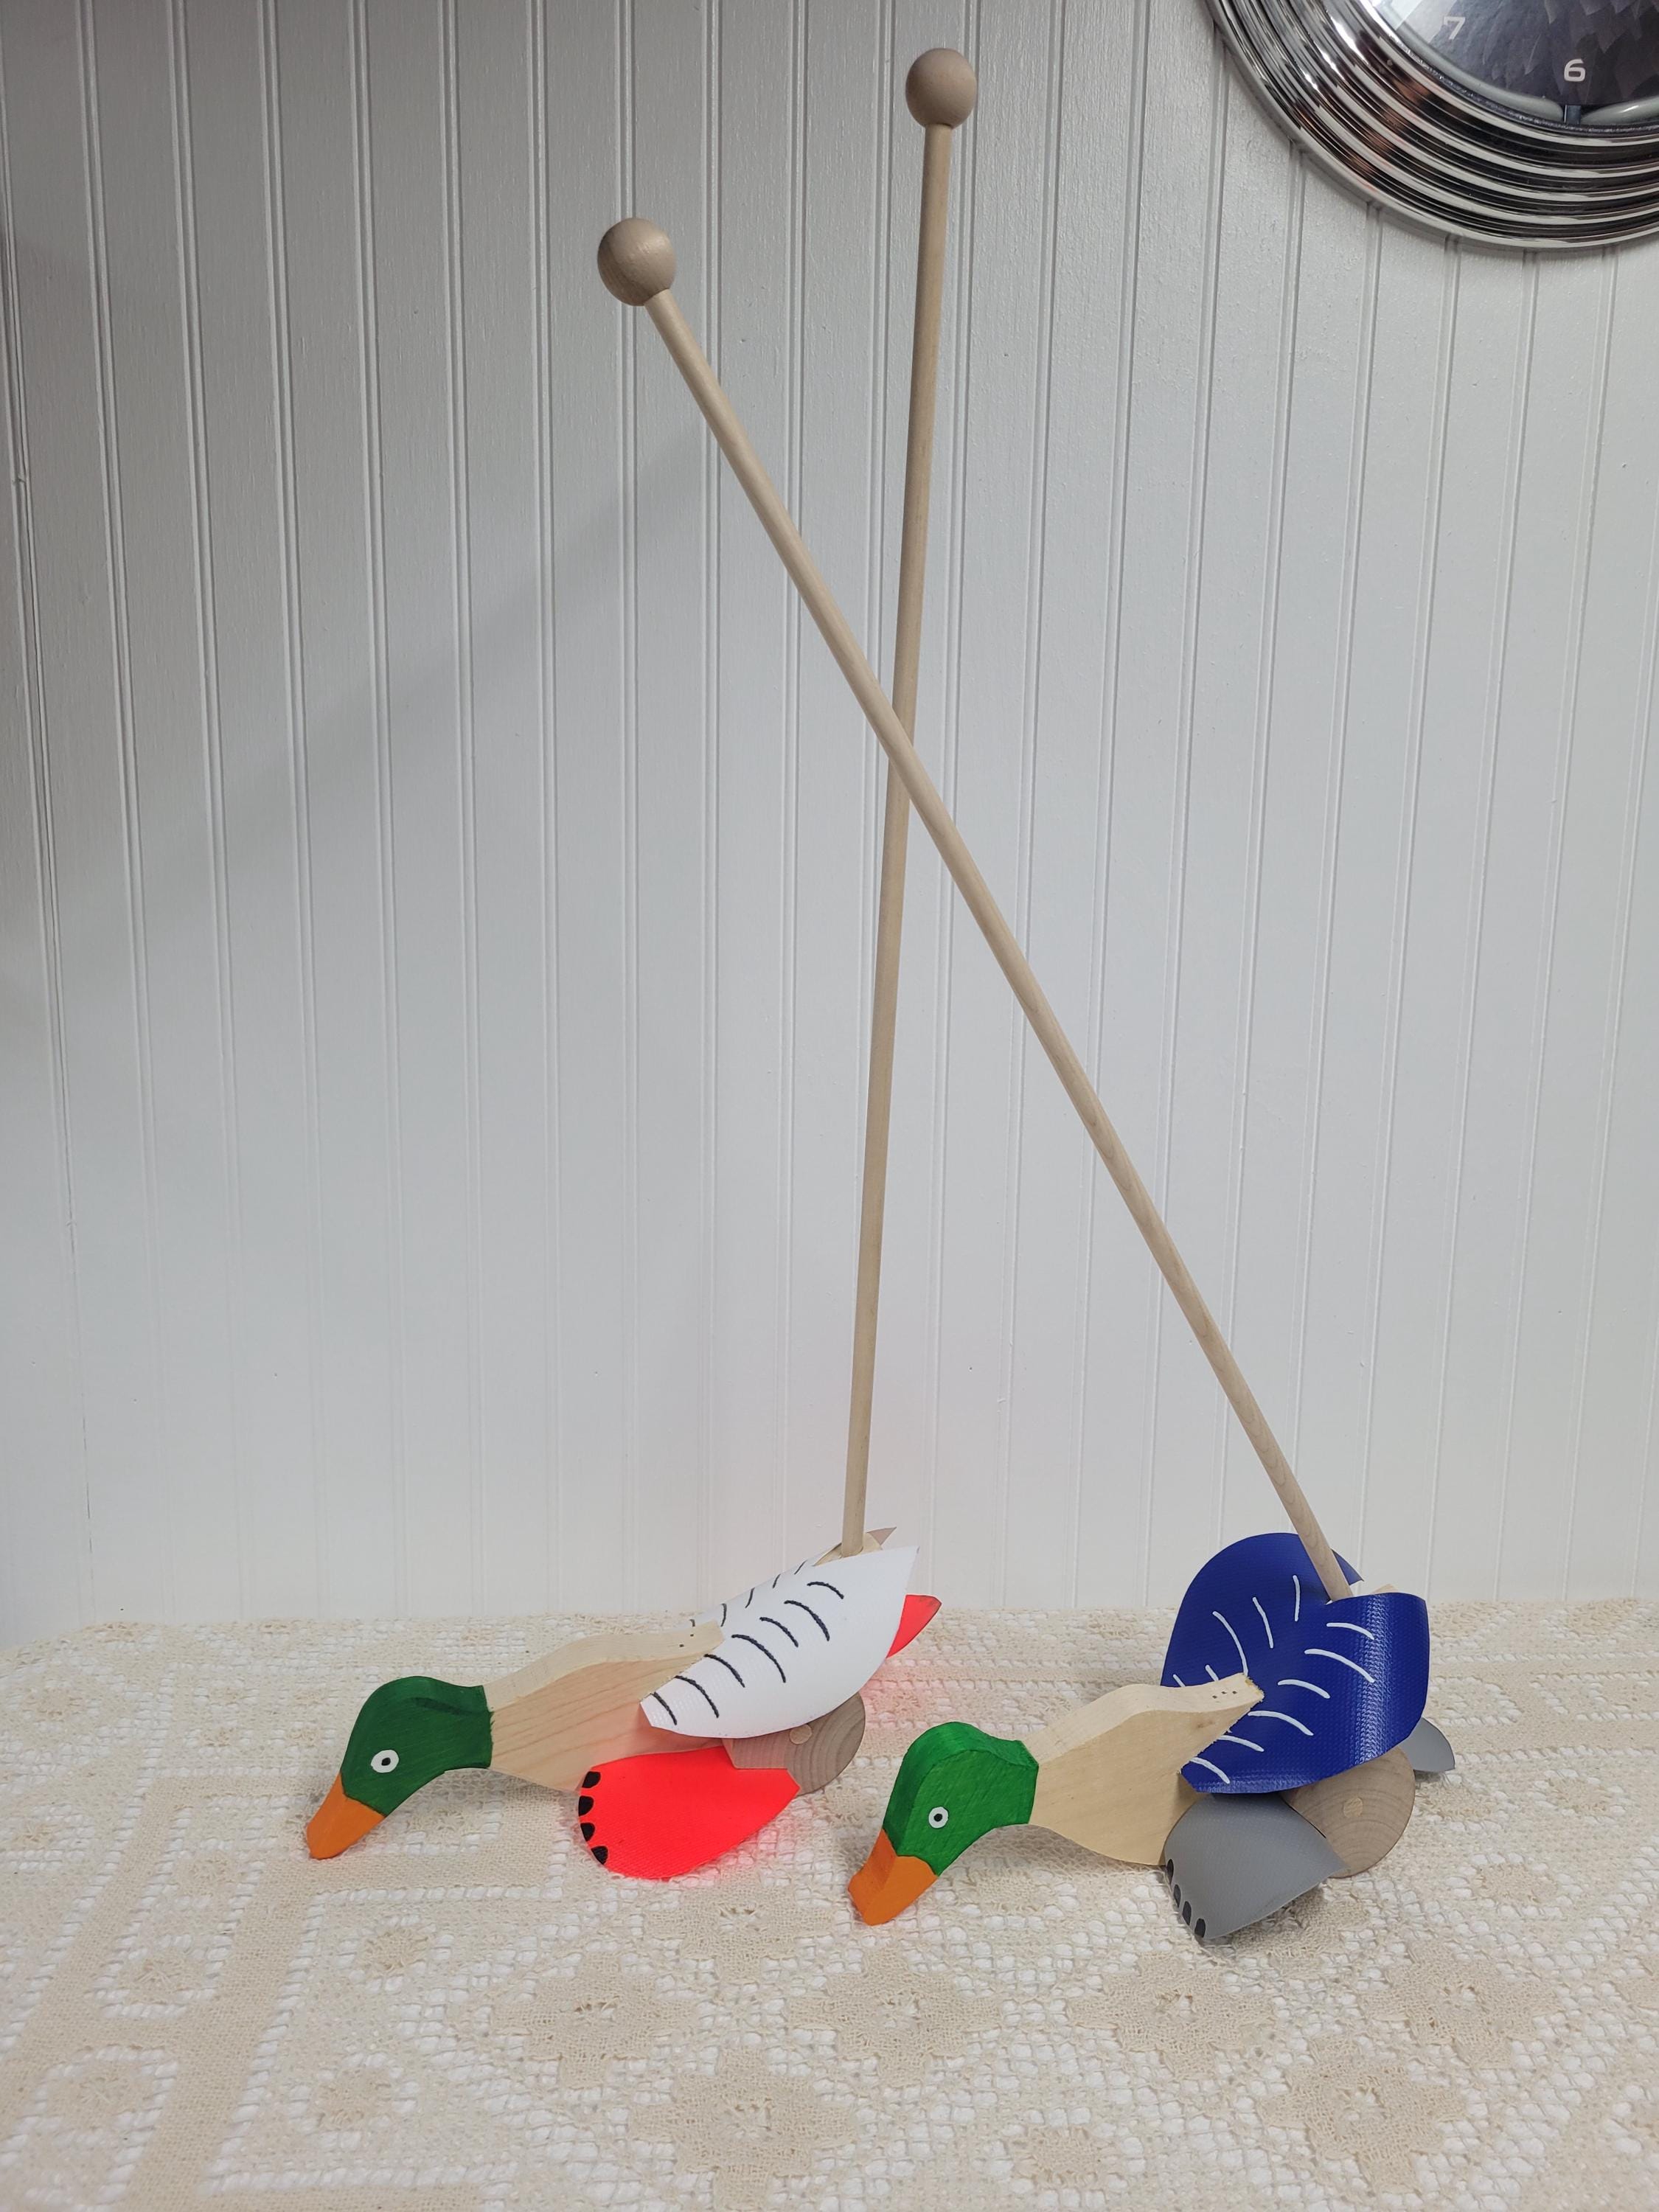
Putting together the wooden walking duck toy is a fun part of the project. This section will guide you through the main steps. You will attach the head, fix the wheels, and add moving parts.
Take your time and follow the instructions carefully. Each part needs to fit well to make the toy work smoothly.
Attaching The Head
Start by placing the duck's head onto the neck peg. Make sure the hole in the head fits tightly over the peg. Use wood glue to secure the head in place. Hold it steady for a few minutes until the glue sets.
Fixing The Wheels
The wheels allow the toy to move smoothly. Attach each wheel to its axle carefully. Push the wheel onto the axle until it fits snugly but can still turn freely. Use small washers if needed to keep the wheels in place.
- Insert the axle through the wheel center hole.
- Slide the axle into the slots on the toy body.
- Add washers on both sides of the wheel.
- Secure the axle with a small wooden pin or glue.
- Check that the wheels spin without resistance.
Adding Moving Parts
Moving parts make the duck walk when pulled. Attach the legs using small wooden dowels. Connect the tail to the body with a hinge so it can wag. Make sure all moving parts have enough space to move freely without sticking.
| Part | Material | Attachment Method | Movement Type |
| Legs | Wooden dowels | Inserted into holes | Rotates |
| Tail | Thin wood piece | Hinged with small pin | Swings back and forth |
| Beak | Wood | Glued | Fixed |
Painting And Finishing
Painting and finishing your wooden walking duck toy makes it look great. It also protects the wood from damage.
Use safe paints and sealants to keep the toy safe for kids. Take your time for the best results.
Choosing Paint Colors
Select colors that bring the duck toy to life. Bright colors often make toys more fun and attractive.
Think about using colors like yellow, orange, or green. You can also add details with white or black paint.
- Use non-toxic, child-safe paints
- Choose bright, cheerful colors
- Pick contrasting colors for details
- Test colors on scrap wood first
Applying Paint
Apply paint in thin, even coats. This helps the paint dry faster and look smoother.
Use small brushes for detail work. Let each coat dry before adding the next one.
- Sand the wood lightly before painting
- Use a clean brush for each color
- Paint small areas carefully
- Allow full drying time between coats
Sealing For Durability
Seal the painted toy with a clear coat. This protects the paint and wood from wear and tear.
Choose a non-toxic sealant safe for children. Apply it evenly and let it dry well.
- Use a water-based, child-safe sealant
- Apply thin coats with a soft brush
- Let each coat dry completely
- Add two or three coats for best protection
Safety Tips
Creating a wooden walking duck toy is a fun project. Safety should be a top priority during the process.
Using safe materials and careful crafting ensures a toy that's safe for children. Here are some essential safety tips to consider.
Non-toxic Materials
Choosing non-toxic materials is crucial for children's safety. This prevents harmful chemicals from affecting kids.
Ensure that all paints, glues, and finishes are labeled as non-toxic. This information is often found on the packaging.
- Use water-based paints and finishes.
- Avoid materials with strong chemical odors.
- Check for certifications like ASTM or EN71.
Smooth Edges
Smooth edges are important to prevent cuts or scrapes. This ensures the toy is safe for small hands.
Sand all edges thoroughly until they are smooth to the touch. Pay special attention to corners and joints.
- Use fine-grit sandpaper for a smooth finish.
- Check edges with your fingers for rough spots.
- Re-sand if needed for extra safety.
Supervision Advice
Always supervise young children when they play with toys. This can prevent accidents and ensure safe playtime.
Explain to kids how to use the toy safely. Encourage them to ask for help if they encounter any issues.
- Keep an eye on children during playtime.
- Teach kids to play gently with their toys.
- Regularly inspect toys for wear and tear.
Troubleshooting Common Issues
Making a wooden walking duck toy can be fun but sometimes problems arise. Fixing these issues helps your toy work smoothly and look great.
Below are some common problems and easy ways to solve them. Follow these tips to keep your wooden duck walking perfectly.
Fixing Loose Parts
Loose parts can cause the toy to fall apart or not move well. Tightening and securing pieces will fix this problem quickly.
- Check all screws and nails to make sure they are tight.
- Use wood glue on joints that feel wobbly.
- Clamp glued parts until the glue dries to hold them firmly.
- Replace any broken or missing fasteners with new ones.
- Test the toy after fixing to ensure parts do not move loose.
Dealing With Paint Smudges
Paint smudges can spoil the look of your wooden duck toy. Removing or preventing smudges keeps the finish clean and smooth.
| Problem | Solution |
|---|---|
| Wet paint smudged | Wipe gently with a damp cloth. Let dry fully before touching again. |
| Dry paint has smears | Lightly sand the area with fine sandpaper. Repaint carefully. |
| Paint drips or runs | Use a small brush to smooth drips before paint dries. |
| Paint stuck to unwanted areas | Remove carefully with a craft knife or paint remover safe for wood. |
Wheel Alignment
Wheels that are not aligned cause the duck to wobble or stop moving. Proper alignment ensures smooth walking.
- Check if wheels spin freely without rubbing the body.
- Adjust wheel axles so wheels are parallel to each other.
- Tighten wheel fasteners enough to hold wheels but allow free rotation.
- Use a ruler or straight edge to confirm wheels line up evenly.
- Test the toy on a flat surface to see if it moves straight.
/https://fbi.cults3d.com/uploaders/14976984/illustration-file/a0d257f7-046c-416f-9299-97ad9cda1f98/cd.gif)

Frequently Asked Questions
What Materials Are Needed For A Wooden Walking Duck Toy?
You need wood pieces, a saw, sandpaper, non-toxic paint, glue, and small wheels. These materials ensure durability and safety for the toy.
How Do You Assemble The Wooden Walking Duck Toy?
Cut wood into duck shapes, sand edges smooth, attach wheels under the body, then paint and glue parts carefully. Follow steps precisely for a sturdy toy.
Can Beginners Make A Wooden Walking Duck Toy?
Yes, beginners can make it with basic woodworking tools and patience. The project is simple and great for learning woodworking skills.
How Long Does It Take To Make This Toy?
It usually takes 2-3 hours depending on skill level. Drying time for paint or glue may add extra hours.
Conclusion
Making a wooden walking duck toy is a fun and simple project. You can enjoy creating it step by step. Using basic tools and wood, the process feels rewarding. This toy can bring joy to children and adults alike. Try adding your own colors or designs for a personal touch.
Crafting by hand builds skills and patience. Give it a try and enjoy the satisfaction of your work. A handmade wooden toy always holds special value. Keep practicing, and you will improve with each project.