Have you ever picked up your favorite doll only to find its joints broken or loose? It’s frustrating to see something you care about damaged, but the good news is—you don’t have to toss it away.
Repairing broken doll joints is easier than you might think, and with a few simple tools and steps, you can bring your doll back to life. Keep reading, and you’ll learn practical tips to fix those joints quickly, so your doll can move and pose just like before.
Your doll deserves a second chance, and you’re about to make that happen.
Tools And Materials Needed
Fixing broken doll joints needs the right tools and materials. These help you repair safely and make the doll last longer.
Gathering everything before you start saves time. Below are the key tools and materials for this job.
Basic Tools
You will need simple tools to open and adjust the doll joints. These tools help you work carefully and avoid damage.
- Small screwdriver set (flat and Phillips head)
- Tweezers for handling small parts
- Needle-nose pliers
- Cutting knife or craft blade
- Fine sandpaper or nail file
Adhesives And Fillers
Strong adhesives hold the joints together. Fillers help fix cracks or missing pieces.
| Material | Purpose |
| Super glue | Fast bonding of small parts |
| Epoxy putty | Filling gaps and shaping joints |
| Wood glue | Fixing wooden doll parts |
| Glue applicator or toothpick | Precise glue application |
Replacement Parts
You may need new parts to replace broken ones. These parts fit the doll and keep it functional.
- New elastic cords or string for joints
- Small screws or pins
- Replacement plastic or wooden joint pieces
Cleaning And Finishing Supplies
Cleaning the doll before repair improves glue hold. Finishing touches hide repairs and protect the doll.
- Soft cloth or brush for cleaning dust
- Isopropyl alcohol or mild soap
- Paints and brushes for touch-ups
- Clear sealant or varnish
Credit: www.dolldoctor.net
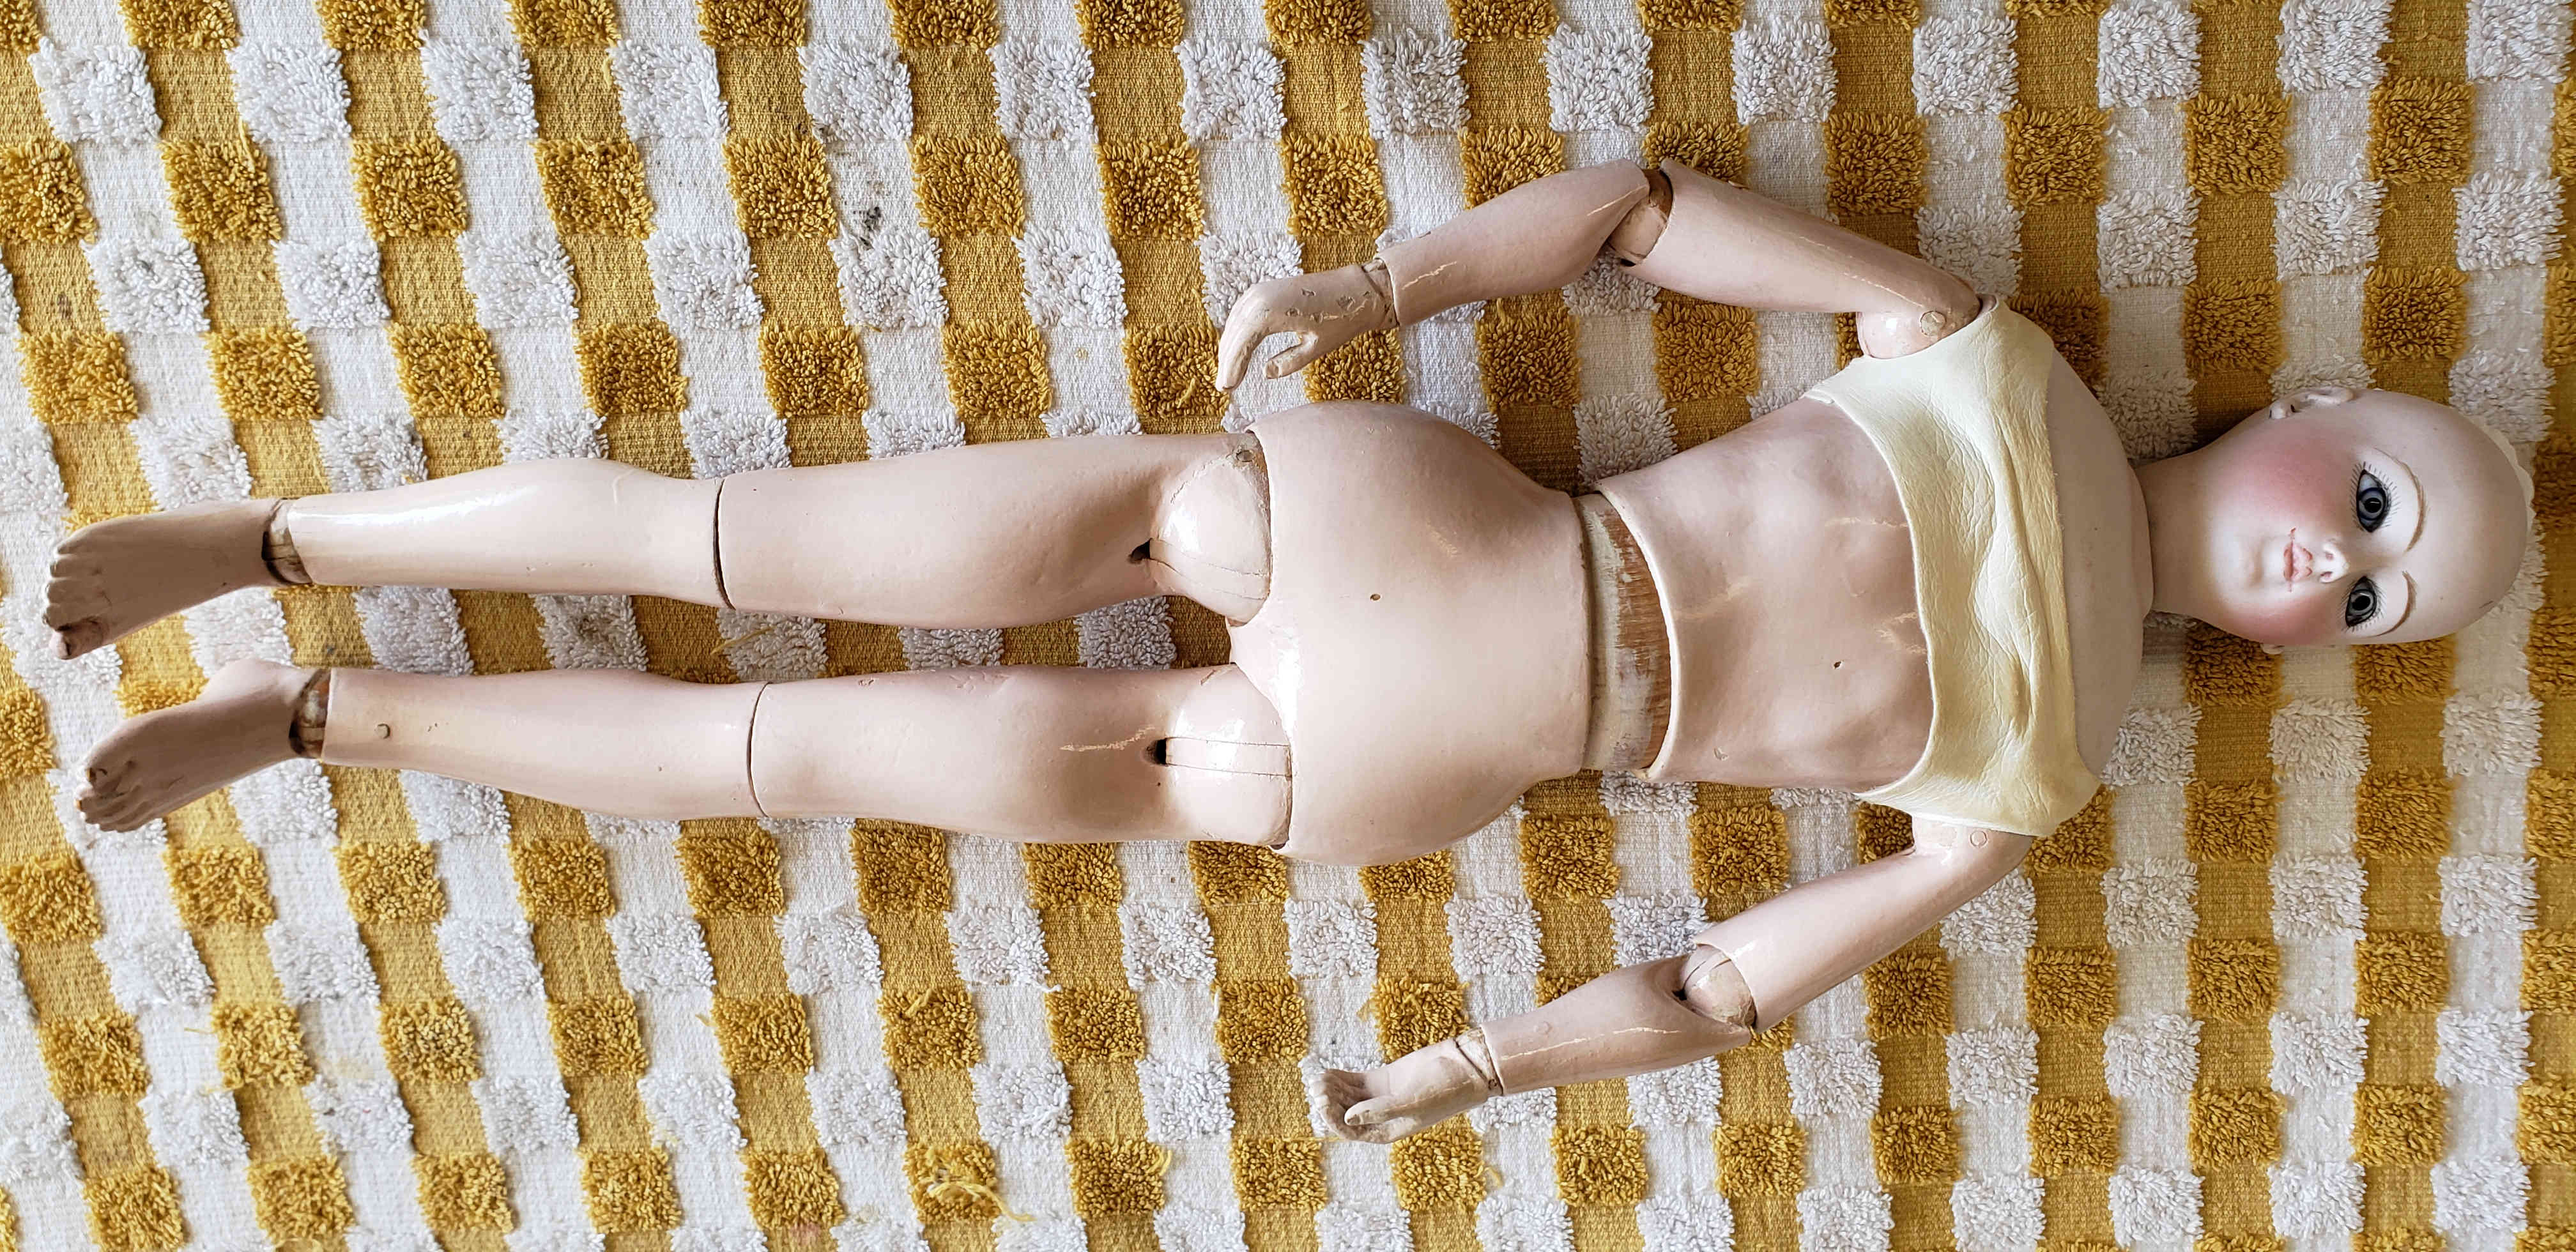
Identifying Joint Types
Dolls have different joint types that allow movement. Knowing the joint type helps in fixing broken parts. Each joint moves in a unique way and needs specific repairs.
Here, we will look at three common doll joint types. These are ball and socket joints, hinged joints, and elastic string joints. Understanding these helps you choose the right repair method.
Ball And Socket Joints
Ball and socket joints connect a rounded ball end to a cup-shaped socket. This joint allows the doll’s limb to rotate in many directions. It is common in dolls’ shoulders, hips, and necks.
- The ball fits tightly into the socket
- Movements include rotation and swinging
- Can be made of plastic, wood, or metal
- Allows smooth and flexible motion
Hinged Joints
Hinged joints work like door hinges. They allow movement in one direction, like bending or straightening. Dolls often have hinged joints at elbows and knees.
| Feature | Description |
| Movement | One direction (bend and straighten) |
| Parts | Two pieces connected by a pin or rod |
| Common Use | Elbows, knees, and fingers |
| Material | Usually plastic or metal |
Elastic String Joints
Elastic string joints use stretchy cords inside the doll’s body. These cords hold parts together and allow movement. When the string breaks, the doll loses limb tension.
Signs of elastic string joints include:
- The doll’s limbs feel loose or floppy
- You can see holes or openings where strings run
- Limbs may fall off or move too freely
Assessing Damage
Repairing broken doll joints starts with checking the damage carefully. Look closely at each joint to see what is wrong.
Knowing the type of damage helps you decide how to fix the doll correctly. Take your time to inspect every part.
Cracks And Breaks
Cracks and breaks can make doll joints weak or unusable. Small cracks might be glued, but big breaks need extra care.
Check if the crack goes deep or if pieces have fallen off. This helps you choose the right repair materials.
- Look for fine cracks on the surface
- Find missing or loose pieces around breaks
- Note if the break affects the joint’s movement
Loose Connections
Loose connections make the doll’s joints move too much or fall apart. This can happen if clips or pins are weak.
Try to move the joint gently and see if it feels loose. Check if parts slide out or wiggle more than usual.
- Test each joint for wobbling or slipping
- Look for broken or stretched elastic bands
- Check if screws or clips are missing or damaged
Missing Parts
Missing parts stop the joint from working well. Look carefully for small pins, screws, or plastic pieces that are gone.
Without these parts, you may need to find replacements before fixing the joint. Note all missing items before starting repairs.
- Check inside and around the joint for lost pieces
- List all missing screws, pins, or clips
- Inspect other joints for possible missing parts
Preparing The Doll For Repair
Fixing broken doll joints needs careful preparation. You must clean and ready the doll before starting.
This step helps glue stick better and makes the repair last longer. Pay attention to small details.
Cleaning The Area
First, remove dirt and dust from the broken joint area. Use a soft cloth or a small brush.
- Wipe gently with a damp cloth to avoid damage.
- Use mild soap if needed, then dry completely.
- Remove any loose paint flakes carefully.
- Let the area air dry before moving on.
Removing Old Adhesive
Old glue can stop new adhesive from sticking well. It is important to remove it fully.
| Method | Description | Tips |
| Use warm water | Soak the joint area briefly to soften glue | Avoid soaking too long to protect the doll material |
| Apply rubbing alcohol | Clean off sticky residue with a cotton swab | Test on a small spot first |
| Use a plastic scraper | Gently scrape off hardened glue | Do not use metal tools to avoid scratches |
Fixing Ball And Socket Joints
Repairing broken doll joints can be simple. This guide will help you fix ball and socket joints.
These joints are common in many dolls, allowing them to move easily. Fixing them can restore your doll's movement.
Reattaching The Ball
If the ball has come out of the socket, it can be reattached. Make sure to check the joint for any damage.
Press the ball back into the socket gently. Ensure it fits snugly to allow smooth movement.
- Check the socket for cracks
- Align the ball with the socket
- Press firmly to reattach
Replacing Missing Pieces
Sometimes, parts of the joint might be missing. You can replace these pieces to fix the joint.
Find replacement parts from old dolls or buy new ones. This will help restore the joint's function.
| Missing Part | Solution |
| Ball | Find similar size from another toy |
| Socket | Purchase a new joint set |
Repairing Hinged Joints
Hinged joints on dolls often break due to wear or accidents. Fixing these joints helps restore the doll’s movement.
This guide covers two main methods: reinforcing with glue and using replacement pins. Both methods can extend the life of your doll.
Reinforcing With Glue
Using glue is a simple way to strengthen loose or cracked hinged joints. It works best for small breaks or cracks.
- Clean the joint area to remove dirt and old glue.
- Apply a small amount of strong, clear-drying glue.
- Hold the joint in place until the glue sets.
- Allow at least 24 hours for full drying before moving the joint.
Using Replacement Pins
Replacement pins work well when the original pin is missing or broken. Pins hold the joint parts together securely.
| Material | Pin Size | Use |
| Metal | 1.5 mm diameter | Strong joints on larger dolls |
| Plastic | 1.0 mm diameter | Lightweight joints on small dolls |
| Wire | Varies, cut to size | Custom repairs and tight fits |
To replace a pin:
- Remove the broken pin carefully.
- Choose a replacement pin that fits the joint holes.
- Insert the new pin through the joint parts.
- Secure the pin ends by bending or gluing if needed.
- Test the joint movement gently.
Restoring Elastic String Joints
Broken doll joints often happen because the elastic string inside stretches or breaks. Fixing these joints can bring your doll back to life. This guide focuses on how to restore elastic string joints.
We will look at replacing elastic bands and adjusting their tension. These steps help keep the doll’s limbs moving smoothly again.
Replacing Elastic Bands
Old elastic bands lose stretch and can snap. Removing them and adding new elastic bands is key. Use elastic that is strong but flexible.
Carefully take out the broken elastic. Measure the right length for the new band. Too long or too short will cause loose or stiff joints.
- Choose elastic string about 1/8 inch wide
- Cut the elastic to match the doll’s limb length plus a little extra
- Thread the elastic through the doll’s joints carefully
- Secure the elastic with knots or clips inside the doll body
Adjusting Tension
Good tension makes the doll’s joints move smoothly. Too tight elastic can tear the doll. Too loose elastic causes floppy limbs.
After placing the elastic, test the joint movement. Adjust the knots or clips to find the right tightness. The doll should hold poses but still move easily.
- Pull elastic gently to tighten before knotting
- Check limb resistance by moving it slowly
- Adjust knots if limbs feel too stiff or floppy
- Trim extra elastic to avoid bulk inside the doll
Finishing Touches
Repairing broken doll joints takes patience. After fixing, you need to make the doll look perfect again. Finishing touches help make the repair invisible.
This guide will show you how to sand, smooth, and paint your repaired doll joints. Follow these steps to complete your doll's transformation.
Sanding And Smoothing
Sanding helps remove rough edges from the repair. Use fine-grit sandpaper to gently smooth the joint. Be careful not to sand too much.
Ensure the surface is even with the rest of the doll. This will help the paint stick better and create a seamless look.
- Use fine-grit sandpaper for a smooth finish
- Sand gently to avoid damaging the doll
- Check the surface is even
Touching Up Paint
Painting brings the doll back to life. Pick a paint that matches the original color. Apply thin layers for a natural look.
Wait for each layer to dry before adding more. This prevents clumping and ensures a smooth finish.
- Choose paint that matches the original color
- Apply thin layers for best results
- Let each layer dry completely
Preventing Future Damage
Fixing broken doll joints helps restore your doll’s pose. You can stop more damage by taking care of the doll properly. Using good habits will keep the joints strong and safe.
Simple changes in handling and storage protect your doll for a long time. Learning these tips helps you avoid repair work later.
Proper Handling Tips
Handle your doll gently to keep joints intact. Rough or fast movements can strain or break the joints again.
- Support the doll’s body when moving arms or legs.
- Avoid forcing joints beyond their natural range of motion.
- Keep nails and jewelry away from joints to prevent scratches.
- Use clean hands to stop dirt buildup on joint areas.
- Do not hang dolls by arms or legs to avoid joint stress.
Storage Recommendations
Store your doll where it stays safe from damage and dirt. Proper storage also helps keep the joints from stiffening or loosening.
| Storage Method | Benefits |
| Use padded boxes or cloth bags | Protects from scratches and dust |
| Store in a cool, dry place | Prevents warping and joint loosening |
| Keep doll upright or lying flat | Reduces stress on joints |
| Avoid direct sunlight | Stops color fading and material damage |
| Remove accessories before storage | Prevents snagging or joint strain |

Credit: www.reddit.com

Credit: www.reddit.com
Frequently Asked Questions
How Can I Fix A Loose Doll Joint At Home?
You can fix loose doll joints by tightening screws or replacing elastic bands. Use small tools and gentle pressure. Avoid harsh chemicals to prevent damage. If needed, apply glue carefully for added stability.
What Materials Are Best For Repairing Doll Joints?
Elastic bands, super glue, and small screws work well for joint repairs. Use soft tools like tweezers and pliers. Avoid heavy adhesives that might damage the doll’s surface. Choose materials compatible with your doll’s joint type.
How Do I Prevent Doll Joints From Breaking Again?
Keep doll joints clean and avoid forcing movements beyond their limits. Store dolls properly to prevent stress. Regularly check joints for looseness and tighten when needed. Use gentle handling to extend joint life.
Can I Repair Broken Doll Joints Without Professional Help?
Yes, many doll joint repairs are simple and can be done at home. Use basic tools and follow step-by-step guides. For complex damage, professional help may be better to avoid further harm.
Conclusion
Repairing broken doll joints takes patience and simple tools. Follow each step carefully for best results. Small fixes can make your doll move like new. Keep your doll safe during the repair process. Practice helps improve your skill over time.
Enjoy bringing your doll back to life. Your effort makes your doll special again. Don’t rush; take breaks if needed. This guide helps you fix joints easily. Try fixing small parts first and build confidence.