Are you ready to bring your creativity to life with a fun and exciting project? The Raspberry Pi Robot Toy Kit is the perfect way to build your own robot while learning new skills.
Imagine controlling a robot you built yourself—watching it move, respond, and explore. Whether you’re a beginner or someone who loves tinkering, this kit makes technology easy and enjoyable. Keep reading to discover how this simple kit can turn your ideas into action and spark your passion for robotics!

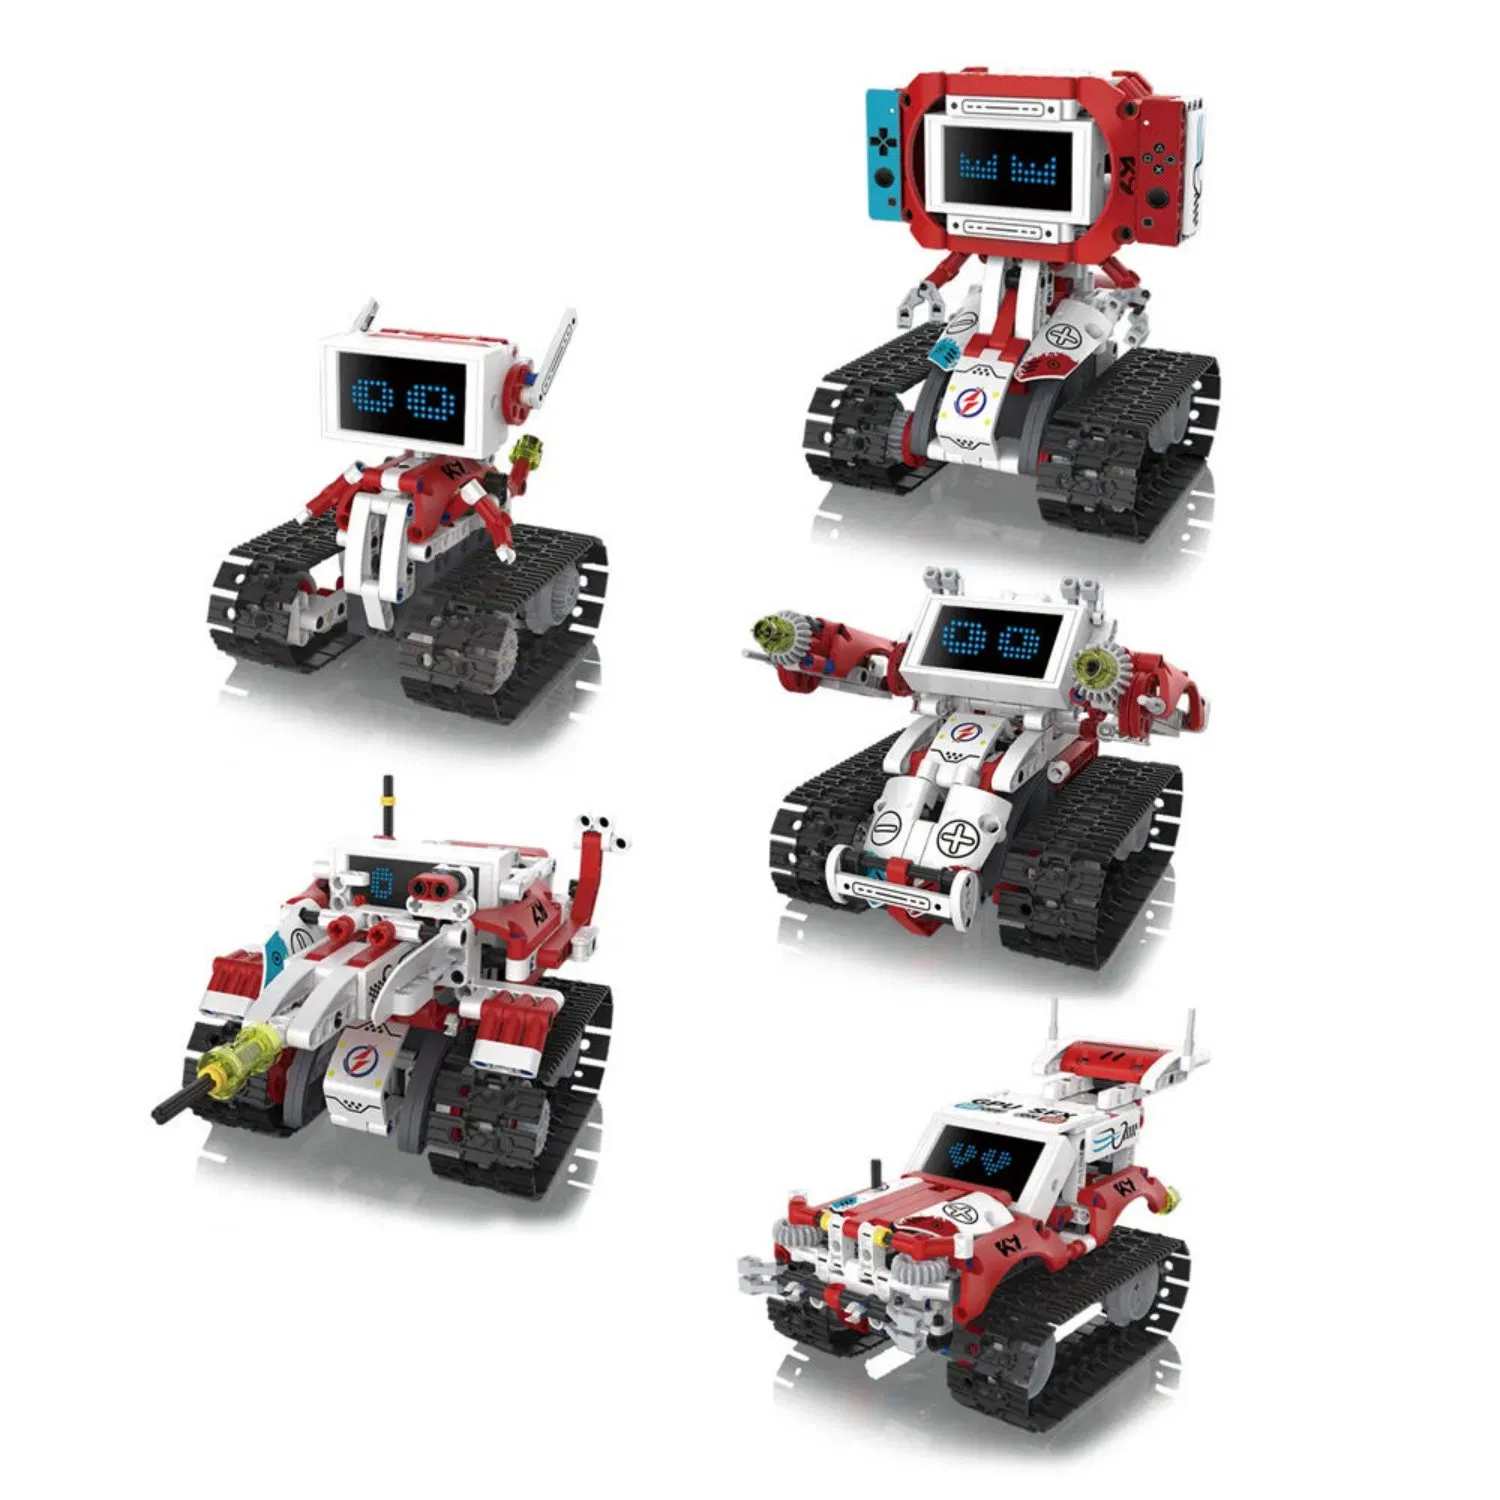
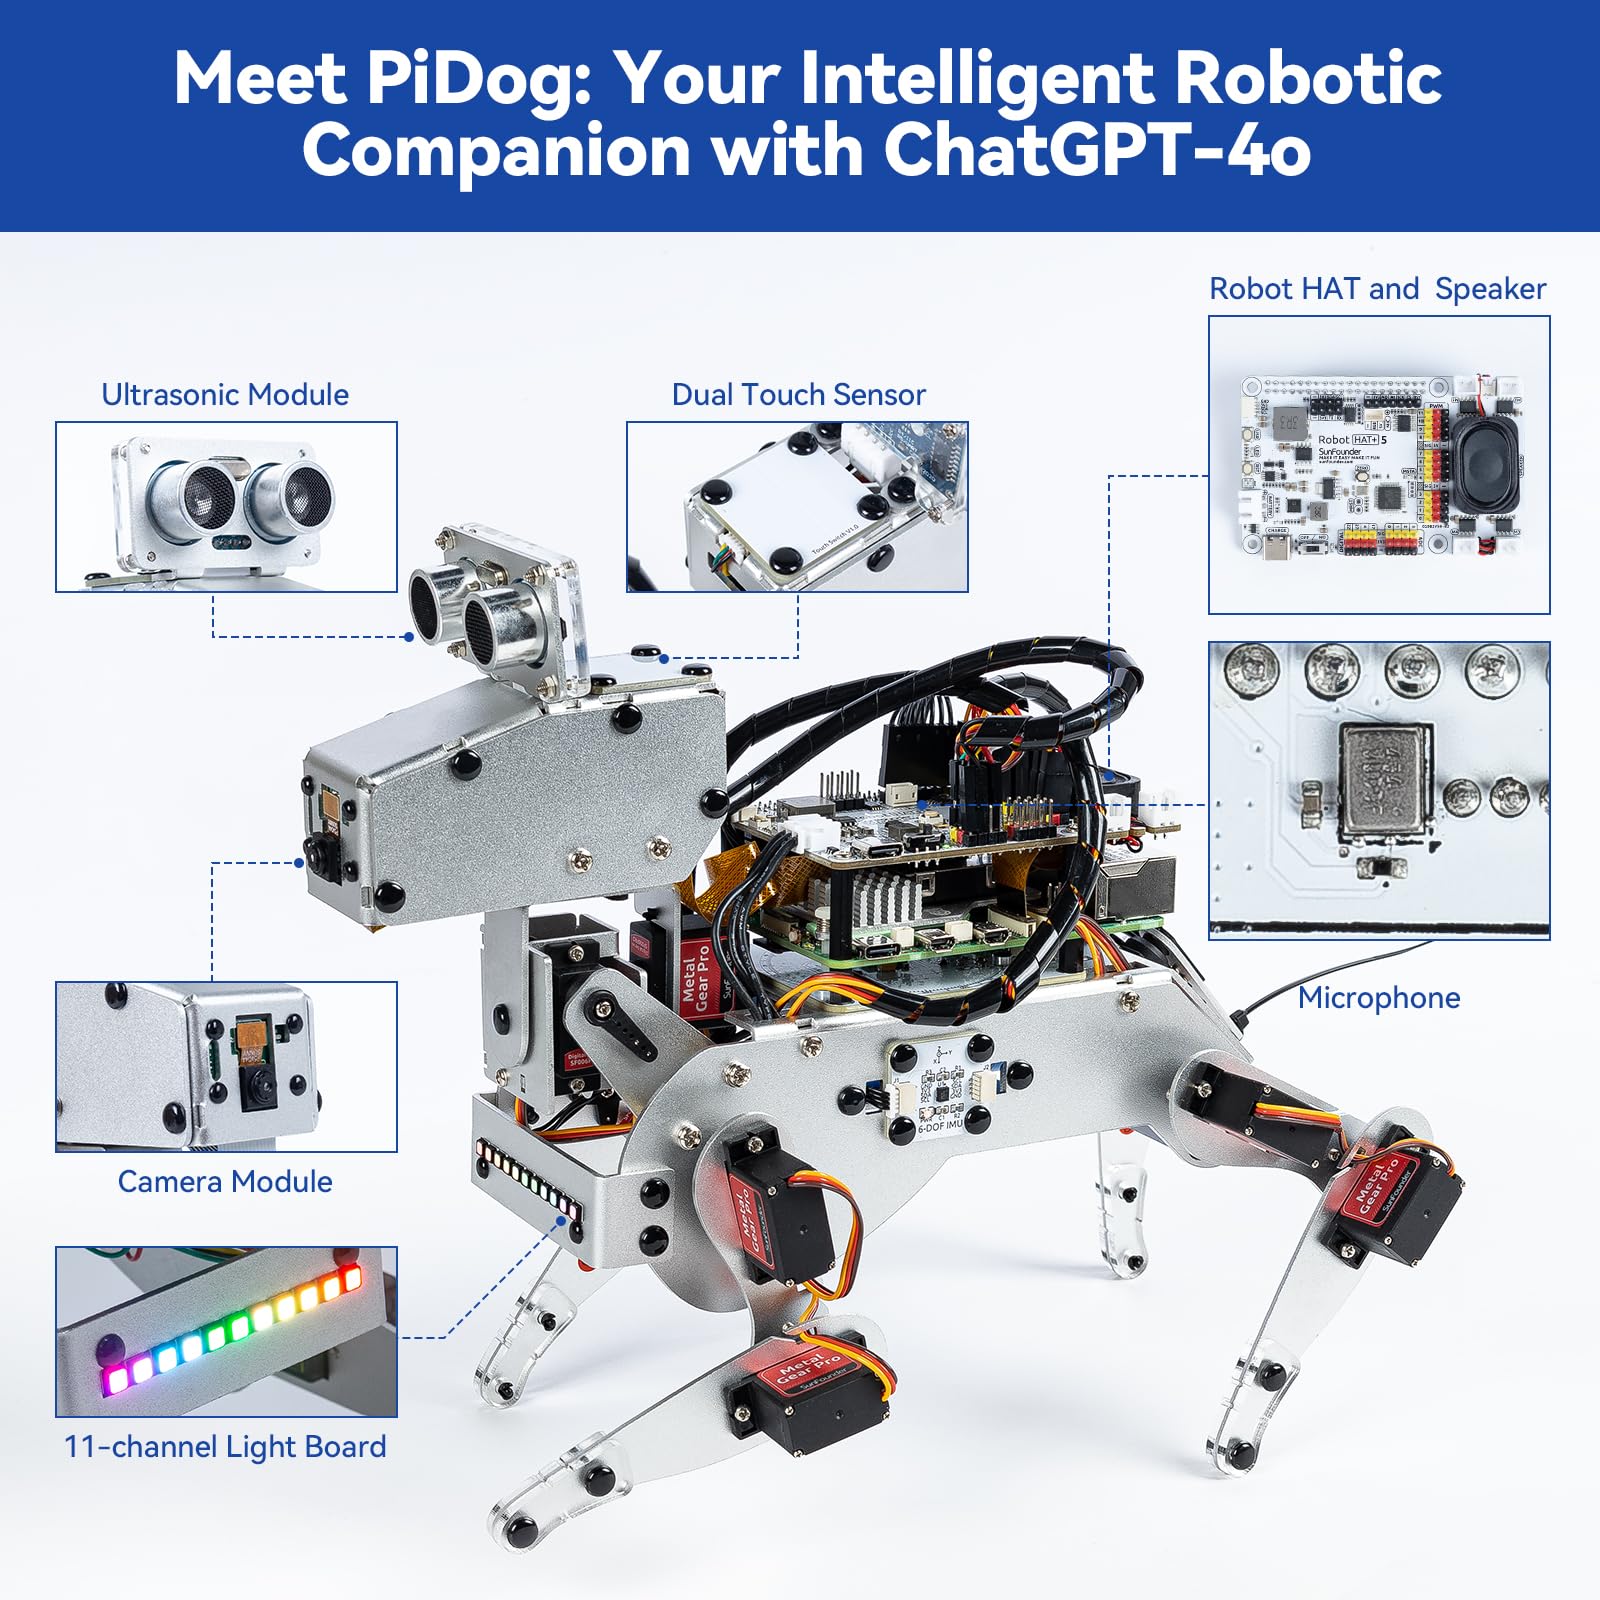
Credit: www.amazon.ca
Choosing The Right Raspberry Pi Kit
Building a Raspberry Pi robot toy is a fun way to learn about technology. Picking the right kit makes the project easier and more enjoyable.
Many kits come with different parts and features. It is important to know what to look for before buying.
Key Components To Look For
A good Raspberry Pi robot kit includes essential parts for building and programming your robot. Check for quality and compatibility.
- Raspberry Pi board (model matters for power and speed)
- Motors and wheels for movement
- Chassis or frame to hold parts together
- Sensors like cameras or distance detectors
- Power supply or battery pack
- Easy-to-follow instructions or tutorials
Popular Kits Compared
Popular Raspberry Pi robot kits vary by parts and difficulty. Some kits are better for beginners, others for advanced users.
| Kit Name | Main Features | Skill Level | Price Range |
|---|---|---|---|
| SunFounder PiCar-S | Camera, motorized wheels, Python control | Beginner to Intermediate | Medium |
| Elegoo Smart Robot Car | Ultrasonic sensors, line tracking, Bluetooth | Beginner | Low to Medium |
| Vilros Raspberry Pi Robot Kit | Robust chassis, motors, sensors | Intermediate | Medium to High |
| Dexter Industries GoPiGo3 | Full sensor suite, easy programming | Intermediate to Advanced | High |
Budget Considerations
Robot kits come in many price ranges. Decide how much you want to spend before choosing a kit.
Some kits offer basic parts at low cost. Others include advanced sensors but cost more.
- Basic kits are good for learning simple robotics
- Mid-range kits add more sensors and programming options
- High-end kits include extra parts and better quality
- Check if the kit includes everything or if you need extras
- Consider buying a Raspberry Pi board separately for better deals
Setting Up Your Raspberry Pi
Setting up your Raspberry Pi is the first step to building your robot toy kit. It lets you prepare the device to control the robot parts. This guide will help you start easily.
You will learn how to install the operating system, connect hardware parts, and do basic setup. Follow these steps to get your Raspberry Pi ready for your robot project.
Installing The Operating System
The operating system is the software that runs your Raspberry Pi. You need to install it on a microSD card. This lets your device start and work properly.
Use Raspberry Pi OS or other compatible systems. Download the OS image and write it to the microSD card using a computer. After that, insert the card into your Raspberry Pi.
- Download the OS image file from the official website
- Use software like Raspberry Pi Imager or balenaEtcher
- Insert the microSD card into your computer
- Write the OS image to the card
- Safely eject the card and insert it into Raspberry Pi
Connecting Hardware Components
Connect all parts of your robot toy kit to the Raspberry Pi. This includes motors, sensors, and power supply. Make sure each cable fits well in the right port.
Check your kit’s manual for the correct pins and connections. Use jumper wires for sensors and motors. Secure the connections to avoid loose contacts during use.
- Attach motors to the motor driver and connect it to GPIO pins
- Connect sensors to the proper input pins
- Plug in the power supply to the Raspberry Pi
- Use a keyboard, mouse, and monitor for initial setup
- Double-check all connections before powering on
Basic Configuration Tips
After turning on your Raspberry Pi, do some basic settings. These settings help your device run smoothly and connect to the network.
Set your language, time zone, and Wi-Fi connection. Change the default password to keep your device safe. Update your system to get the latest fixes.
- Set up language and keyboard layout
- Connect to Wi-Fi or use Ethernet cable
- Change the default password for security
- Run system updates using terminal commands
- Enable SSH for remote access if needed
Building The Robot
Building a Raspberry Pi robot toy kit is a fun and educational project. It helps you learn about electronics and programming.
This guide will explain how to assemble the robot step-by-step. You will work on the chassis, wiring, and testing.
Assembling The Chassis
The chassis is the frame that holds all parts of the robot. Start by attaching the wheels and motors to the base.
Use screws and brackets from the kit to secure the parts. Make sure everything fits tightly and moves freely.
- Attach the motor mounts to the base plate
- Fix the wheels to the motor shafts
- Secure the battery holder on the chassis
Wiring Sensors And Motors
Connect sensors and motors to the Raspberry Pi using the provided cables. Follow the color codes to avoid mistakes.
Double check each connection before powering on. Use a breadboard if the kit includes one for easier wiring.
- Connect motors to the motor driver pins
- Attach sensors to the GPIO pins on the Pi
- Ensure power cables are connected correctly
Testing Movement And Controls
After wiring, test the robot's movement. Run simple code to check if motors and sensors work properly.
Adjust any loose wires or parts if the robot does not move as expected. Repeat tests until controls respond well.
- Run motor control scripts
- Check sensor readings for accuracy
- Fix wiring or code errors as needed
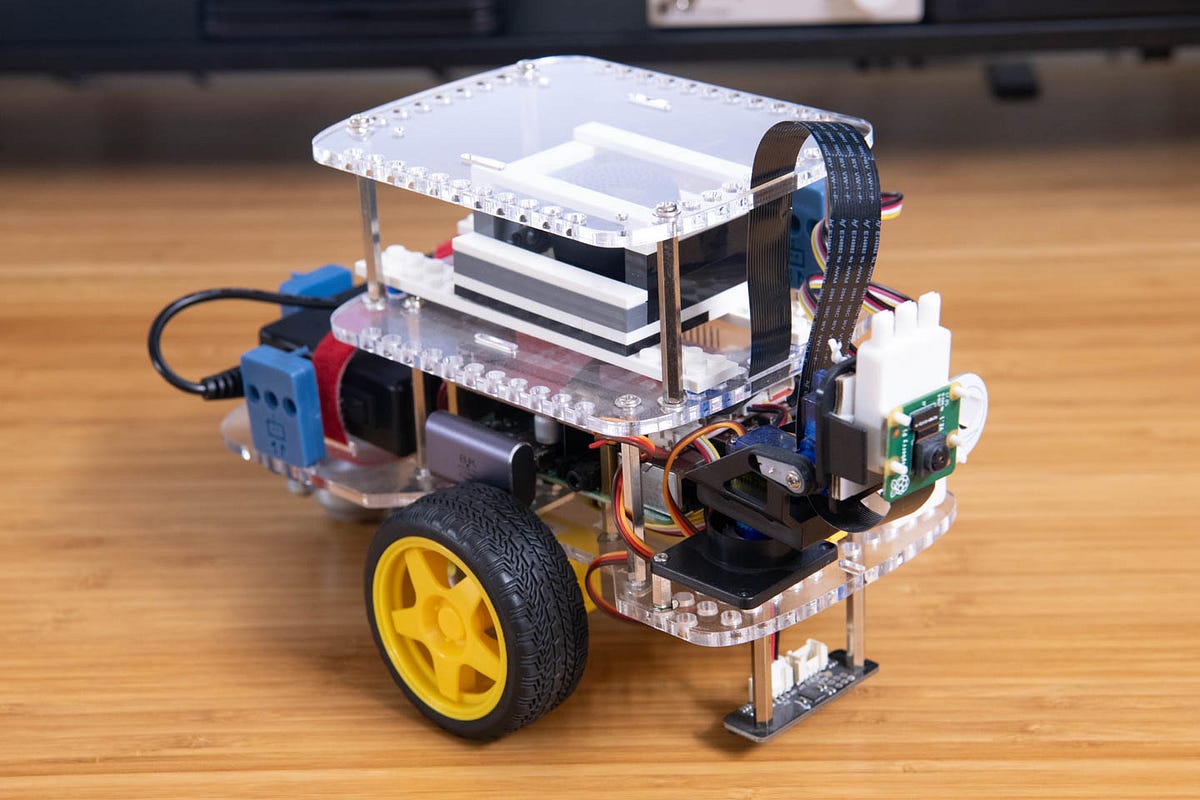
Credit: medium.com
Programming Your Robot
Programming your Raspberry Pi Robot Toy Kit lets you control how it moves and reacts. You use code to tell the robot what to do.
This guide will help you start writing simple programs to make your robot smart and fun to use.
Introduction To Python For Robotics
Python is a popular language for programming robots. It is easy to read and write. Many robot parts have Python libraries to help you control them.
You can use Python to move motors, read sensors, and make decisions. It works well on the Raspberry Pi, which runs your robot.
Writing Simple Control Scripts
Start by writing small scripts that control your robot’s actions. For example, make it move forward or turn. Use commands that tell the motors what to do.
Test your script, see how the robot moves, and then change the code to try new actions. This helps you learn how programming affects your robot.
- Set motor speed
- Control direction
- Add delays to pause
- Repeat actions with loops
Integrating Sensor Data
Your robot can sense its environment using sensors like distance sensors or cameras. You can read this data in your program to make decisions.
Use sensor input to change how the robot moves. For example, stop if it detects an obstacle or follow a line on the ground.
- Read sensor values in Python
- Use conditions to check sensor data
- Make the robot react to the environment
- Combine sensors for better control
Expanding Robot Capabilities
The Raspberry Pi Robot Toy Kit offers many ways to grow its functions.
Adding new features can make your robot smarter and more useful.
Adding Wireless Connectivity
Wireless connections let your robot move and work without wires.
- Use Wi-Fi modules for internet access
- Bluetooth allows control from phones or tablets
- Radio frequency (RF) can extend remote control range
- Install antennas to improve signal strength
Incorporating Ai Features
Artificial intelligence helps the robot learn and make decisions.
| AI Feature | Purpose | Tools Needed |
| Voice Recognition | Control robot by speaking | Microphone, AI software |
| Object Detection | Avoid obstacles and find targets | Camera, TensorFlow |
| Path Planning | Choose the best route | Algorithms, sensors |
Customizing With Additional Modules
Extra modules let you add new skills to your robot kit.
Popular modules include:
- Servo motors for moving arms or wheels
- LED lights for signals and displays
- Temperature sensors for environment checks
- Ultrasonic sensors for distance measuring
Learning Through Play
The Raspberry Pi Robot Toy Kit is a fun way for kids to learn. It combines play with education, making learning enjoyable.
Kids build robots and explore coding. This hands-on experience helps them understand technology better.
Educational Benefits For Kids
The kit offers many educational benefits. It helps kids learn important skills while having fun.
- Improves problem-solving abilities
- Teaches basic programming concepts
- Enhances critical thinking
- Encourages teamwork and collaboration
Fun Projects To Try
There are many fun projects to try with the robot kit. Kids can build different types of robots and explore creative ideas.
| Project | Skills Learned |
| Line-following robot | Sensor integration |
| Obstacle-avoiding robot | Basic AI and logic |
| Remote-controlled car | Wireless technology |
Encouraging Creativity And Problem Solving
The kit encourages creativity and problem solving. Kids think of unique solutions and design their own robots.
Troubleshooting Common Issues
Raspberry Pi Robot Toy Kits are fun and educational. But sometimes, they have issues. This guide helps you fix common problems.
Understanding hardware and software issues is key. You can solve many problems with a bit of patience.
Hardware Problems And Fixes
Check all connections if your robot does not move. Loose wires can cause issues. Ensure everything is securely connected.
Examine the battery if the robot stops suddenly. Make sure the battery is charged and properly installed.
- Inspect all wires for breaks
- Confirm motor connections are tight
- Verify battery voltage
Software Debugging Tips
Software errors can halt robot functions. Check your code for mistakes. Small errors in coding can lead to big issues.
Use online simulators to test your code. They help identify problems before running it on your robot.
- Double-check syntax and spelling in code
- Use comments to keep track of changes
- Run code in sections to find errors
Community Resources And Support
Online forums are great for finding solutions. Many people share their experiences and fixes for common problems.
Join Raspberry Pi groups for advice. These communities can offer support and guidance.
- Visit Raspberry Pi official forums
- Search for troubleshooting videos online
- Participate in community discussions
Credit: www.amazon.ca
Frequently Asked Questions
What Is Included In A Raspberry Pi Robot Toy Kit?
A Raspberry Pi Robot Toy Kit includes a Raspberry Pi board, motors, sensors, wheels, and assembly parts. It often comes with a battery pack and detailed instructions for building and programming the robot.
How Do I Program A Raspberry Pi Robot Toy Kit?
You program the Raspberry Pi Robot Toy Kit using Python or Scratch. The kit supports various coding platforms, allowing beginners to write commands that control motors and sensors easily.
Is The Raspberry Pi Robot Toy Kit Suitable For Beginners?
Yes, it is ideal for beginners. The kit offers step-by-step assembly guides and simple programming tutorials, helping users learn robotics and coding in a fun, hands-on way.
Can The Raspberry Pi Robot Toy Kit Be Customized?
Absolutely. Users can add sensors, change wheels, or modify code. This flexibility allows learners to expand the robot’s capabilities and experiment with different robotics projects.
Conclusion
Building a Raspberry Pi robot toy kit is fun and educational. It helps you learn coding and electronics step by step. The kit offers hands-on experience with real technology. You get to see your robot move and work. It encourages creativity and problem-solving skills.
This project suits beginners and kids who want to explore robotics. Enjoy the process and learn at your own pace. A Raspberry Pi robot toy kit makes learning interactive and exciting. Give it a try and watch your ideas come to life.