Imagine turning simple cardboard into a fun, interactive toy robot dog that you built yourself. Sounds exciting, right?
You don’t need fancy tools or expensive materials—just a bit of creativity and some basic supplies. This DIY cardboard toy robot dog will not only spark your imagination but also give you a sense of pride and accomplishment. Ready to bring your own robot pet to life?
Keep reading, and I’ll guide you step-by-step through making your very own cardboard companion.
Materials Needed
Building a cardboard toy robot dog is a fun project. You need some basic materials to get started. These materials are easy to find and safe to use.
Below are the types of cardboard and tools you will need. There are also some optional items to decorate your robot dog.
Cardboard Types
Choosing the right cardboard makes your robot dog sturdy and easy to build. Use corrugated cardboard for the main body. It is strong and light. Thin cardboard works well for small parts and details.
- Corrugated cardboard (large pieces for body)
- Thin cardboard (for ears, tail, and small parts)
- Recycled cardboard boxes (eco-friendly option)
- Cardstock (for extra firmness on some parts)
Tools And Supplies
| Tool or Supply | Purpose |
| Utility knife or scissors | Cutting cardboard pieces |
| Ruler | Measuring and making straight lines |
| Glue (white glue or hot glue gun) | Attaching parts together |
| Pencil | Marking cutting lines |
| Cutting mat | Protecting surfaces while cutting |
| Tape (masking or clear tape) | Holding pieces temporarily |
Optional Decorative Items
Decorate your robot dog with colors and textures. These items make your toy look fun and unique. Use what you have at home or buy simple craft supplies.
- Colored markers or paint
- Googly eyes or stickers
- Colored paper or wrapping paper
- Pipe cleaners for tail or antennas
- Buttons or beads for nose and joints
Basic Design Concepts
Creating a cardboard toy robot dog is fun and teaches basic design skills. You can make a simple model using everyday materials.
This guide covers key ideas for designing your robot dog. It focuses on shape, moving parts, and simple mechanisms.
Choosing The Robot Dog Shape
Pick a shape that is easy to cut and assemble. Simple geometric shapes like rectangles and cylinders work well.
- Use a box shape for the body
- Create a rectangular head
- Make legs from folded cardboard strips
- Add ears as small triangles
- Keep shapes clear and simple
Planning Movable Parts
Decide which parts will move. Common movable parts include legs, head, and tail. Movement adds play value.
- Choose joints like paper fasteners or tape hinges
- Make sure parts can swing or rotate easily
- Test the movement before gluing pieces
- Keep movable parts light to avoid breakage
Incorporating Simple Mechanisms
Use basic mechanisms to bring your robot dog to life. You can add simple gears or pulleys made from cardboard.
| Mechanism | Description | Example Use |
| Lever | A rigid bar that moves around a pivot | Move the tail up and down |
| Wheel and Axle | A round object turning on a rod | Make legs move when wheels turn |
| Pulley | A wheel with a rope to lift parts | Raise the head slightly |
| Gear | Interlocking wheels with teeth | Coordinate leg movements |
Step-by-step Assembly
Creating a cardboard toy robot dog is a fun project. Follow these steps to make your own playful pet.
Gather all your materials before starting. You will need cardboard, glue, scissors, and markers.
Cutting Cardboard Pieces
Begin by cutting the cardboard into various shapes. You will need rectangles, circles, and squares.
Ensure the pieces are of the right size. This helps in easy assembly.
- Cut two large rectangles for the body
- Cut four small rectangles for the legs
- Cut a circle for the head
- Cut a small strip for the tail
Constructing The Body
Glue the two large rectangles together. This forms the main body of the robot dog.
Let the glue dry completely. This ensures a strong and stable structure.
Adding Legs And Tail
Attach the four small rectangles to the body. These will be the legs of your robot dog.
Glue the small strip to the back of the body. This becomes the tail.
| Leg Position | Attach to Bottom Corners |
| Tail Position | Attach to Back Center |
Attaching The Head And Features
Glue the circle to the top of the body. This forms the head of the robot dog.
Draw eyes and a nose with markers. Add any other features you like.
- Add ears made from small triangles
- Draw a smile or tongue
- Decorate with stickers or paint
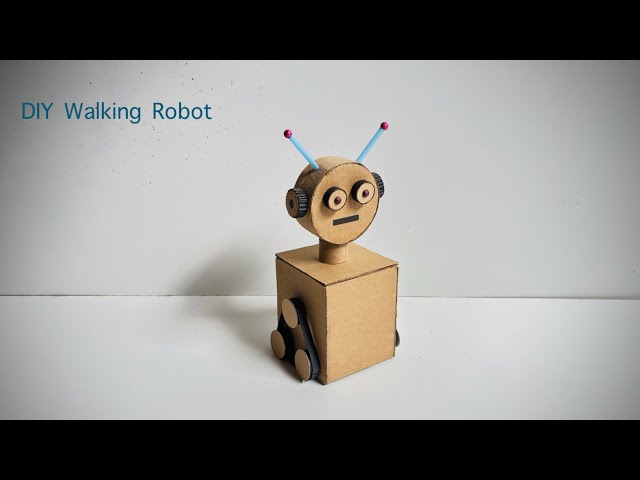
Credit: www.youtube.com
Creative Customization Ideas
Making a cardboard toy robot dog can be a fun project. You can add your own style to make it unique.
Here are some ideas to help you change your robot dog with easy and creative touches.
Painting And Coloring
Use bright colors to make your robot dog stand out. You can try patterns or solid colors to match your taste.
- Use acrylic paints for strong colors
- Try markers for small details
- Mix colors to create new shades
- Add glitter for sparkle effects
- Use stencils to make shapes or letters
Adding Lights And Sounds
Lights and sounds bring your robot dog to life. Small LED lights and tiny speakers work well with cardboard.
| Component | Purpose | Tips |
| LED lights | Make eyes or buttons glow | Use battery-powered lights |
| Small speakers | Play sounds or barks | Choose lightweight and small size |
| Switches | Turn lights or sounds on/off | Glue carefully on cardboard |
Personalizing With Accessories
Accessories make your robot dog special. You can add collars, hats, or even small backpacks.
- Use fabric scraps for clothes or collars
- Make ears or tails from paper or felt
- Add buttons or beads as eyes or decorations
- Attach small bells or charms for sounds
- Use glue or tape to fix accessories firmly
Safety Tips For Kids
Building a DIY cardboard toy robot dog is fun and creative. It also needs care to keep kids safe.
These safety tips help children enjoy making the toy without getting hurt.
Using Tools Safely
Kids should use scissors and cutters carefully. Always cut away from the body and fingers.
Use child-safe scissors when possible. Teach children to put tools down after use.
- Keep sharp tools out of reach when not in use
- Use a cutting mat or safe surface
- Wear protective gloves if needed
Non-toxic Materials
Choose materials that are safe for kids. Avoid paints, glues, or markers with harmful chemicals.
Look for labels that say "non-toxic" on art supplies. This keeps children safe from allergies or poisoning.
- Use water-based glue or paste
- Pick non-toxic paint or crayons
- Use cardboard that is clean and free from harmful inks
Supervision Guidelines
Adults should watch children while they build the toy robot dog. Supervision helps prevent accidents.
Be ready to help with tricky cuts or small parts. Check that all pieces are safe and secure.
- Stay close during tool use
- Help with small or sharp parts
- Ensure the play area is clean and safe
Troubleshooting Common Issues
Building a DIY cardboard toy robot dog is fun. Sometimes, problems can happen.
Fixing these issues helps your robot dog work better and last longer.
Fixing Weak Joints
Weak joints make the robot dog's parts fall apart easily. Check all connection points.
Use extra glue or tape to strengthen these areas. Let the glue dry fully before moving parts.
- Apply strong glue like white craft glue or hot glue.
- Reinforce joints with small cardboard strips or tape.
- Avoid using too much glue to prevent stiffness.
Improving Stability
A stable base stops the robot dog from tipping over. Check the legs and feet design.
Add weight or widen the base if it falls easily. Balance helps the robot stay upright.
- Attach small weights inside the legs or body.
- Make feet wider with extra cardboard pieces.
- Ensure all legs are the same length for balance.
Enhancing Movement
Robot dog moves better with smooth joints and flexible parts. Avoid stiff connections.
Use materials like string or small hinges to allow bending and turning.
- Use thin strips of cardboard or string for flexible joints.
- Test each moving part to check for smooth motion.
- Trim or sand rough edges that block movement.
Encouraging Learning Through Play
Building a DIY cardboard toy robot dog is a fun way for kids to learn. They engage in play while developing important skills.
This activity combines creativity with education, making it both enjoyable and beneficial for young minds.
Stem Skills Development
Creating a toy robot dog involves science, technology, engineering, and math. Kids learn how these fields connect in a hands-on way.
- Measure and cut cardboard precisely
- Assemble parts with simple engineering techniques
- Explore basic electronics with moving parts
Creative Problem Solving
While building the robot dog, kids face challenges that require creative thinking. They figure out how to make parts fit and function.
Consider using recyclable materials to innovate and create unique designs. This not only nurtures creativity but also promotes sustainability.
Teamwork And Sharing
Making a toy robot dog is more fun with friends or family. It encourages teamwork and sharing of ideas and materials.
| Task | Who Can Help |
| Cutting cardboard | Older sibling |
| Decorating | Friend |
| Assembly | Parent |

Credit: www.petoi.com

Credit: www.youtube.com
Frequently Asked Questions
What Materials Are Needed For A Diy Cardboard Toy Robot Dog?
You need cardboard sheets, scissors, glue, markers, and small craft supplies. Optional items include buttons or LEDs for decoration. Using recycled cardboard is eco-friendly and cost-effective. These materials are easy to find and safe for kids to use.
How Can I Make The Robot Dog Move?
Movement can be added with simple mechanisms like wheels or elastic bands. You can also use small motors powered by batteries for advanced motion. This adds interactivity and makes the toy more fun to play with.
Is This Diy Robot Dog Suitable For Children?
Yes, it is a great educational craft for children aged 6 and up. Adult supervision is recommended for cutting and gluing steps. It encourages creativity, fine motor skills, and basic engineering concepts.
How Long Does It Take To Build The Cardboard Robot Dog?
Building time varies but generally takes 1 to 2 hours. This depends on the complexity of your design and the child's age. Planning and preparation can reduce total assembly time.
Conclusion
Building a cardboard toy robot dog is fun and rewarding. You can reuse old boxes and save money. It helps develop creativity and hand skills. Kids and adults enjoy making and playing with it. The steps are simple to follow and do.
Try adding your own colors or designs for fun. This project brings joy and learning together. Give it a try and see what you create!