Have you ever wanted to create a fun toy car using just cardboard? Imagine turning simple materials into something you can play with, customize, and proudly show off.
Making a cardboard toy car is easier than you think, and it’s a great way to spend your time creatively. In this guide, you’ll discover step-by-step how to build your own toy car that looks cool and works well. Ready to bring your imagination to life and enjoy a hands-on project?
Let’s get started!
Materials Needed
Making a cardboard toy car is a fun and easy project. You only need a few basic materials to get started.
Choosing the right materials helps your toy car look great and last longer.
Cardboard Types
Different kinds of cardboard work well for toy cars. Pick one that is strong but easy to cut.
- Corrugated cardboard: Thick and strong, good for the car body
- Cardboard sheets: Thin and smooth, good for details and decorations
- Recycled cardboard: Eco-friendly and easy to find
Basic Tools
You need some simple tools to build your cardboard toy car. These tools make cutting and assembling easier.
- Scissors or a craft knife for cutting cardboard
- Ruler and pencil for measuring and drawing shapes
- Glue or tape to hold pieces together
- A cutting mat to protect your work surface
Additional Decorations
Decorations make your toy car unique and colorful. Use simple items to add style and fun.
- Markers or paint to color your car
- Stickers for extra details
- Buttons or bottle caps for wheels
- Colored paper for windows and designs

Credit: www.youtube.com
Preparing The Cardboard
Creating a toy car from cardboard is a fun project. To start, you need to prepare the cardboard properly.
Good preparation makes the building process smoother and more enjoyable.
Measuring And Marking
Careful measuring and marking are key steps. This ensures your toy car parts fit well together.
- Use a ruler for straight lines.
- Mark dimensions with a pencil.
- Double-check measurements before cutting.
Cutting Techniques
After marking, cutting the cardboard is the next step. Use safe and precise techniques.
| Tool | Use |
| Scissors | For small cuts |
| Craft knife | For detailed shapes |
| Box cutter | For straight edges |
Assembling The Car Body
Building a cardboard toy car can be fun and easy. Start by assembling the car body with simple steps.
Follow these instructions to fold, shape, glue, and secure your car with care.
Folding And Shaping
Folding the cardboard correctly is crucial for a strong car body. Use lines as guides for accurate folds.
- Mark the fold lines on the cardboard.
- Bend the cardboard along the lines carefully.
- Ensure all corners are sharp and defined.
Gluing And Securing
After shaping, it is time to glue the parts together. This step ensures your car holds its form.
| Material | Purpose |
| Glue | To bond pieces |
| Tape | For extra support |
| Clips | To hold pieces while drying |
Apply glue to the edges and press the parts firmly. Use clips to hold them until the glue dries.

Credit: www.youtube.com
Making The Wheels
The wheels are an important part of your cardboard toy car. They help the car move and look realistic. Making good wheels needs careful cutting and attaching.
Use thick cardboard for strong wheels. You can decorate them with paint or markers. Let’s start by cutting the wheel shapes.
Cutting Wheel Shapes
Cutting the wheels carefully will make your toy car look neat. Use a pencil and a round object to draw circles on the cardboard. Then cut them out with scissors or a craft knife.
- Draw four circles of the same size on the cardboard.
- Cut the circles out slowly to avoid rough edges.
- If you want, cut smaller circles to glue on top for detail.
- Use sandpaper to smooth the wheel edges if needed.
Attaching Wheels To The Car
Attach the wheels so they can spin or stay fixed. Use a small stick or a wooden skewer as an axle. Make holes in the car body and the wheels for the axle to fit.
| Material | Purpose |
| Wooden skewer | Axle for wheels to spin |
| Glue | Fix wheels if not spinning |
| Cardboard | Make wheels and car body |
| Scissors or craft knife | Cut wheels and holes |
Adding Details
Adding details to your cardboard toy car makes it look fun and real. Small touches bring your creation to life. This guide covers painting, coloring, stickers, and accessories.
Use simple materials to decorate your toy car. These details help show your style and make the car special.
Painting And Coloring
Choose bright colors to paint your cardboard car. Use water-based paints or markers for easy coloring. Paint in thin layers to avoid soggy cardboard.
- Start with a base color for the whole car.
- Add stripes or dots for a sporty look.
- Use a small brush to paint windows and doors.
- Let paint dry between layers.
- Seal with clear glue or spray to protect color.
Adding Stickers And Accessories
Stickers and small parts can make your toy car unique. Use stickers to add logos or patterns. Accessories like bottle caps or buttons make wheels or headlights.
| Accessory | Use | How to Attach |
|---|---|---|
| Bottle Caps | Wheels | Glue or push a toothpick through center |
| Buttons | Headlights | Glue on front of car |
| Paper Strips | Roof or spoilers | Glue or tape on top |
| Stickers | Decorations | Stick on painted surface |
Safety Tips
Making a cardboard toy car is fun but safety is very important. Follow these tips to avoid accidents and injuries.
Always work carefully and keep safety in mind. This helps everyone enjoy the project safely.
Handling Tools Carefully
Use scissors, cutters, and glue with care. These tools can hurt you if not used properly.
Keep blades away from fingers and cut on a safe surface. Store tools safely after use.
- Use scissors with blunt tips for kids
- Cut away from your body
- Keep glue away from eyes and mouth
- Work in a well-lit area
- Ask for help if you are unsure
Supervision For Younger Kids
Young children need an adult to watch them while making the toy car. Adults can stop accidents early.
Keep sharp tools and small parts out of reach of very young kids. This prevents choking and cuts.
- Adults should help with cutting and gluing
- Watch children closely during the project
- Explain safety rules before starting
- Use child-safe tools when possible
- Keep the work area clean and organized
Creative Variations
Making a cardboard toy car can be fun and easy. You can add your own creative touches. This lets you make a unique toy every time.
Try different styles and materials to create new designs. These ideas help you enjoy crafting and learn new skills.
Customizing Designs
You can change how your toy car looks by using colors and shapes. Paint the car with bright colors or patterns. Add stickers or draw windows and doors.
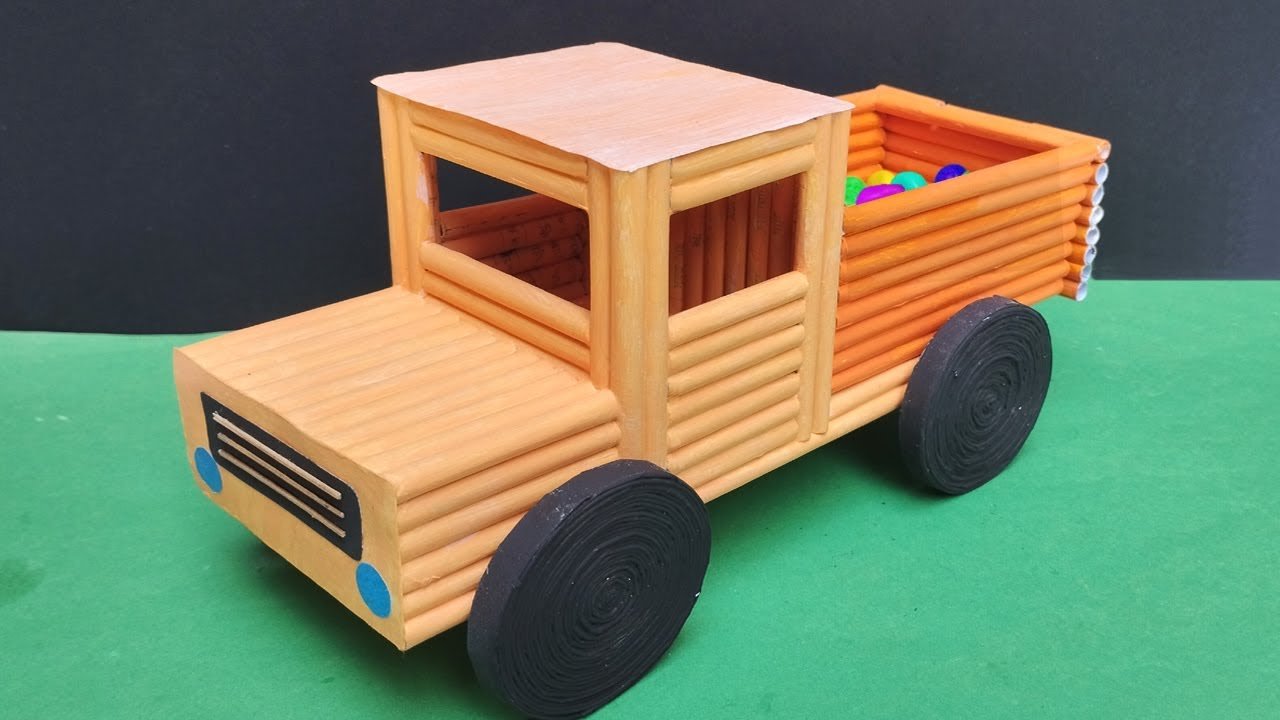
Try making the car in different sizes. You can make a small race car or a big truck. Use extra cardboard pieces to add parts like spoilers or headlights.
- Use markers or crayons for decoration
- Cut cardboard to add spoilers or bumpers
- Create different car shapes like trucks or sports cars
- Add wheels using bottle caps or paper circles
- Draw or glue on windows and doors
Using Recycled Materials
Using recycled materials helps the environment and saves money. You can use old boxes, bottle caps, or scraps of paper. These materials work great for making parts of your toy car.
Look around your home for clean, safe items to use. Cardboard from food boxes or packaging can be cut and shaped easily. Bottle caps make perfect wheels or hubcaps.
- Old cardboard boxes for the car body
- Bottle caps or buttons for wheels
- Scraps of paper or fabric for seats
- Used straws for axles
- Plastic lids for headlights

Credit: www.youtube.com
Frequently Asked Questions
What Materials Are Needed To Make A Cardboard Toy Car?
You need cardboard, scissors, glue, paint, markers, and small wheels. These basic materials help create a sturdy and colorful toy car. Using recycled cardboard is eco-friendly and cost-effective. Additional decorations can personalize the toy car further.
How Long Does It Take To Build A Cardboard Toy Car?
Building a cardboard toy car typically takes 1 to 2 hours. Time varies depending on design complexity and drying time for glue or paint. Simple models are quicker, while detailed cars require more effort and patience.
Can Children Safely Make Cardboard Toy Cars?
Yes, children can safely make cardboard toy cars with adult supervision. Scissors and glue should be handled carefully. This craft encourages creativity and fine motor skills. It’s a fun, educational project suitable for various age groups.
How To Make A Cardboard Toy Car Durable?
To make it durable, use thick cardboard and strong glue. Reinforce edges and joints with tape or extra layers. Avoid excessive water exposure to prevent weakening. Proper drying time ensures the glue bonds well for lasting play.
Conclusion
Making a cardboard toy car is fun and simple. It helps you use your creativity and learn new skills. You only need basic materials and a little patience. This project is perfect for kids and adults who enjoy crafting. Once finished, you have a unique toy to play with or decorate your space.
Give it a try and enjoy the process. Crafting with cardboard can be a great way to spend time and express yourself. Keep practicing, and your designs will get even better.