Are you looking for a fun and creative project that brings joy to your kids and adds charm to your home? Building a DIY wooden toy garage is the perfect way to do just that.
Imagine crafting a sturdy, beautiful garage where your child’s toy cars can race and park, sparking their imagination every day. In this guide, you’ll discover simple steps, handy tips, and easy tools to create a wooden toy garage that’s both durable and delightful.
Ready to turn your ideas into a timeless playtime treasure? Let’s get started!

Credit: www.etsy.com
Materials Needed
Building a wooden toy garage is a fun project. You need the right materials to make it safe and strong.
This guide covers the types of wood, tools, and safety gear you will need.
Wood Types
Choose wood that is safe for children and easy to work with. Softwoods are good for beginners.
- Pine: Affordable and easy to cut
- Poplar: Smooth and good for painting
- Birch: Strong and durable
- Avoid treated wood to keep it safe
Tools Required
You will need some basic woodworking tools to build the garage. These tools help you cut and assemble the wood.
- Hand saw or electric saw
- Measuring tape
- Pencil for marking
- Hammer and nails or screwdriver and screws
- Sandpaper for smoothing edges
- Wood glue for extra strength
Safety Gear
Safety is important while working with wood and tools. Always wear the right gear to protect yourself.
- Safety glasses to protect your eyes
- Dust mask to avoid breathing sawdust
- Gloves to protect your hands
- Ear protection if using loud power tools
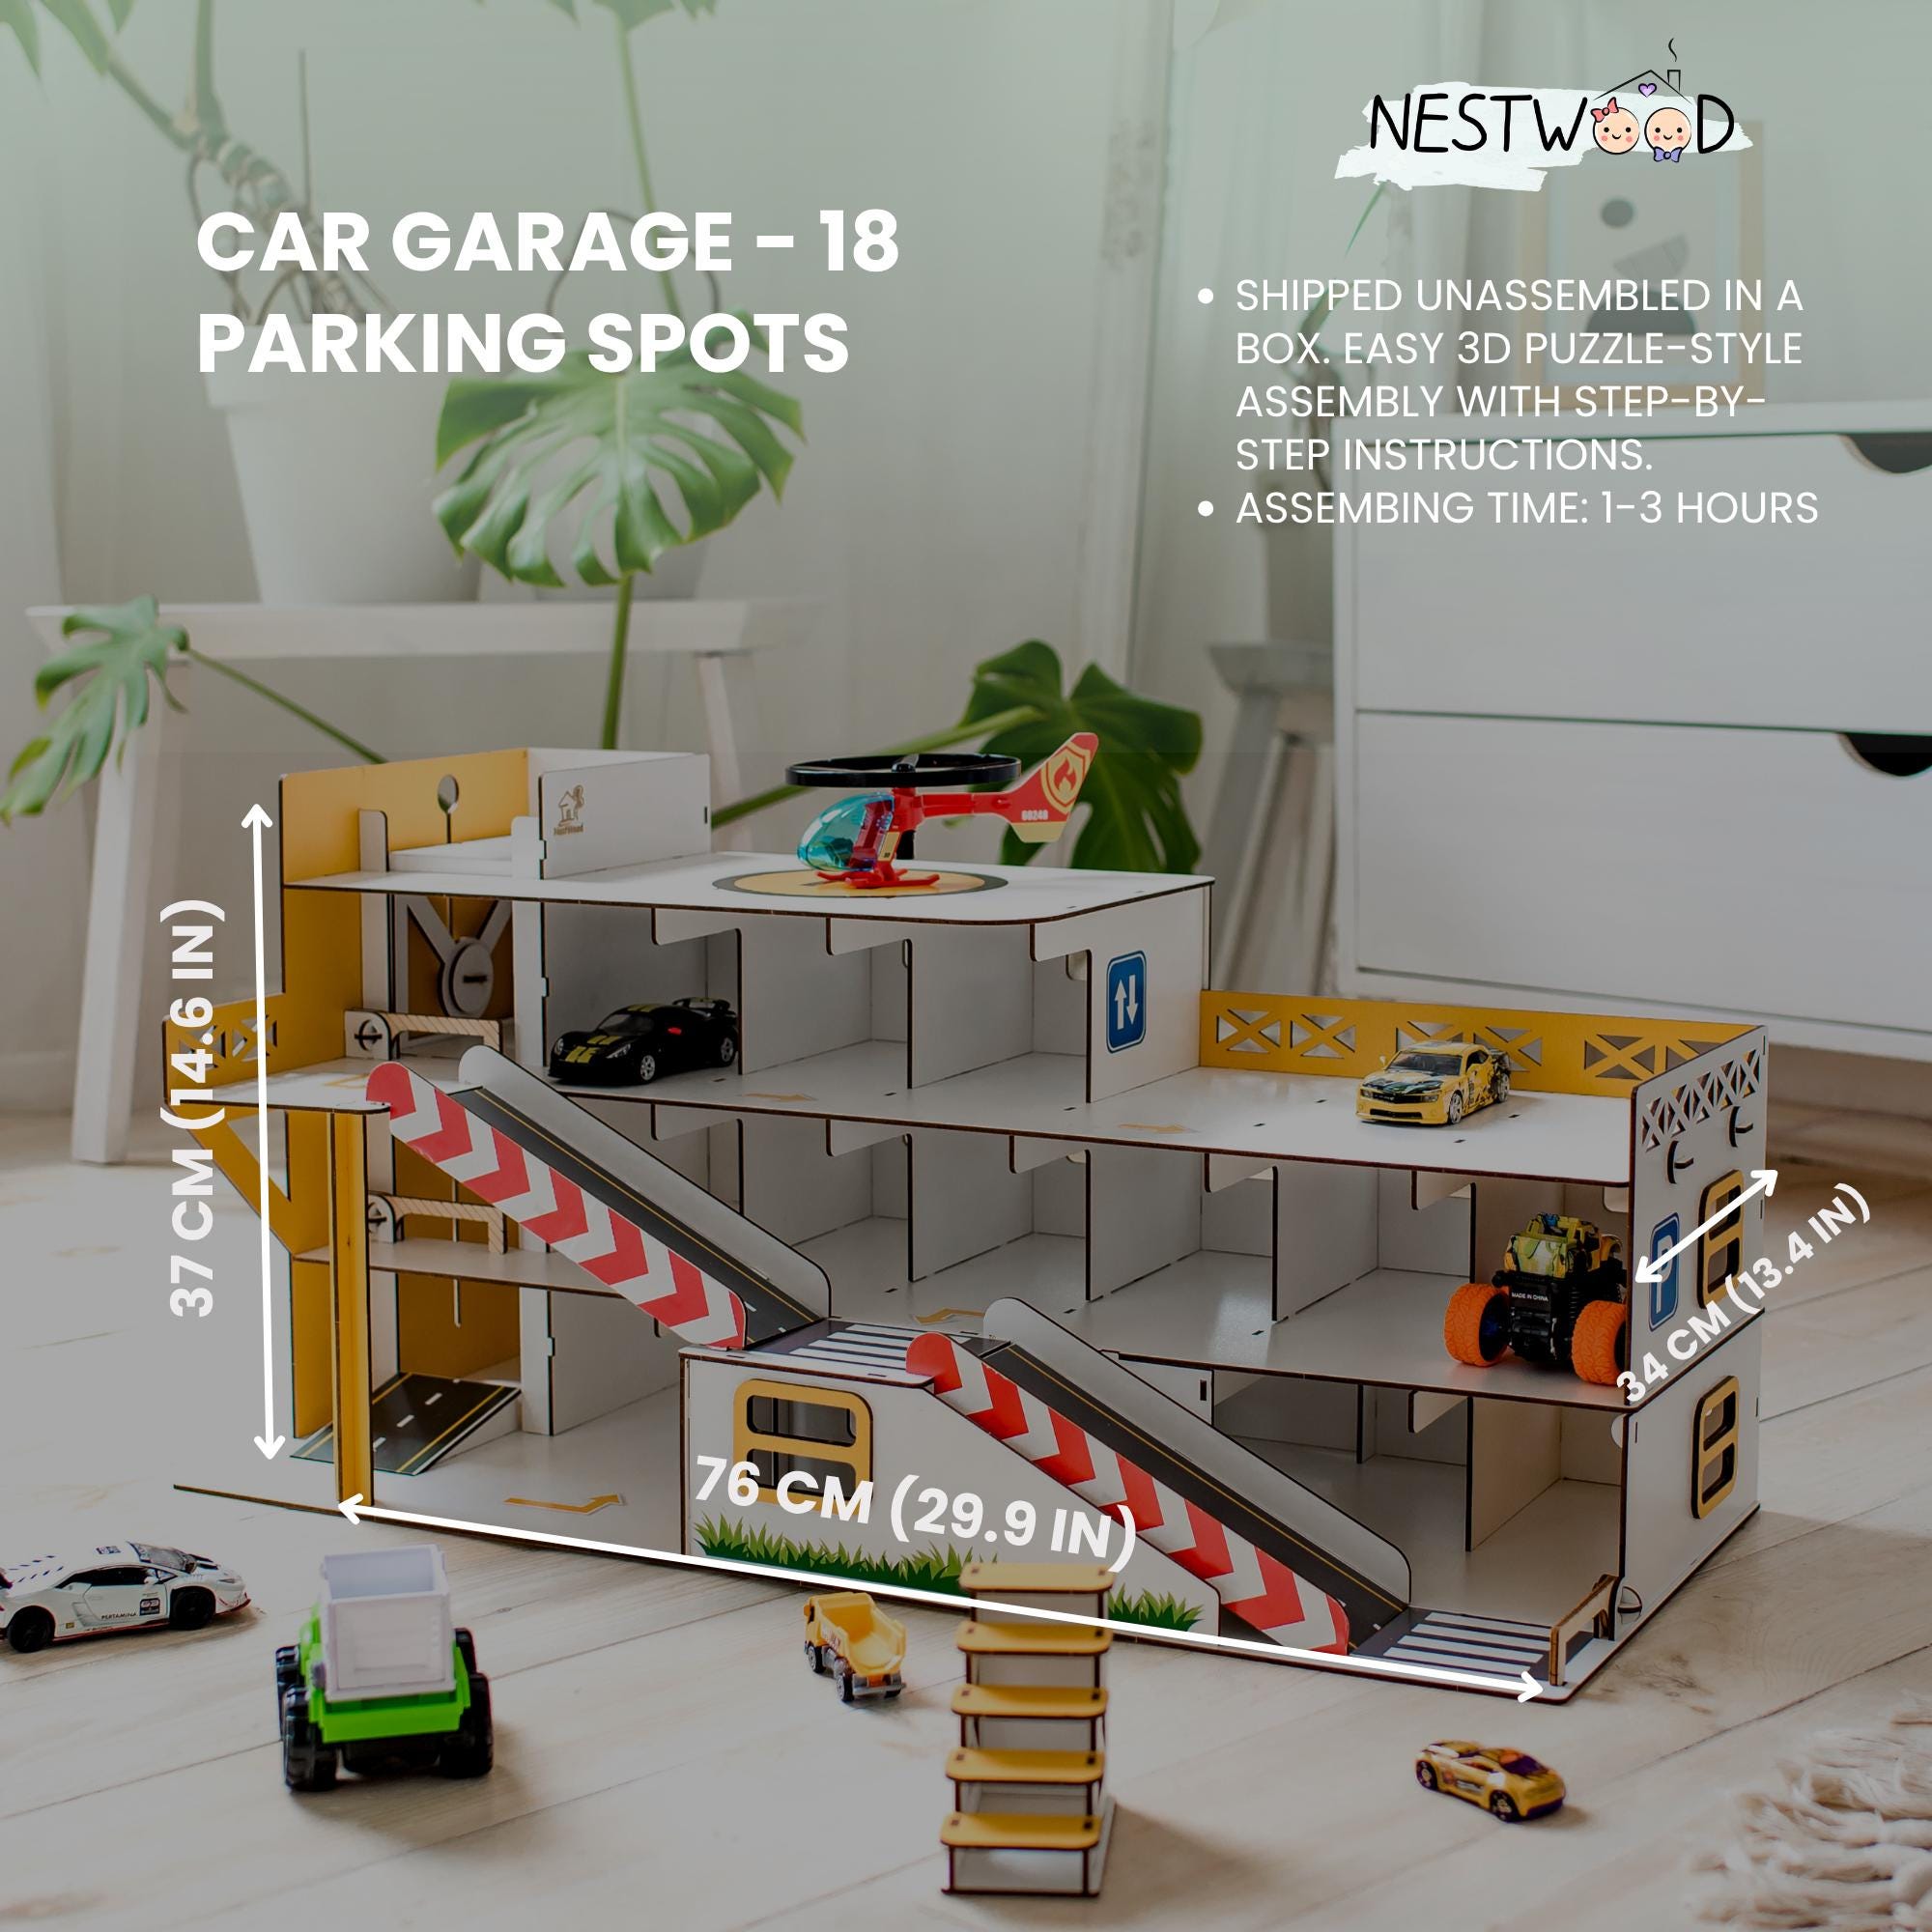
Credit: www.etsy.com
Design Planning
Planning your DIY wooden toy garage helps you build a fun and safe play area. Good design makes the project easier to complete and enjoy.
Start by thinking about the size, shape, and features you want. This guide covers key steps to plan your garage well.
Choosing The Size
Decide how big the toy garage should be. Think about the space where you will put it and how many cars it should hold.
- Measure the area for the garage carefully.
- Consider the height so kids can reach all parts.
- Make sure there is room for doors and ramps.
- Plan space for future toy additions.
Sketching The Layout
Draw a simple sketch of your garage design. This helps you see the whole project before building.
Use this table to plan the main parts of your garage:
| Garage Part | Size (inches) | Material Needed |
|---|---|---|
| Main Frame | 24 x 18 x 12 | Wood planks |
| Doors | 6 x 12 | Thin plywood |
| Ramps | 12 x 6 | Wood strips |
| Parking Spaces | 4 x 4 each | Paint or markers |
Selecting Features
Choose features that make the garage fun and useful. Think about what your child likes and how they play.
- Include ramps for cars to drive up and down.
- Add doors that open and close.
- Design parking spots with paint or stickers.
- Consider shelves to store extra cars or tools.
Cutting The Wood
Cutting wood is an important part of building your wooden toy garage. You need to be careful and precise for the best results.
Using the right tools and methods helps you cut wood safely and accurately. This guide covers measuring, marking, and safe cutting techniques.
Measuring And Marking
Measure the wood carefully before cutting. Mark the lines clearly to guide your cuts and avoid mistakes.
- Use a tape measure for accuracy
- Mark lines with a sharp pencil or marking knife
- Double-check measurements before marking
- Use a square tool to make straight lines
Safe Cutting Techniques
Safety is very important when cutting wood. Follow these tips to protect yourself and make clean cuts.
| Safety Tip | Reason |
| Wear safety goggles | Protects eyes from dust and wood chips |
| Use clamps to hold the wood | Keeps wood steady and prevents slipping |
| Keep fingers away from the blade | Prevents cuts and injuries |
| Cut slowly and steadily | Ensures clean and controlled cuts |
Credit: www.etsy.com
Assembly Steps
Building a wooden toy garage is a fun and rewarding project. Follow these simple steps to assemble your garage easily.
Each section guides you through the main parts of the assembly. Take your time and enjoy the process.
Building The Base
Start by creating a strong base for your toy garage. This supports the entire structure and keeps it stable.
- Cut a wooden board to the size you want for the garage base.
- Sand the edges to make them smooth and safe for kids.
- Attach four small wooden blocks to the corners as feet.
- Use wood glue and nails to secure the blocks firmly.
- Let the glue dry completely before moving to the next step.
Constructing Walls And Roof
Next, build the walls and roof to form the main shape of the garage. Make sure everything fits well.
| Part | Material | Size (inches) |
| Front Wall | Wood | 12 x 8 |
| Back Wall | Wood | 12 x 8 |
| Side Walls (2) | Wood | 8 x 8 |
| Roof Panels (2) | Wood | 13 x 6 |
Attach the walls to the base using nails and glue. Then, fix the roof panels at an angle on top of the walls.
Adding Details
Finish your garage by adding small details. These make the toy more fun and realistic.
- Paint the garage with safe, bright colors.
- Attach small wooden doors that open and close.
- Add windows using thin wooden strips or plastic sheets.
- Place tiny wooden cars inside for play.
- Use stickers or markers to add signs or decorations.
Finishing Touches
Adding finishing touches makes your wooden toy garage look great. It also helps protect it from wear and tear.
Take time to smooth, paint, and seal your project. These steps improve both appearance and durability.
Sanding And Smoothing
Start by sanding all surfaces with fine-grit sandpaper. This removes rough spots and splinters.
Sanding helps paint and sealant stick better. Make sure edges and corners are smooth to the touch.
- Use 120-grit sandpaper for rough sanding
- Finish with 220-grit sandpaper for smoothness
- Wipe off dust with a dry cloth before painting
Painting And Decorating
Choose child-safe, non-toxic paint for your toy garage. Bright colors make it fun and eye-catching.
Use small brushes for details like doors and windows. Let each coat dry fully before adding another.
- Use water-based acrylic paints
- Apply thin, even coats
- Add fun details with stencils or stickers
Sealing For Durability
Seal your painted garage with a clear, child-safe finish. This protects the paint and wood from damage.
Choose a finish that is easy to clean and resists scratches. Apply two or three coats for best protection.
- Use water-based polyurethane or varnish
- Apply with a clean brush or foam applicator
- Allow each coat to dry completely before next
Playset Ideas
Creating a DIY wooden toy garage can be a fun project. It offers a great opportunity to design a playset that encourages creativity in children.
There are many ways to customize your wooden toy garage. These ideas will help make playtime exciting and engaging.
Customizing With Accessories
Accessories make a toy garage more fun. Add miniature cars, road signs, and ramps.
These items enhance the play experience. Kids can imagine different scenarios as they play.
- Miniature cars for racing and parking
- Ramps for exciting jumps
- Road signs for realistic play
Incorporating Storage
A toy garage with storage helps keep things tidy. Design shelves or compartments for storing toy cars.
Storage can be part of the garage or separate. It teaches kids to organize their toys after playtime.
| Shelves | For holding toy cars |
| Compartments | For organizing accessories |
Encouraging Creative Play
A wooden toy garage can spark imagination. Children can create stories and adventures with their toys.
Encourage kids to use their imagination. They can create their own rules and scenarios, making playtime more engaging.
- Painted backgrounds for different scenes
- Interchangeable parts for varied setups
Maintenance Tips
Keeping your DIY wooden toy garage in good shape makes it safe and fun to use. Regular care helps it last longer and look great.
Follow these simple tips to clean, repair, and store your wooden playset properly.
Cleaning Guidelines
Clean the wooden toy garage gently to avoid damage. Use mild soap and water with a soft cloth. Avoid soaking the wood to prevent warping.
- Dust the playset regularly with a dry cloth.
- Wipe with a damp cloth and mild soap for dirt.
- Dry immediately with a clean towel.
- Do not use harsh chemicals or abrasive tools.
Repairing Damage
Small cracks or scratches can be fixed quickly to keep the toy safe. Use wood glue for loose parts and sandpaper to smooth rough edges.
| Type of Damage | Repair Method |
| Loose or broken parts | Apply wood glue and clamp until dry |
| Scratches or small cracks | Light sanding and touch-up with wood finish |
| Missing pieces | Replace with similar wood parts |
| Paint chips | Use non-toxic paint for touch-ups |
Storing The Playset
Store your wooden toy garage in a dry, cool place to avoid damage. Keep it away from direct sunlight and moisture.
- Cover the playset with a cloth to keep dust off.
- Place it on a flat surface to prevent warping.
- Do not store near heaters or damp areas.
- Check periodically for any signs of damage.
Frequently Asked Questions
What Materials Are Needed For A Diy Wooden Toy Garage?
You need plywood or solid wood, wood glue, nails, sandpaper, non-toxic paint, and small hinges for doors. Basic woodworking tools like a saw, drill, and hammer are essential for assembly and finishing.
How Long Does It Take To Build A Wooden Toy Garage?
Building a wooden toy garage typically takes 4 to 6 hours. This depends on your skill level, design complexity, and drying time for paint or glue.
Is A Diy Wooden Toy Garage Safe For Children?
Yes, if you use non-toxic paint and smooth all edges, it is safe. Always supervise young children during play to avoid small detachable parts hazards.
Can I Customize The Wooden Toy Garage Design?
Absolutely! You can add ramps, multiple levels, or personalized paint colors. Customization enhances creativity and makes the toy more engaging for kids.
Conclusion
Building a DIY wooden toy garage brings joy and learning together. Kids enjoy playing with a toy they helped create. The project is simple and uses easy materials. It teaches basic skills like measuring and assembling. Plus, it sparks creativity and imagination during playtime.
This garage lasts long and stays fun for years. Try making one for your child or as a gift. A wooden toy garage is a great way to bond and build memories. Give it a go and watch the smiles grow.