Imagine having a cool rally car that you made yourself—one that’s fun, unique, and kind to the planet. A handmade cardboard toy rally car isn’t just a toy; it’s your chance to get creative, build something with your own hands, and enjoy hours of play.
Whether you want a new project to do alone or with family, this guide will show you how to make a sturdy, eye-catching rally car from simple materials you already have. Ready to bring your imagination to life and create a toy that’s truly one of a kind?
Keep reading, and let’s get started!
Materials Needed
Making a handmade cardboard toy rally car is fun and easy. You only need a few materials to get started. Good materials help your car look great and last longer.
Below, you will find what kind of cardboard to choose and the tools you will need for this project.
Choosing The Right Cardboard
Pick cardboard that is strong but easy to cut. Avoid thin or soft cardboard because it may bend or tear. Corrugated cardboard is a good choice because it is sturdy.
| Cardboard Type | Best Use | Notes |
| Corrugated cardboard | Body and frame | Strong and durable |
| Single-layer cardboard | Details and decorations | Easier to cut and shape |
| Recycled cardboard | Eco-friendly option | Check for strength and cleanliness |
Essential Tools And Supplies
You will need some basic tools to shape and assemble your toy car. Using the right tools makes the work easier and safer.
- Box cutter or craft knife for cutting cardboard
- Metal ruler for straight cuts
- Glue (white glue or hot glue) to stick parts together
- Scissors for trimming small pieces
- Pencil for drawing shapes and lines
- Cutting mat to protect your work surface
- Paint or markers for decorating your car

Credit: learningfromplaying.com
Designing Your Rally Car
Designing a handmade cardboard toy rally car is a fun creative project. You start by imagining the shape and style of your car.
Careful design helps your car look unique and ready for a toy race. Let’s explore how to sketch the car shape and add details.
Sketching The Car Shape
Begin by drawing the basic outline of your rally car on paper. Keep the shapes simple and bold for easy cutting.
Think about the car’s body, wheels, and spoiler. Use smooth lines and sharp angles to show speed and strength.
- Draw a low, wide body for stability.
- Add large wheels for rough terrain.
- Include a rear spoiler for style.
- Keep the shape balanced and proportional.
Adding Creative Details
Add small features to make your rally car special. Use markers or paint to create designs on the cardboard.
Details like headlights, racing stripes, and numbers bring your car to life. Use bright colors for a bold look.
- Draw headlights and grills on the front.
- Add racing stripes on the hood and sides.
- Write a racing number on the doors.
- Decorate the spoiler with patterns or logos.
Building The Car Frame
Building the frame is the first step to making your cardboard toy rally car. The frame gives the car its shape and strength.
Use strong cardboard and simple tools to create a sturdy base for your toy car.
Cutting And Shaping Cardboard
Start by cutting the cardboard into the main parts of the car frame. Use a ruler and pencil to draw straight lines.
Shape the edges carefully to fit the car design. Smooth edges help the pieces fit better.
- Use a sharp craft knife for clean cuts
- Cut the side panels, base, and front and back pieces
- Score fold lines lightly for easy bending
- Shape curves by cutting small notches
Assembling The Base Structure
Join the cut pieces to build the car’s base. Use glue or tape to hold parts firmly.
Make sure the base is flat and strong. This helps the car roll smoothly and stay balanced.
- Attach side panels to the base piece
- Secure front and back parts to the frame
- Reinforce corners with extra cardboard strips
- Check that all parts fit tightly without gaps
Credit: www.etsy.com
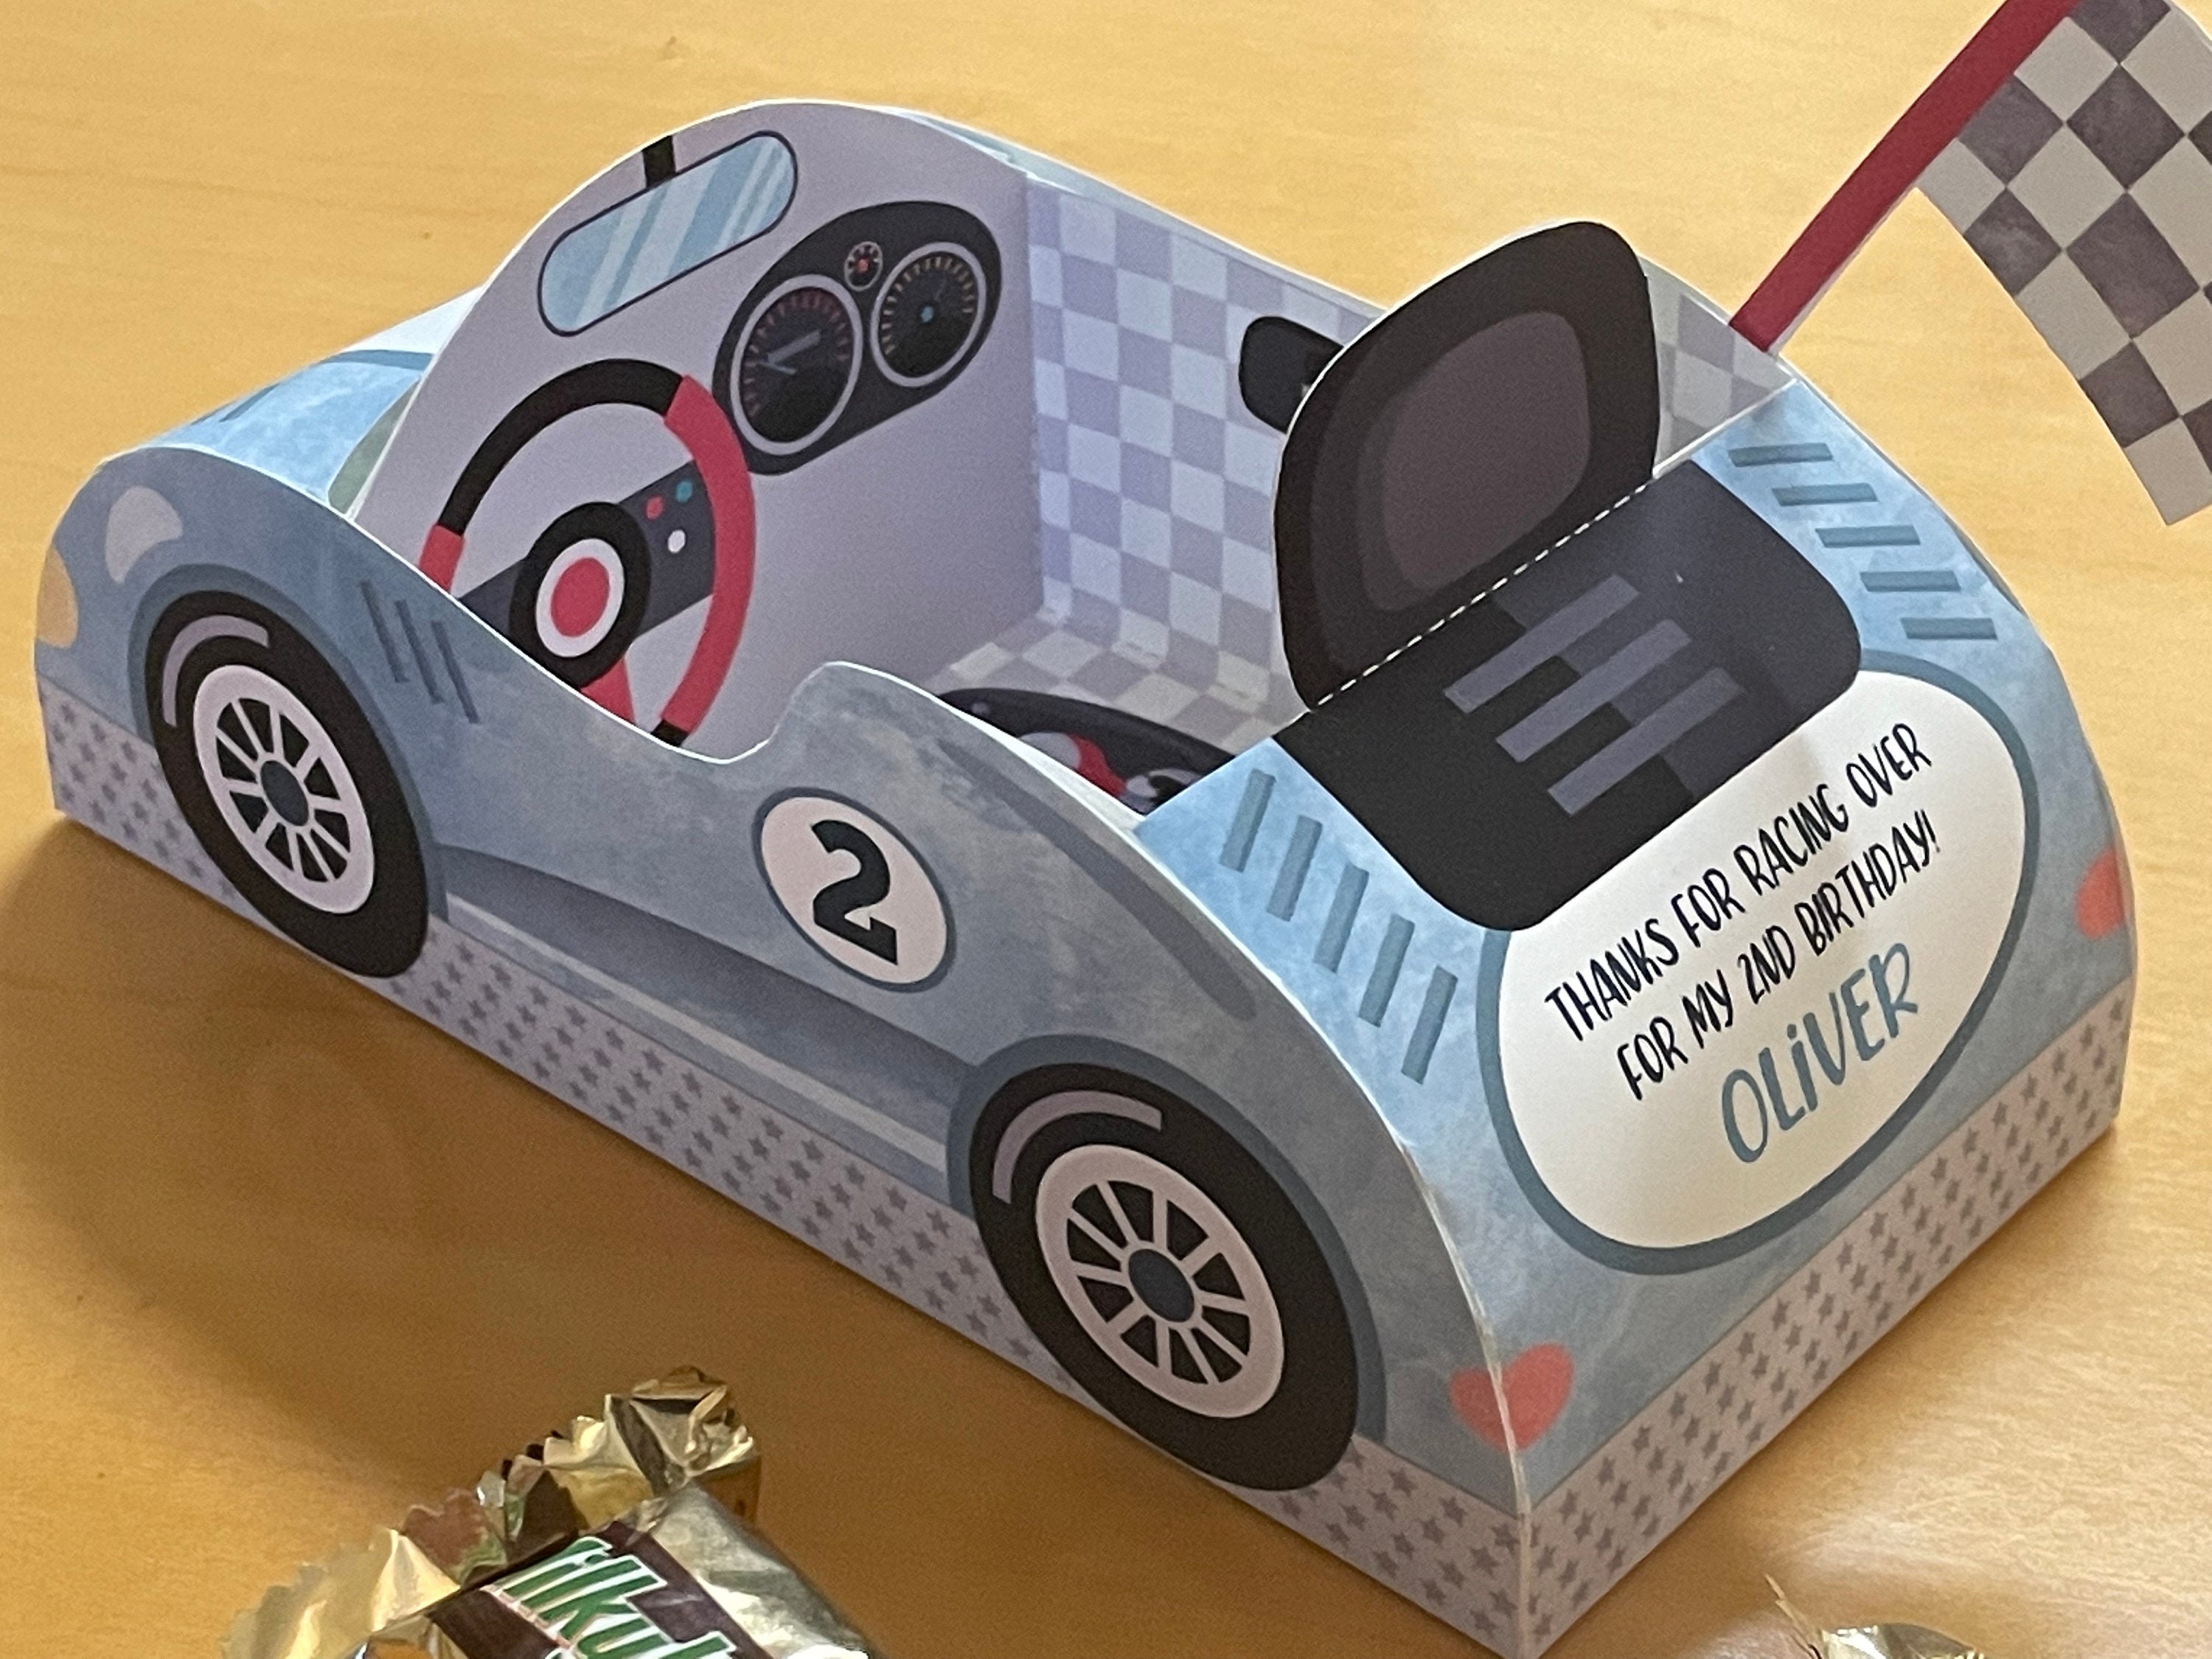
Decorating The Toy Car
Decorating your handmade cardboard toy rally car makes it unique and fun. Adding colors and designs brings your creation to life. You can use simple tools and materials to make it stand out.
There are many ways to decorate your toy car. You can paint it or add stickers and other accessories. Both methods let you express your creativity easily.
Painting And Coloring Ideas
Painting is a great way to add color and personality to your toy car. Use water-based paints for easy cleanup and safe use. You can create stripes, dots, or even flames on the car body.
- Use bright colors like red, blue, or yellow for a lively look
- Apply a base coat first to help colors stand out
- Try sponging paint for texture effects
- Draw simple shapes like stars or lightning bolts with markers
- Let each paint layer dry before adding the next
Using Stickers And Accessories
Stickers and small accessories add fun details to your toy car. You can find stickers with racing logos or shapes that match your car’s theme. Accessories like buttons or beads work well as headlights or wheels.
| Accessory | Use |
| Sticker decals | Decorate sides and hood |
| Buttons | Make headlights or wheels |
| Ribbon pieces | Create racing stripes |
| Beads | Add bumpers or exhaust tips |
Adding Moving Parts
Adding moving parts makes your cardboard rally car fun to play with. It also teaches basic mechanics and creativity.
Focus on making wheels, axles, and steering that actually move. This brings your toy car to life.
Creating Functional Wheels
Use sturdy cardboard circles for wheels. Make sure they are the same size for balance. Attach wheels so they can spin freely.
- Cut four equal-sized circles for wheels
- Use a toothpick or small stick as the wheel’s center
- Make a hole in the wheel’s center for the axle
- Attach wheels loosely to allow spinning
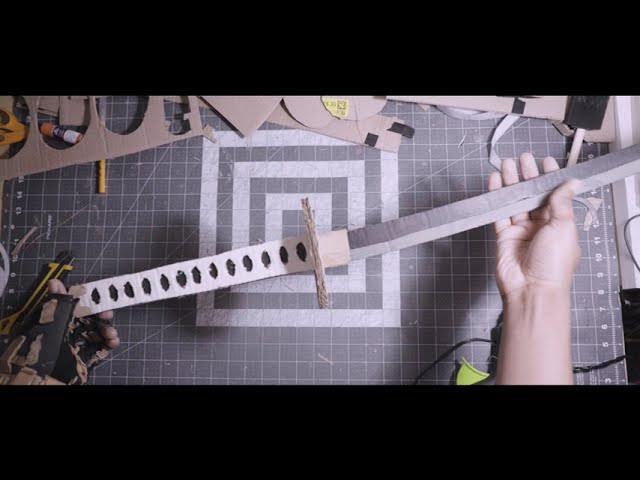
Incorporating Axles And Steering
Axles connect the wheels and let them turn together. Steering lets you change the car’s direction with a simple mechanism.
| Part | Material | Purpose |
| Axle | Wooden skewer or straw | Connects wheels and allows rotation |
| Steering arm | Small cardboard strip | Makes the front wheels turn |
| Pivot point | Paper fastener | Allows steering arm to move |

Credit: www.youtube.com
Fun Rally Car Games
Playing with handmade cardboard rally cars brings joy to kids and adults alike. These toys spark creativity and friendly competition.
Setting up fun race games is easy and brings families together for exciting moments. Let’s explore how to create the best rally car experiences.
Setting Up Race Tracks
Build simple and fun race tracks at home using cardboard or tape. Different track shapes add variety and challenge to the game.
- Use masking tape to mark lanes on a table or floor.
- Create curves and straight sections for exciting races.
- Add small ramps or obstacles for more fun.
- Make start and finish lines clear with colored paper.
- Measure track length to keep races fair.
Organizing Family Races
Family races bring everyone together for fun and friendly contests. Set simple rules and keep the games light and fair.
| Rule | Description |
| Race Order | Decide who races first by drawing names or rolling dice. |
| Race Length | Set how many laps each race will have. |
| Fair Play | No pushing or moving other cars during races. |
| Time Limit | Keep races short to keep energy high and interest strong. |
| Winner Rewards | Celebrate with fun prizes like stickers or extra turns. |
Benefits Of Handmade Toys
Handmade toys offer a unique combination of quality, safety, and educational value that mass-produced toys cannot match. By choosing handmade toys, parents can provide their children with a more engaging and interactive play experience.
Encouraging Creativity
Handmade toys like the Cardboard Toy Rally Car encourage children to think creatively and use their imagination. By allowing children to explore and engage with handmade toys, parents can help foster their creativity and problem-solving skills.
Children who play with handmade toys are more likely to develop a growth mindset, embracing challenges and learning from their mistakes. This creativity can extend beyond playtime, benefiting children in academic and professional settings.
- Children are more likely to experiment and try new things
- Handmade toys provide a platform for self-expression and creativity
- Parents can engage in play and learn alongside their children
Improving Fine Motor Skills
Handmade toys like the Cardboard Toy Rally Car require children to use their hands and fingers to assemble, manipulate, and play with the toy. This hands-on experience helps children develop their fine motor skills, hand-eye coordination, and dexterity.
Regular play with handmade toys can improve children's ability to grasp, manipulate, and release small objects, essential skills for everyday activities like writing, drawing, and even playing musical instruments.
- Children develop hand-eye coordination and dexterity
- Improved fine motor skills enhance overall hand function
- Regular play reduces the risk of motor skill delays
Tips For Safety
Making a handmade cardboard toy rally car is fun but needs care. Safety is important for both kids and adults during crafting.
Follow safety tips to avoid injuries and keep your project safe to play with.
Safe Tool Usage
Use tools like scissors and cutters carefully. Always cut away from your body and fingers to prevent cuts.
Keep tools sharp and clean. Dull tools can slip and cause accidents.
- Use a cutting mat to protect surfaces
- Store tools out of children's reach
- Wear safety gloves if needed
- Work in a well-lit area
Non-toxic Materials
Choose non-toxic glue, paint, and markers for your cardboard car. These materials keep kids safe from harmful chemicals.
Check labels to make sure materials are safe for children. Use water-based products whenever possible.
- Use non-toxic glue sticks or white glue
- Pick water-based, non-toxic paints
- Avoid spray paints and strong solvents
- Test new materials on small cardboard pieces first
Frequently Asked Questions
What Materials Are Needed For A Cardboard Toy Rally Car?
You need sturdy cardboard, scissors, glue, paint, markers, and small wheels. These materials are easy to find and safe for kids. Using recycled cardboard is eco-friendly and budget-friendly.
How Do You Assemble A Handmade Cardboard Rally Car?
Cut out the car parts, fold edges, and glue them together. Attach wheels securely to allow smooth movement. Paint and decorate the car after assembly for a personalized touch.
Is This Cardboard Rally Car Safe For Children?
Yes, it uses non-toxic materials like cardboard and safe paints. Adult supervision is recommended during cutting and assembling. The toy is lightweight and free from sharp edges when made properly.
Can I Customize The Design Of The Cardboard Rally Car?
Absolutely! You can paint it with any colors, add stickers, or draw patterns. Personalizing the car enhances creativity and makes each toy unique. Use different shapes and sizes to create variety.
Conclusion
Creating a handmade cardboard toy rally car is fun and simple. It helps develop creativity and hands-on skills. Kids enjoy building and playing with their own cars. Using cardboard is eco-friendly and easy to find. Each car can be unique with colors and designs.
This project brings joy and learning together. Try making one for a fun family activity. Everyone can join and share the excitement. Crafting your own toy car feels rewarding and special. Give it a go and enjoy the process!