Are you ready to create something special with your own hands? Building a wooden toy truck is a fun and rewarding project that anyone can enjoy.
Imagine the pride you’ll feel when you see your finished truck, crafted carefully from simple pieces of wood. Whether you want a unique gift, a keepsake, or a new hobby, this guide will walk you through each easy step. Keep reading, and you’ll discover how simple it is to bring your wooden toy truck to life.

Credit: www.amazon.com
Choosing The Right Wood
Building a wooden toy truck starts with choosing the right wood. The wood must be safe and easy to work with. It also needs to last long and look good.
Different woods have different qualities. Knowing which wood to use helps you create a toy that is both fun and safe for children.
Types Of Wood For Toys
Some woods are better for toys because they are hard, smooth, and free from harmful chemicals. Here are some common woods used for making wooden toys.
- Maple: Hard and strong, with a smooth finish.
- Beech: Durable and easy to sand, often used for toys.
- Birch: Light-colored wood that is stable and tough.
- Alder: Soft and easy to carve, good for detailed parts.
- Cherry: Hard wood with a nice color, ages well.
Wood Safety And Quality
Safety matters most when making toys. Wood must be free of splinters and chemicals. Look for wood that is natural and untreated.
| Safety Factor | What to Check |
|---|---|
| Splinters | Wood should be smooth and sanded well |
| Toxic Chemicals | Avoid treated or painted wood with harmful substances |
| Durability | Choose wood that resists cracking and breaking |
| Grain Pattern | Fine grain wood is less likely to splinter |

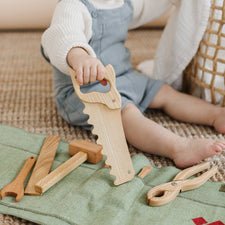
Credit: kayunganjuk.com
Gathering Tools And Materials
Building a wooden toy truck starts with having the right tools and materials. This helps make the project smooth and safe.
Gathering everything before you begin saves time and avoids interruptions during your work.
Essential Tools List
Use these basic tools to cut, shape, and assemble the wooden parts for your toy truck.
- Hand saw or jigsaw for cutting wood pieces
- Sandpaper or sanding block for smoothing edges
- Wood glue to join parts securely
- Clamps to hold pieces while glue dries
- Drill with small drill bits for wheel holes
- Measuring tape or ruler for precise cuts
- Pencil to mark cutting lines
- Screwdriver if screws are used
Additional Supplies Needed
Besides tools, you will need certain materials to build and finish the toy truck.
| Material | Purpose |
| Wood blocks or planks | Main body and parts of the truck |
| Wooden wheels or round dowels | Wheels for rolling motion |
| Non-toxic paint or wood stain | Color and protect the wood |
| Wood screws or nails | Extra support for joining parts |
| Clear wood finish or varnish | Protect surface and add shine |
Designing Your Toy Truck
Building a wooden toy truck is a fun project. It starts with a good design. Planning helps create a toy that is both attractive and durable.
Designing your toy truck involves creating blueprints. You can customize these to make your truck unique.
Simple Truck Blueprints
Start with a basic blueprint. It shows the truck's parts and how they fit together. This helps you understand the truck's structure.
Blueprints can be found online or you can draw your own. Keep them simple for easy construction.
- Body: Main part of the truck
- Wheels: Four wheels for stability
- Cabin: Small area for the driver
Customizing Your Design
Customizing your toy truck makes it special. You can change its shape or add details. This can include paint or stickers.
Think about what makes your truck unique. Do you want bright colors or a classic look? These choices make your design stand out.
- Paint: Choose colors that you like
- Stickers: Add fun designs or logos
- Shape: Alter the body for a unique style
Cutting The Wood Pieces
Cutting the wood pieces is a key step in building a wooden toy truck. You need to prepare the wood carefully for the best fit and finish.
Using the right tools and methods helps you cut safely and accurately. This guide covers measuring, marking, and safe cutting techniques.
Measuring And Marking
Measure each piece of wood twice to avoid mistakes. Mark the cut lines clearly with a pencil or fine marker.
- Use a ruler or tape measure for precise lengths.
- Draw straight lines with a square or straight edge.
- Label each piece to keep track of parts.
- Double-check measurements before cutting.
Safe Cutting Techniques
Always wear safety gear like goggles and gloves before cutting. Keep your hands away from the blade and cut slowly.
| Safety Tip | Description |
| Use clamps | Secure wood to prevent slipping during cuts. |
| Check blade sharpness | A sharp blade cuts cleaner and reduces accidents. |
| Cut on a stable surface | Work on a flat table to keep control. |
| Follow tool instructions | Read manuals to use tools correctly. |
Assembling The Truck Body
Building the wooden toy truck body needs careful joining of parts. You must fit wood pieces tightly for a strong frame.
Using the right tools and materials helps the truck last longer. Follow simple steps to join and secure the wood.
Joining Wood Pieces
Start by arranging the wood pieces in the shape of the truck body. Check that all edges line up evenly before fixing.
- Use clamps to hold pieces steady while working.
- Sand edges lightly for a smooth fit.
- Match corners carefully to avoid gaps.
- Dry fit all parts before gluing or screwing.
Using Wood Glue And Screws
Wood glue creates a strong bond between parts. Screws add extra support to keep the truck body tight.
| Material | Purpose | Tip |
| Wood Glue | Bond wood pieces | Apply evenly on both surfaces |
| Screws | Secure parts firmly | Pre-drill holes to avoid splitting |
| Clamps | Hold wood while drying | Use enough pressure without crushing wood |
Credit: www.etsy.com
Creating Wheels And Axles
Building a wooden toy truck is fun and educational. The wheels and axles are key parts. They help the truck move smoothly. Let's learn how to make and attach them.
To start, you will need some basic tools and materials. Gather wood, a saw, sandpaper, and glue. Safety gear like goggles is also important.
Shaping The Wheels
Wheels are round and even. Begin by tracing a circle on a piece of wood. Use a compass or a round object as a guide.
Carefully cut out the circle with a saw. Sand the edges until they are smooth. This ensures the wheels roll well.
- Trace the circle on wood
- Cut out the circle
- Sand the edges smoothly
Attaching Axles Securely
Axles connect the wheels to the truck body. They need to be strong. Cut a dowel rod to the right length for the axles.
Drill holes in the center of each wheel. Push the dowel through the holes. Secure them with wood glue. Let it dry completely.
- Cut dowel rods for axles
- Drill holes in wheels' centers
- Insert dowel and glue securely
Sanding And Smoothing
Sanding and smoothing are important steps in building a wooden toy truck. They help make the wood safe and nice to touch.
These steps remove rough spots and prepare the wood for finishing. A smooth surface looks better and lasts longer.
Removing Rough Edges
Rough edges can cause splinters and make the toy unsafe. Use sandpaper to gently smooth these edges.
Start with coarse sandpaper to remove big bumps. Then use finer sandpaper to make the surface smooth.
- Hold the sandpaper firmly but gently.
- Sand along the wood grain to avoid scratches.
- Check edges often to see progress.
- Use a sanding block for flat surfaces.
Preparing For Finishing
After sanding, clean the toy to remove dust and wood particles. A clean surface helps the finish stick well.
Use a soft cloth to wipe the toy. Check for any spots that need extra sanding before finishing.
- Wipe the toy with a damp cloth and let it dry.
- Inspect all surfaces for smoothness.
- Sand any rough areas again if needed.
- Keep the toy dust-free until finishing.
Painting And Finishing
Painting and finishing give your wooden toy truck a nice look. It also protects the wood from damage.
Use safe materials to keep the toy healthy for children. Take time to add details and seal the wood well.
Safe Paint Options For Toys
Choose paints that are non-toxic and child-safe. These paints do not contain harmful chemicals.
Look for water-based paints or natural paints made for children’s toys. They dry fast and are easy to clean.
- Water-based acrylic paints
- Milk paint with natural ingredients
- Non-toxic tempera paints
- Natural plant-based dyes
Adding Details And Sealing
Add small details like windows, wheels, or stripes with fine brushes. Let each layer dry before adding more paint.
Seal the painted toy with a clear, child-safe finish. This protects the paint and wood from moisture and wear.
- Use clear water-based polyurethane or varnish
- Apply thin coats and let dry fully
- Sand lightly between coats for smooth finish
- Make sure the finish is labeled safe for toys
Final Assembly And Testing
The final assembly of your wooden toy truck brings all parts together. This step makes sure the truck is ready to play with.
Testing the toy truck checks its strength and safety. This keeps children safe while having fun.
Putting All Parts Together
Start by fitting the wheels onto the axles. Make sure they spin freely but stay attached.
Attach the truck bed to the cab using wood glue and small nails. Align all parts carefully for a neat look.
- Check that all screws and nails are tight
- Use clamps to hold glued parts while drying
- Sand any rough edges before final assembly
Ensuring Durability And Safety
Test the toy truck by gently pushing and pulling it. Look for any loose parts or weak spots.
Use non-toxic paint or finish to protect the wood. This keeps the toy safe and strong.
- Check all edges are smooth to avoid splinters
- Make sure wheels stay attached under light pressure
- Use child-safe finishes without harmful chemicals
Tips For Beginners
Building a wooden toy truck is fun and rewarding. Beginners can start with simple tools and easy steps.
Safety and patience are key. Take your time to learn the basics before moving to complex parts.
Common Mistakes To Avoid
Many beginners make mistakes that slow progress or cause frustration. Avoid these common errors to improve your work.
- Using the wrong type of wood can make your toy weak or hard to work with.
- Skipping sanding leads to rough edges and splinters.
- Rushing through glue drying causes parts to come apart later.
- Not measuring twice before cutting results in wrong sizes.
- Ignoring safety gear like goggles and gloves can cause injuries.
Improving Your Woodworking Skills
Practice and learning help you build better toys. Follow these tips to improve your skills step by step.
| Tip | Description |
| Start Small | Build simple projects to gain confidence. |
| Use Quality Tools | Good tools make cutting and shaping easier. |
| Watch Tutorials | Learn techniques from experienced woodworkers. |
| Practice Measuring | Accurate measuring avoids mistakes and waste. |
| Keep Workspace Clean | A tidy area helps you work safely and efficiently. |
Frequently Asked Questions
What Materials Are Needed To Build A Wooden Toy Truck?
You need wood, sandpaper, wood glue, non-toxic paint, small wheels, and screws. Choose smooth, durable wood for safety and ease of shaping.
How Long Does It Take To Build A Wooden Toy Truck?
Building a wooden toy truck typically takes 3 to 5 hours. Time varies based on skill level and design complexity.
What Tools Are Essential For Making A Wooden Toy Truck?
Essential tools include a saw, drill, screwdriver, clamps, and sanding block. These help shape, assemble, and finish the toy truck safely.
How Can I Ensure The Toy Truck Is Child-safe?
Use non-toxic paint, smooth all edges, and secure small parts firmly. Avoid sharp corners and loose components to prevent choking hazards.
Conclusion
Building a wooden toy truck is a fun and rewarding project. It helps improve your skills and creativity. You can enjoy the process step by step. Each part you make brings the truck closer to life. This simple craft also creates a special toy for kids.
Try it yourself and see the joy it brings. Keep practicing, and your projects will get better. Woodworking can become a great hobby to relax and create. Start small, stay patient, and enjoy every moment.