Have you ever wanted to create something special with your own hands? Sewing a toy teddy bear is a wonderful way to bring warmth and joy into your life—or someone else’s.
Imagine holding a soft, cuddly bear that you made yourself. It’s easier than you think, and you don’t need to be an expert to start. In this guide, you’ll find simple steps that make the process fun and rewarding. Ready to turn fabric and thread into a charming teddy bear?
Let’s get started!
Materials Needed
Sewing a toy teddy bear requires some basic materials. Picking the right supplies makes your project easier and more fun.
This guide lists the main materials you need before starting your teddy bear sewing.
Fabric Choices
Choose soft and durable fabric to make your teddy bear cuddly. Cotton, fleece, or minky fabric work well. Avoid fabrics that fray easily.
Sewing Tools
- Sewing needles (hand or machine needles)
- Thread matching your fabric color
- Fabric scissors for clean cuts
- Pins or clips to hold pieces together
- Measuring tape or ruler
- Seam ripper for fixing mistakes
Stuffing Options
| Type | Description |
| Polyester Fiberfill | Soft, lightweight, and easy to use |
| Cotton Batting | Natural and firm stuffing option |
| Wool | Warm and eco-friendly but may be itchy |
| Fabric Scraps | Recycled stuffing, good for firm bears |
Additional Accessories
Add small accessories to give your teddy bear character. Eyes, nose, and ribbons are common choices. Use safety eyes for children’s toys.
- Safety eyes or buttons for eyes
- Embroidery thread for nose and mouth
- Ribbon or bow for decoration
- Small bells or tags for sound or identity
Preparing The Pattern
Starting with a good pattern is key to sewing a neat teddy bear. The pattern guides you on shapes and sizes.
This section covers choosing the pattern, printing, cutting, and moving it to fabric.
Selecting A Pattern
Choose a teddy bear pattern that fits your skill level. Simple shapes are best for beginners.
- Look for patterns with clear instructions.
- Pick a size that matches your project needs.
- Check if the pattern includes all parts like arms and ears.
- Consider patterns with options for different fabrics.
Printing And Cutting
Print the pattern on paper at full size. Check the print scale before cutting.
Cut out each pattern piece carefully along the lines. Use sharp scissors for neat edges.
| Tip | Reason |
| Use thick paper | Holds shape better during tracing |
| Label each piece | Makes assembly easier |
| Keep pattern flat | Prevents size distortion |
Transferring To Fabric
Place the paper pattern on your fabric. Pin it down to stop slipping.
Use these tools to trace the pattern:
- Tailor's chalk for dark fabrics
- Fabric marking pen for light fabrics
- Tracing wheel and carbon paper for detailed lines
Cut fabric pieces outside the drawn lines if the pattern shows seam allowances.
Cutting The Fabric
Cutting fabric is an important step in sewing a teddy bear. It shapes the pieces that will form your toy.
Careful cutting helps the teddy bear look neat and fit together well. Take your time to cut each part correctly.
Laying Out The Pieces
Place your fabric on a flat surface before cutting. Smooth out any wrinkles to avoid mistakes.
Arrange the teddy bear pattern pieces on the fabric. Make sure to follow the grainline direction on the fabric.
- Put pieces close to save fabric
- Check the fabric’s stretch direction
- Pin or weigh down pieces to keep them steady
Cutting Techniques
Use sharp fabric scissors for clean cuts. Avoid using dull scissors that can fray the edges.
Cut slowly and follow the pattern lines exactly. Keep your hand steady to make smooth cuts.
- Cut outside the pattern lines if you will sew a seam allowance
- Use small snips for curves and corners
- Do not lift the fabric while cutting to keep shapes accurate
Marking Important Points
Mark key points like notches and darts on the fabric after cutting. These marks help when sewing the pieces together.
Use tailor’s chalk or fabric markers that wash out easily. Avoid permanent markers that could show on the teddy bear.
- Mark seam allowances if not included in the pattern
- Note where the eyes and nose will go
- Mark spots for stuffing openings or joints

Credit: www.youtube.com
Sewing The Pieces
Sewing a toy teddy bear starts with joining the separate fabric pieces. This step creates the bear's shape and structure. Take your time to align the pieces correctly.
Use a needle and thread or a sewing machine for stronger seams. Sew carefully to avoid gaps or uneven edges. Let’s look at the key parts to sew.
Joining The Body Parts
Begin by sewing the front and back body pieces together. Place the right sides of the fabric facing each other. Pin the edges to keep them aligned.
Sew around the edges, leaving an opening at the bottom or side. This opening lets you turn the bear right side out and stuff it later. Keep the stitches close and even.
Attaching Limbs And Ears
Sew the arms, legs, and ears separately first. Turn each limb right side out and stuff lightly. Attach these parts to the body before closing the main opening.
Pin limbs and ears in place on the body. Sew them securely with small stitches. This keeps them strong for playtime. Check that they are even on both sides.
- Sew arms at shoulder height
- Attach legs at the bottom sides
- Place ears near the top of the head
Sewing The Head
Sew the head pieces together by matching the edges. Leave an opening to turn the head right side out. Stuff the head firmly but not too tight.
Attach the head to the body using strong stitches. Make sure the seam is smooth and secure. This step gives the teddy its classic look.
Stuffing The Bear
Stuffing a toy teddy bear is a fun and creative process. It brings your toy to life. The right stuffing makes a big difference in how your bear feels and looks.
Let's explore the steps to ensure your teddy bear is cuddly and well-shaped. Follow these tips to make the perfect plush companion.
Choosing The Right Stuffing
Picking the right stuffing is essential for a soft and huggable bear. There are different types of stuffing materials available.
- Polyester fiberfill: Soft and lightweight
- Cotton: Natural and firm
- Wool: Warm and sturdy
- Recycled materials: Eco-friendly option
Filling Evenly
Filling the bear evenly is crucial for balance and comfort. It ensures that the bear stands upright and feels consistent when hugged.
| Area | Amount of Stuffing |
| Head | Firm but soft |
| Body | Moderate and even |
| Arms and Legs | Well-filled for support |
Shaping The Bear
Shaping the bear gives it a unique character. Pay attention to the details to make your teddy bear special.
Use your fingers to gently massage the stuffing. This helps in distributing it evenly. Focus on areas that might appear lumpy.

Credit: www.youtube.com
Finishing Touches
After sewing the main parts of your teddy bear, the final steps add charm and personality. These finishing touches complete your handmade toy and make it ready for cuddles.
Focus on closing the seams neatly, adding the eyes and nose, and decorating your bear with small details. Each step helps bring your teddy bear to life.
Closing The Seams
Close the seams with small, tight stitches to keep the stuffing inside. Use a ladder stitch for a clean finish that hides your thread.
- Thread a needle with matching thread color.
- Insert the needle inside the seam edge on one side.
- Catch the thread on the opposite edge, creating small stitches.
- Pull tight to close the seam smoothly.
- Tie a knot at the end and trim extra thread.
Adding Eyes And Nose
Sewing on the eyes and nose gives your teddy bear its friendly face. Choose buttons, safety eyes, or embroidery thread based on your bear’s style and age suitability.
| Feature | Options | Tips |
|---|---|---|
| Eyes | Plastic safety eyes, buttons, embroidered eyes | Safety eyes are best for children; buttons need secure stitching. |
| Nose | Embroidered nose, small button, felt patch | Use embroidery for softness; buttons add texture but must be secure. |
Decorative Details
Decorate your teddy bear with ribbons, bows, or stitched patterns. These details add character and make your toy unique.
Try these decorative ideas:
- Sew a small ribbon around the neck.
- Attach a felt heart or star patch.
- Use embroidery to add a smile or eyebrows.
- Add tiny buttons or beads as accessories.
Tips For Beginners
Sewing a toy teddy bear is a fun project. It is perfect for beginners wanting to learn sewing. You can create a cute and cuddly friend with simple materials and techniques.
This guide will help you avoid common mistakes. You will learn simple stitch techniques. You will also understand how to maintain consistency in your work.
Avoiding Common Mistakes
Beginners can make mistakes when sewing teddy bears. One common mistake is cutting fabric unevenly. Always use sharp scissors for clean cuts.
Another mistake is sewing too tightly. This can make the bear stiff. Keep your stitches even and not too tight.
- Use a pattern to guide your cuts
- Pin fabric pieces before sewing
- Check stitching for uniformity
Simple Stitch Techniques
There are simple stitches you can use for sewing teddy bears. The running stitch is easy and quick. It is perfect for joining pieces of fabric.
The backstitch is strong and ideal for seams. Practice these stitches to get comfortable. Use small, even stitches for a neat look.
- Practice on scrap fabric first
- Keep needle size appropriate for fabric
- Use matching thread for a clean finish
Maintaining Consistency
Consistency is key in sewing. It ensures your teddy bear looks polished. Measure and mark fabric before cutting and sewing.
Keep your workspace organized. This helps in maintaining consistency. Take breaks to avoid mistakes from fatigue.
- Use a tape measure for accuracy
- Align fabric edges carefully
- Review work regularly for errors
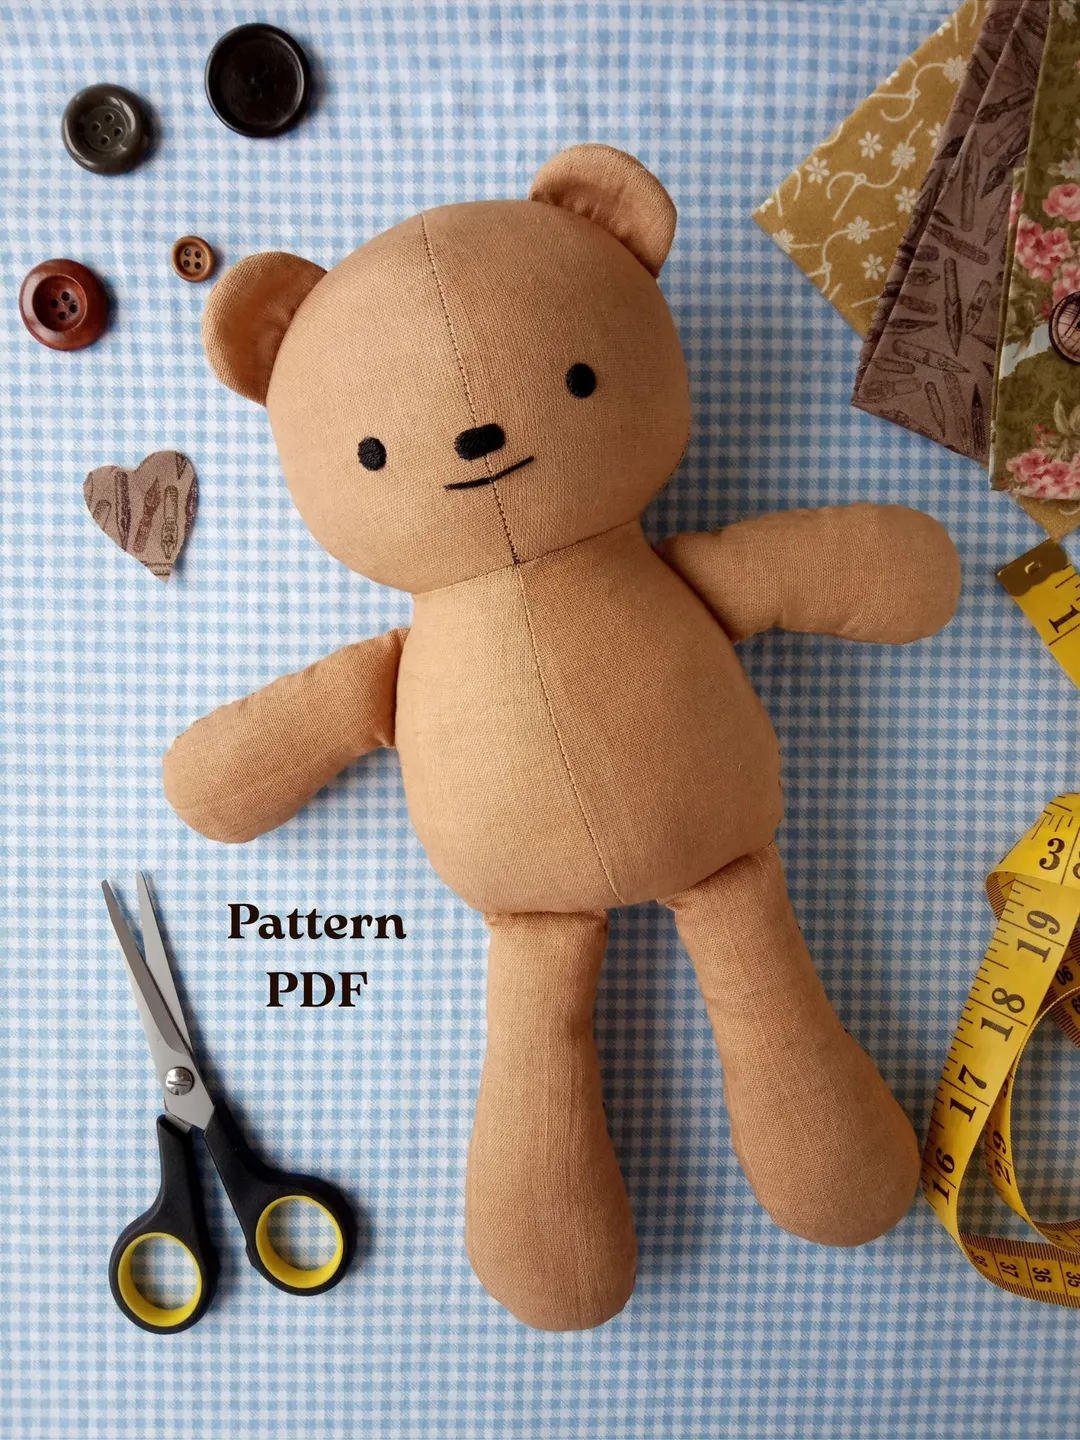
Credit: ballwool.com
Frequently Asked Questions
What Materials Do I Need To Sew A Teddy Bear?
You need fabric, stuffing, sewing needles, thread, scissors, and a teddy bear pattern. Optional items include buttons for eyes and a sewing machine.
How Long Does It Take To Sew A Teddy Bear?
It typically takes 2 to 4 hours depending on your sewing skills and the teddy bear's size and complexity.
Can Beginners Sew A Teddy Bear Easily?
Yes, beginners can sew a teddy bear by following simple patterns and step-by-step instructions carefully.
What Type Of Fabric Is Best For Teddy Bears?
Soft fabrics like fleece, felt, or cotton are best for teddy bears due to their durability and comfort.
Conclusion
Sewing a toy teddy bear is fun and rewarding. You create a special gift with your own hands. Take your time and enjoy each step carefully. Use soft fabric and strong thread for best results. Practice makes your stitches neat and steady.
Soon, your teddy bear will be ready to hug. Keep trying, and your skills will improve fast. Sewing brings joy and a sense of pride. Start today and make your own cuddly friend!