Have you ever wanted to create something special with your own hands? Making a wooden toy train is a fun and rewarding project that you can enjoy, whether you’re a beginner or have some woodworking experience.
Imagine the joy of seeing your own handcrafted train come to life, ready to delight kids or add charm to your home. In this guide, you’ll discover simple steps, useful tips, and easy techniques to build a beautiful wooden toy train.
Keep reading, and you’ll be surprised at how satisfying and enjoyable this creative process can be!

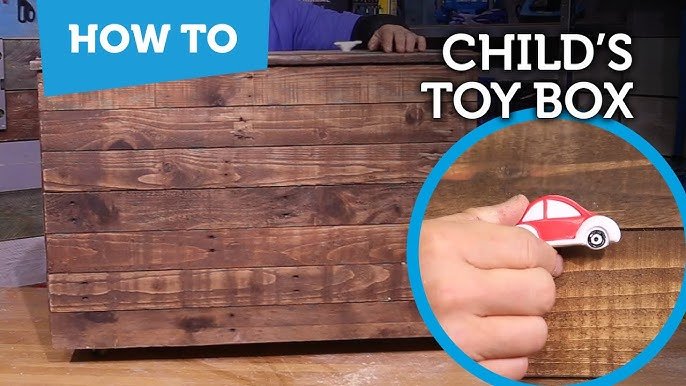
Credit: www.youtube.com
Materials And Tools Needed
Making a wooden toy train is a fun and creative project. You need the right materials and tools to build it well.
This guide will help you choose wood, tools, and safety gear for your project.
Choosing The Right Wood
Select wood that is easy to shape and safe for children. Avoid wood with rough surfaces or splinters.
Softwoods like pine or basswood are good choices. They are light and easy to cut.
- Pine: affordable and easy to work with
- Basswood: soft, smooth, and light
- Maple: harder, good for detailed parts
- Avoid treated or toxic woods
Essential Tools For The Project
Use tools that help you cut, shape, and smooth the wood pieces. Having the right tools makes the work easier.
Basic tools include saws, sandpaper, and drills. You might also need clamps and wood glue.
- Hand saw or jigsaw for cutting wood
- Sandpaper (medium and fine grit) for smoothing
- Drill for making holes
- Wood glue to join parts
- Clamps to hold pieces while drying
- Pencil and ruler for measuring
Safety Gear To Use
Safety is important when working with tools and wood. Always wear protective gear to avoid injuries.
Use goggles to protect your eyes and gloves to keep your hands safe. A mask helps prevent breathing dust.
- Safety goggles to protect eyes
- Work gloves to protect hands
- Dust mask to avoid inhaling sawdust
- Ear protection if using loud power tools
- Wear tight clothing and tie back long hair
Designing The Toy Train
Designing a wooden toy train starts with a simple plan. The design guides your cuts and shapes. A clear design makes building easier and fun.
This section covers the basic shape, drawing templates, and ways to add your own style.
Basic Train Shape And Size
Start by deciding the size of your toy train. Keep it small enough for children to hold but big enough to work with your tools. The shape usually has a rectangular body, a cabin, and wheels.
- Body length: about 6 to 8 inches
- Body height: about 3 to 4 inches
- Cabin height: about 2 inches above the body
- Wheels diameter: about 1 to 1.5 inches
Drawing Simple Templates
Use paper to draw each part of the train before cutting wood. Templates help keep shapes consistent and cuts precise. Draw the side view, top view, and wheel shapes.
- Draw the body as a rectangle with rounded edges.
- Sketch the cabin as a smaller rectangle on top.
- Draw circles for the wheels sized to your plan.
- Cut out the paper templates carefully.
Customizing Your Design
Add personal touches to your train. Change shapes, add windows, or paint patterns. This makes your train unique and fun to look at.
| Customization | Ideas |
| Body Shape | Curved edges, square, or angled |
| Cabin | Add windows or a chimney |
| Paint | Bright colors or simple patterns |
| Wheels | Different sizes or colors |
Cutting The Wood Pieces
Cutting wood pieces is an important part of making a wooden toy train. You need to be careful and precise to get good results.
This section explains how to mark the wood, use saws safely, and shape the parts of the train.
Marking The Wood Accurately
Marking the wood clearly helps you cut the pieces in the right shape and size. Use a pencil and ruler to draw straight lines.
Double-check your measurements before cutting to avoid mistakes. Mark all sides of the wood if needed.
- Use a sharp pencil for clear lines
- Measure twice to be sure
- Mark the cutting lines on all visible sides
Using A Saw Safely
Using a saw needs care to avoid accidents. Always wear safety glasses to protect your eyes from dust and wood chips.
Keep your hands away from the blade and use clamps to hold the wood steady. Cut slowly and follow the marked lines closely.
- Wear safety glasses and gloves
- Use clamps to hold wood firmly
- Keep fingers far from the saw blade
- Cut along the marked lines slowly
Shaping The Train Components
After cutting, shape the pieces to look like parts of the train. Use sandpaper to smooth the edges and corners.
Carve small details carefully to make the train more realistic. Take your time to get smooth and even shapes.
- Use sandpaper to smooth rough edges
- Shape details with small files or knives
- Work slowly for neat results
Assembling The Train Parts
Putting together a wooden toy train is a fun and rewarding task. You need to join the parts carefully to make a strong train.
Good assembly ensures the train looks nice and works well. Let’s look at how to join the parts, attach wheels, and check the fit.
Joining Techniques For Wood
Use simple ways to join the wooden parts. Wood glue works well for a strong bond. Apply glue to both surfaces before pressing them together.
Nails or small screws add extra strength. Drill small pilot holes first to avoid splitting the wood. Clamp the parts until the glue dries.
- Apply wood glue evenly
- Use nails or screws with pilot holes
- Clamp pieces while drying
Attaching Wheels And Axles
Wheels and axles help the train move smoothly. Slide the wheels onto the axle rods carefully. Make sure the wheels spin freely without wobbling.
Fix the axle rods to the train base. Use small nails or glue to keep the axles in place. Avoid making the fit too tight or too loose.
- Slide wheels on axles gently
- Check wheels spin smoothly
- Secure axles with nails or glue
Checking Stability And Fit
After assembly, check the train for stability. Make sure all parts fit tightly without gaps. The train should not wobble or feel loose.
Test the wheels by rolling the train on a flat surface. Adjust any loose parts or wheels that do not spin well before the glue dries.
Sanding And Finishing
Sanding and finishing are key steps in making a wooden toy train look smooth and last long. These steps protect the wood and give it a nice shine. Taking time to do them well makes the toy safer and more fun to play with.
This guide covers how to smooth the surfaces, apply paint or stain, and seal the toy for durability. Each part helps improve the final look and strength of your wooden train.
Smoothing The Surfaces
Start by sanding all parts of the wooden train to remove rough edges and splinters. Use fine-grit sandpaper to make the surface soft and even. Sand gently along the grain of the wood to avoid scratches.
- Use 120-grit sandpaper for the first pass
- Switch to 220-grit sandpaper for a smooth finish
- Wipe the dust off with a clean cloth after sanding
- Check for any rough spots and sand again if needed
Applying Paint Or Stain
Paint or stain adds color and character to your wooden train. Choose non-toxic, child-safe paints or stains. Apply thin, even coats and let each coat dry fully before adding the next.
| Type | Best Use | Drying Time |
| Water-based paint | Bright colors, easy cleanup | 1-2 hours |
| Oil-based stain | Enhances wood grain | 6-8 hours |
| Natural wood stain | Light tint, natural look | 2-4 hours |
Sealing For Durability
Sealing protects the toy from water, dirt, and wear. Use a clear, non-toxic sealant safe for children. Apply several thin coats, allowing each to dry well. This step helps keep the wood strong and looking good.
- Use a brush or spray to apply the sealant evenly
- Let the sealant dry in a dust-free area
- Lightly sand between coats with fine sandpaper
- Apply at least two coats for best protection

Credit: www.youtube.com
Adding Details And Decorations
Creating a wooden toy train is fun. Adding details makes it special. Decorations can bring your toy to life.
Details like painting and stickers make trains unique. Small accessories add charm. Let's explore ways to decorate.
Painting Faces And Windows
Faces give the train character. Use bright colors for happy faces. Windows can be painted in blue or black.
Paint carefully using small brushes. Allow colors to dry before adding more details. A steady hand helps with neat lines.
- Choose non-toxic paint
- Use small brushes for tiny details
- Let paint dry completely
Using Stickers Or Decals
Stickers make decorating easy. They come in many designs. Decals can be added for extra flair.
Peel and stick carefully on clean surfaces. Press firmly to avoid air bubbles. Choose colorful stickers for a vibrant look.
- Wipe the surface before applying
- Press out air bubbles
- Select themes like animals or numbers
Adding Accessories
Accessories add realism to your train. Small items like bells or whistles can be attached. This makes the train more engaging.
Secure accessories safely. Make sure they do not fall off during play. Use glue or screws for a firm hold.
- Choose safe, non-toxic materials
- Ensure accessories are securely attached
- Consider adding lights for fun
Tips For Beginners
Creating a wooden toy train can be fun and rewarding. Beginners need some tips to get started easily.
These tips will help you avoid problems and work more efficiently. They will also guide you in taking care of your tools.
Avoiding Common Mistakes
Beginners often make some common mistakes while working on wooden toy trains. Knowing these mistakes helps you prevent them.
Always measure twice before cutting the wood. This ensures the parts fit together correctly.
- Do not rush through the process
- Use the right type of wood for each part
- Securely attach wheels to avoid wobbly movement
Working Efficiently
Efficient work saves time and effort. Organize your workspace before starting the project.
Gather all necessary tools and materials. Follow the steps in a logical order to avoid confusion.
- Prepare a clear plan or blueprint
- Label parts to avoid mix-ups
- Keep your workspace clean and tidy
Maintaining Your Tools
Well-maintained tools work better and last longer. Clean your tools after each use to prevent rust.
Store tools in a dry place. Regularly check for damage or wear and replace when necessary.
- Sharpen blades for precise cuts
- Oil moving parts to ensure smooth operation
- Keep power tools unplugged when not in use

Credit: m.youtube.com
Frequently Asked Questions
What Materials Do I Need To Make A Wooden Toy Train?
To make a wooden toy train, you need wood, sandpaper, wood glue, paint, and non-toxic finish. Tools like saws and drills are also essential for shaping and assembling.
How Long Does It Take To Build A Wooden Toy Train?
Building a wooden toy train typically takes 2 to 4 hours. The time varies depending on the design complexity and your woodworking skills.
Is Woodworking Safe For Beginners Making Toy Trains?
Yes, woodworking is safe for beginners if you use proper safety gear. Always wear goggles, gloves, and follow tool instructions carefully.
Can I Customize The Design Of My Wooden Toy Train?
Absolutely! Customizing allows you to add personal touches like colors, shapes, and additional features to your wooden toy train.
Conclusion
Making a wooden toy train is fun and rewarding. You only need simple tools and some wood. Follow the steps carefully to shape and paint your train. This project helps improve your skills and creativity. It also makes a great gift for children.
Enjoy the process and take your time. Soon, you will have a unique toy to share and cherish. Keep practicing to create even better wooden toys next time.